|
|
|
Jensen Monday Club |
|
|
|
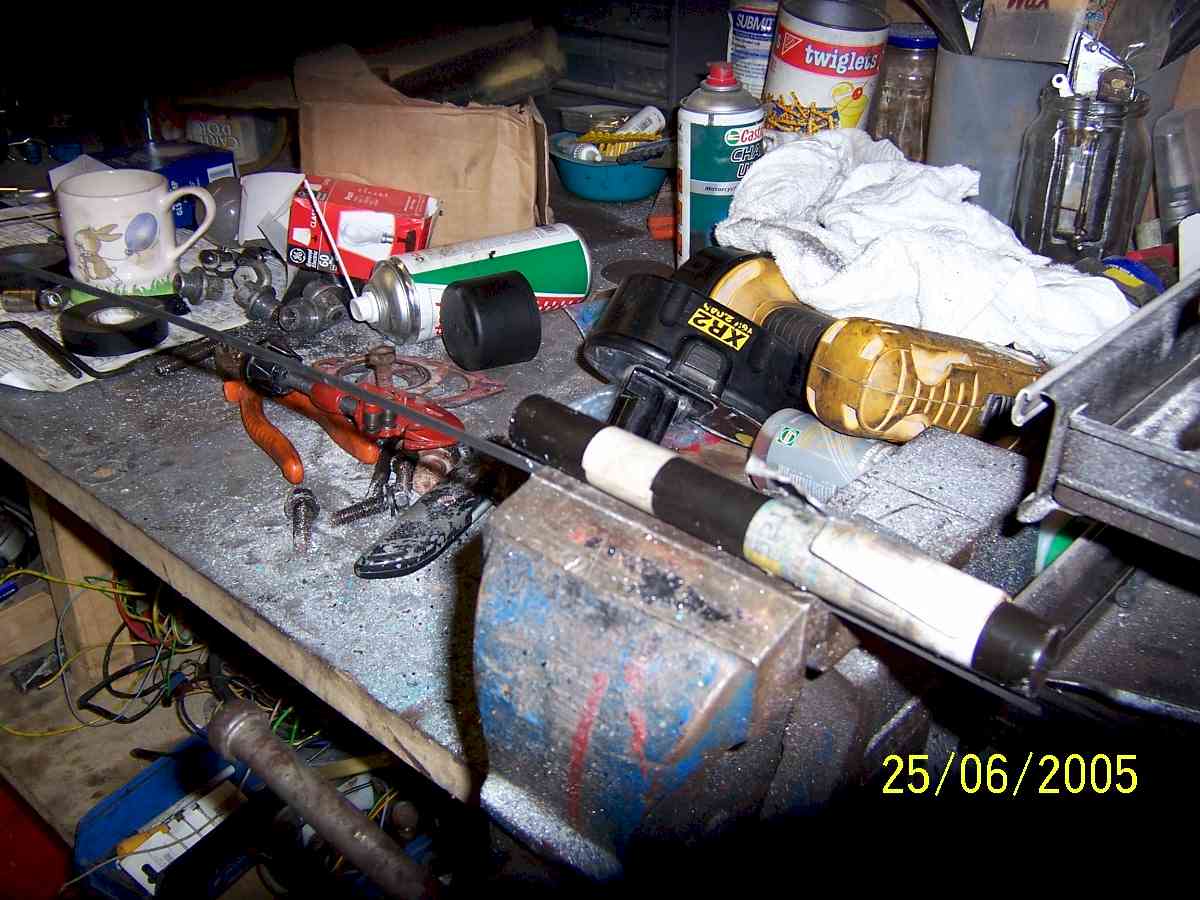
One of the most obvious differences between a "classic car" and a modern vehicle is way in which what was "super car" performance in years gone by is now achieved by modern day family cars. The ability to exceed 100mph was an amazing achievement years ago, but a quick look in any modern motoring journal reveals that even the most modest "run about" will attain this figure. Part of the reason for this are gearboxes used in modern vehicles. 5 speed gear boxes are the norm, and 7 and even 9 speeds are becoming more common all the time. This enables the car to run at high cruising speeds with low engine revs, which significantly improves fuel consumption, reduces engine wear, reduces the noise within the vehicle, and make for more relaxed high speed cruising. Steve Payne regularly does more than 12,000 miles per year in his MK3 Interceptor, and given the sky high cost of fuel in the UK, any savings in fuel consumption are more than welcome. As he also does regular long distance trips in Europe, the reduced cabin noise of a lower revving engine will be an added bonus. Steve has had chance to monitor the fuel consumption since the installation, and a recent trip of a total of 115 miles, with 70 to 80mph motorway cruising, town driving, and all with the air conditioning on gave over 19mpg Follow this link for other measurements www.onlineconversion.com/fuel_consumption.htm Steve looked at the various options, which included the "Gear Vendors" overdrive unit which keeps the original 727 gearbox, and adds the overdrive unit to the rear of it, and the system he eventually chose, which is the 518 gearbox with overdrive. This gives not only an overdrive gear, but has a lockup torque converter like modern auto boxes. Part of the reason for the choice was the minimum amount of chassis modification required to fit the 518 compared to the Gear Vendors unit. It could also reuse the original kick down and gear change linkages, as well as the oil cooler pipes. Sounded like a job for the Monday Club... The 518 is designed for small block engines, and has to be heavily modified to handle big block outputs. This gives you the opportunity to have the box made to suit your requirements. Steve opted for 1800rpm torque converter stall speed, with a stage 2 shift kit, as a stage one kit was felt to be insufficient for his engine. Other stall speeds and shift settings can be ordered. The 518 in it's packing case
The 518 was ordered from http://www.transmissioncenter.net and came with:
The adaptor plate that came with the kit was found to be unsuitable for the job (it placed the starter motor in the wrong place), and the correct plate was sourced from J.V.X Engineering in the USA.
The old 727 was removed as follows:
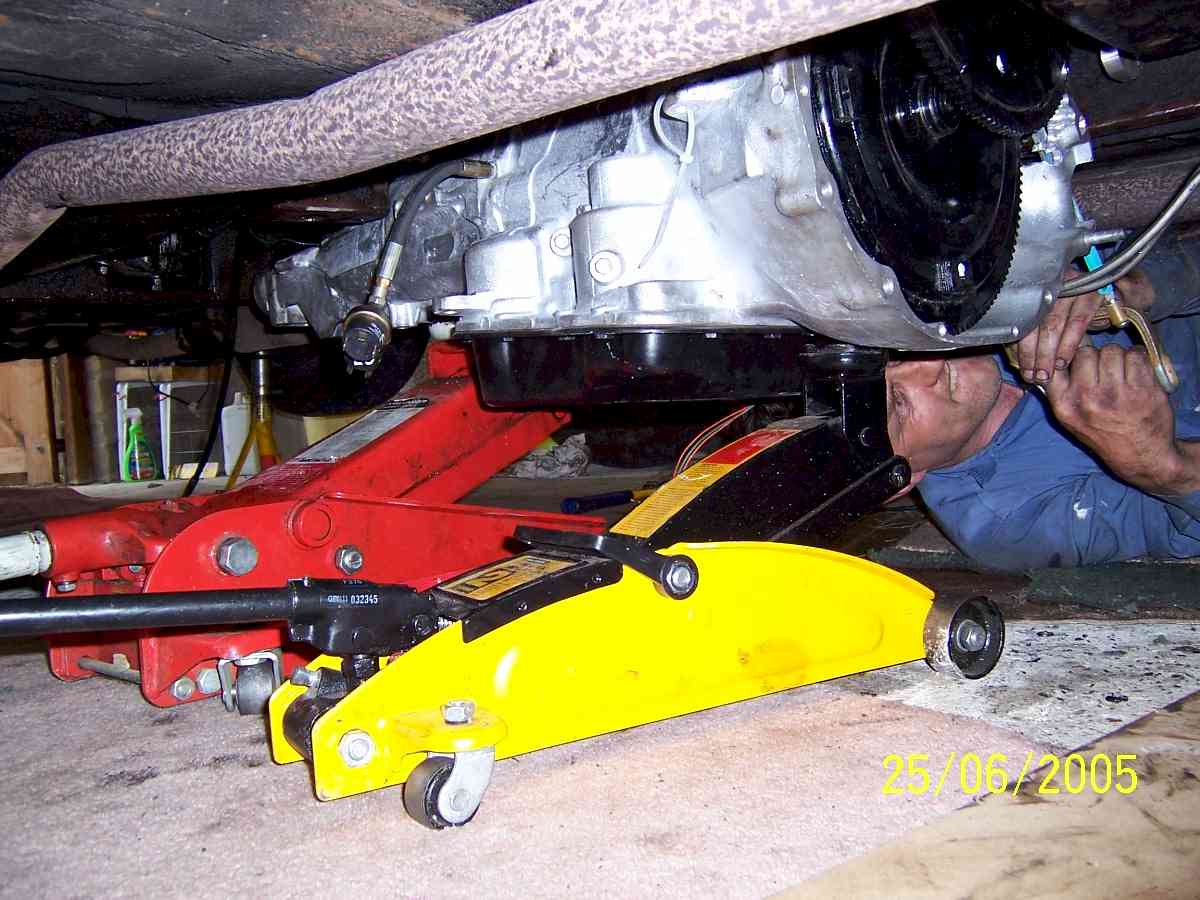
The 727 was then lowered with a trolley jack.
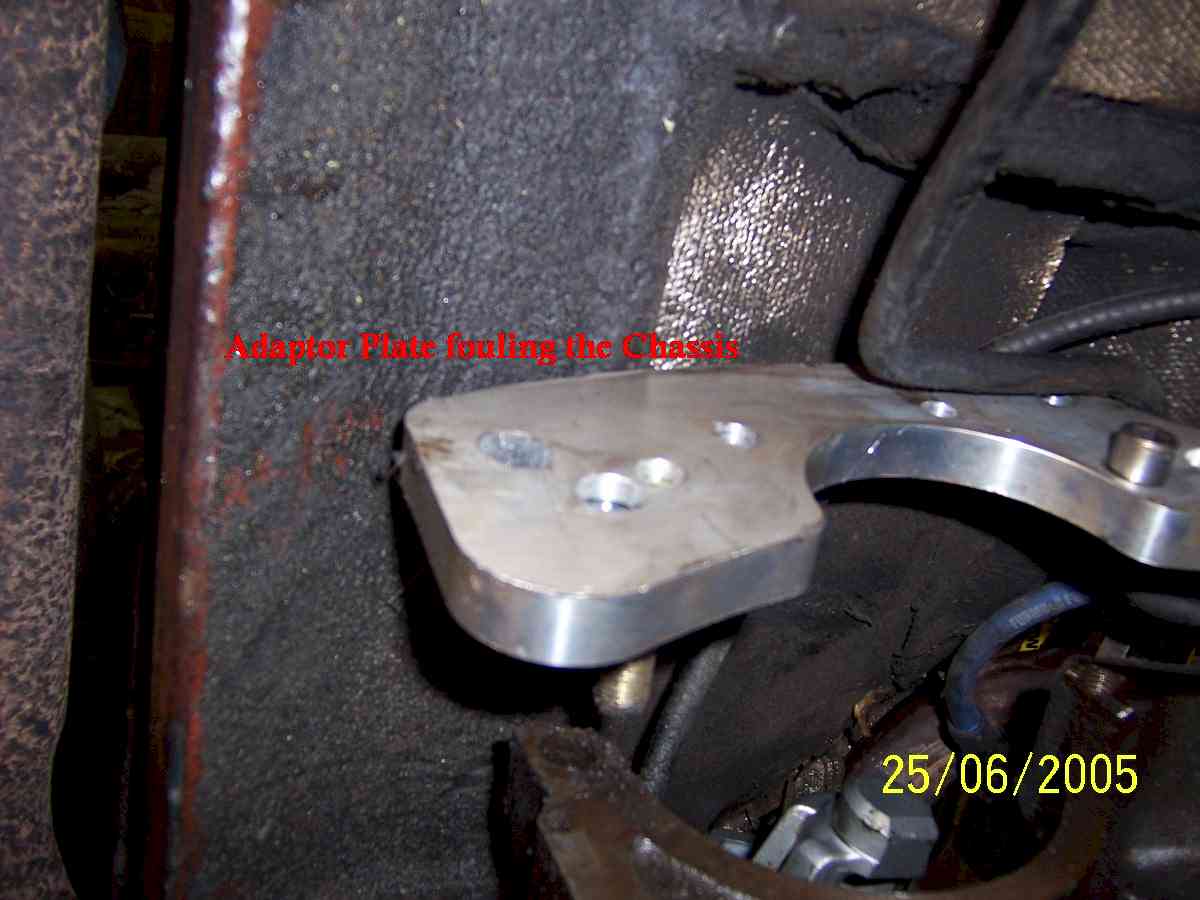
Although the 518 will bolt directly to the block via the adaptor plate, it is too wide in places to go between the Interceptor chassis tubes. This conversion is not a problem in Mopar vehicles as they tend to be a lot wider than the Jensen. This is where the job got scary. We had to take a hacksaw to a new 518 gear box! We first offered the adaptor plate up to the engine, and marked where it was to large to fit in between the chassis rails.
This was then hacksawed down to make it fit. As it is made of aluminium, it was very easy.
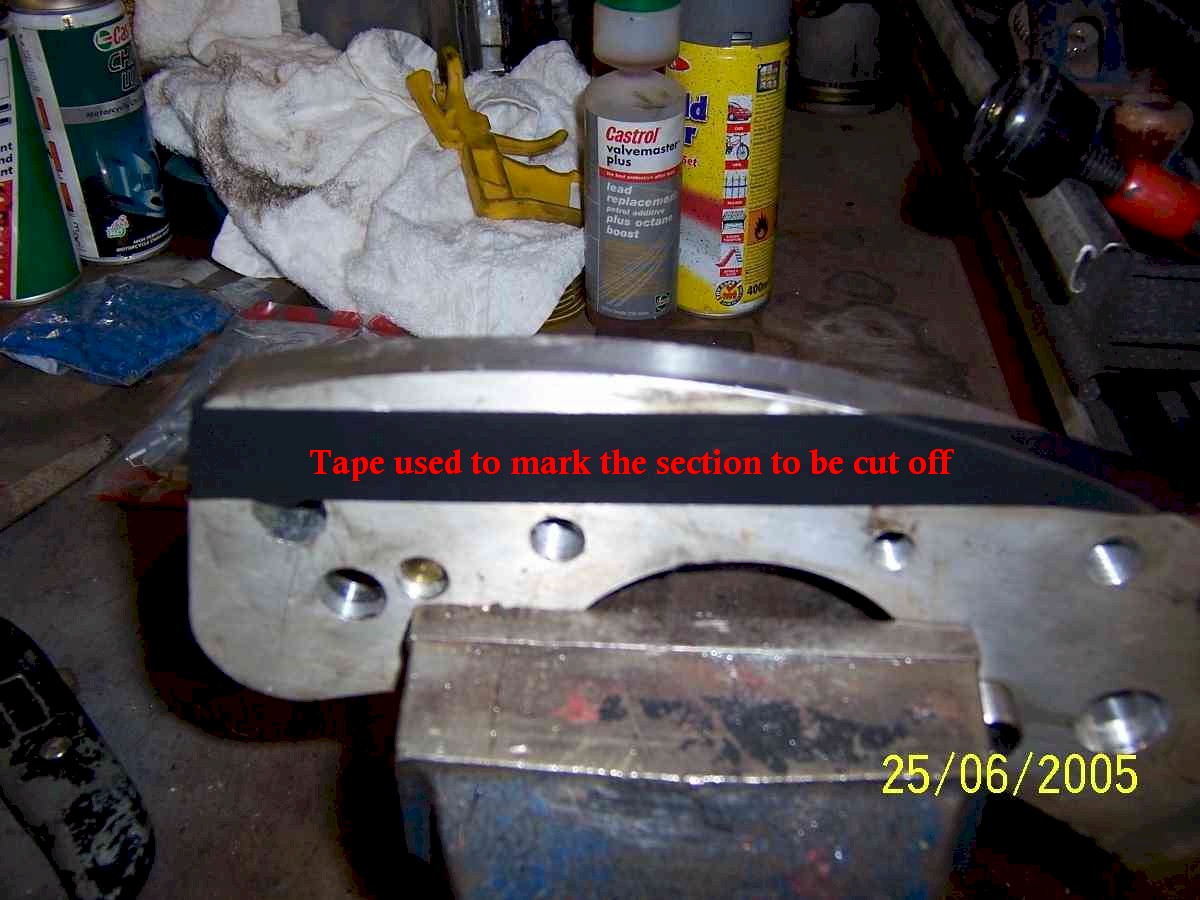
Once the adaptor plate was cut to ensure it would not foul the chassis, even when the gearbox moves under hard acceleration, the adaptor plate was bolted to the box, and the box was marked using the plate as a template.
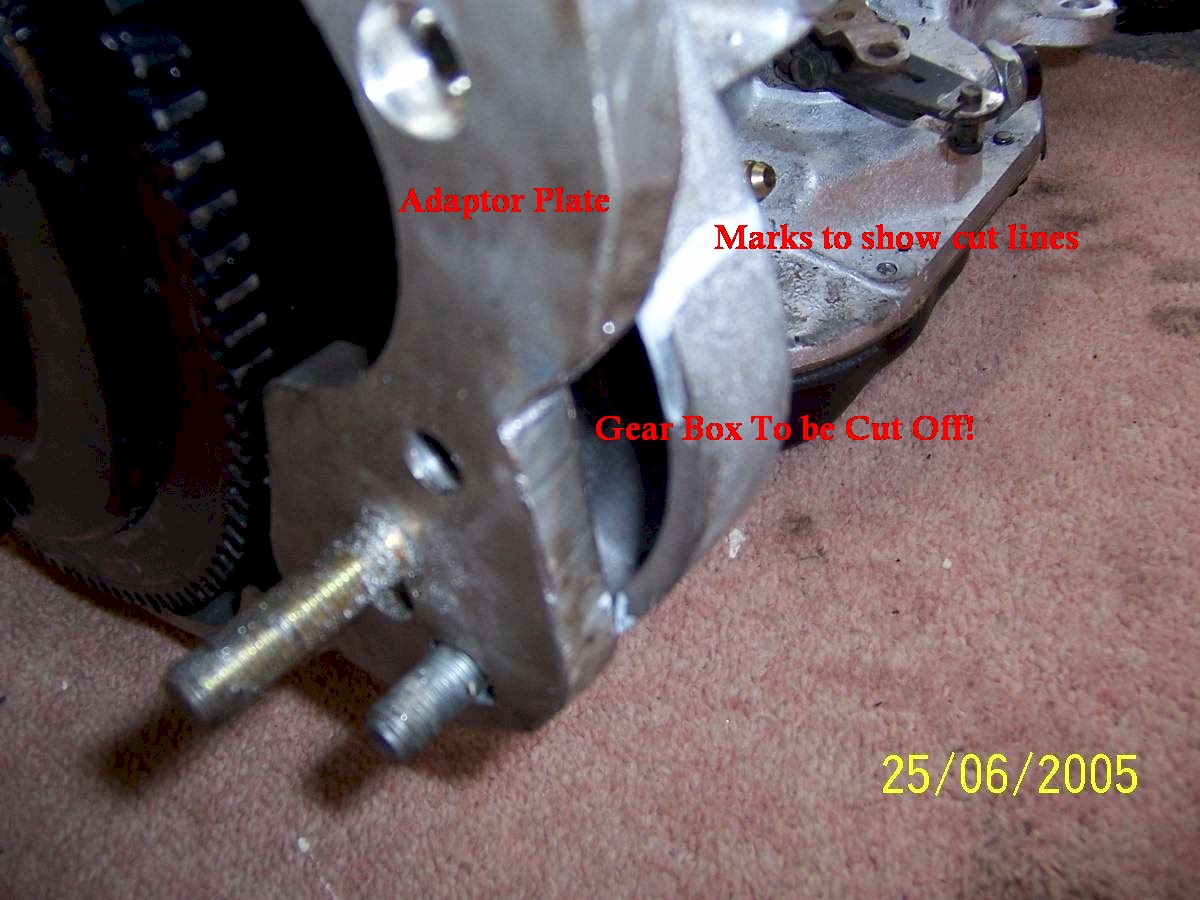
If you are of a nervous disposition, look away now.
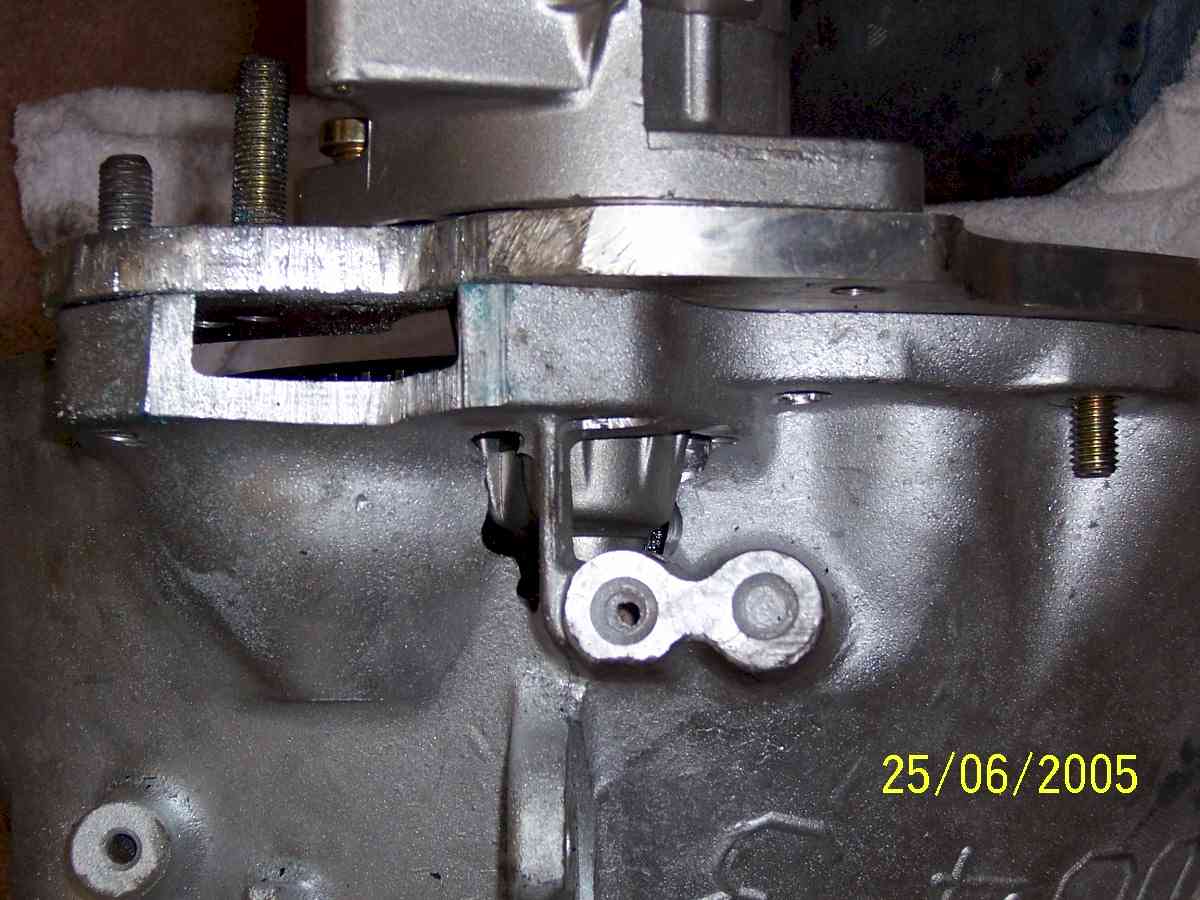
We also need to make a hole to allow room for the end of the starter motor. Hole made for starter motor. This was covered with epoxy to prevent dirt and water getting in. Conventional wisdom would suggest you get your mate to do this part as if it goes wrong, you can blame him and give him a slap. It won't solve the problem, but you will feel better for it. The next part was to offer the gearbox up to the engine.
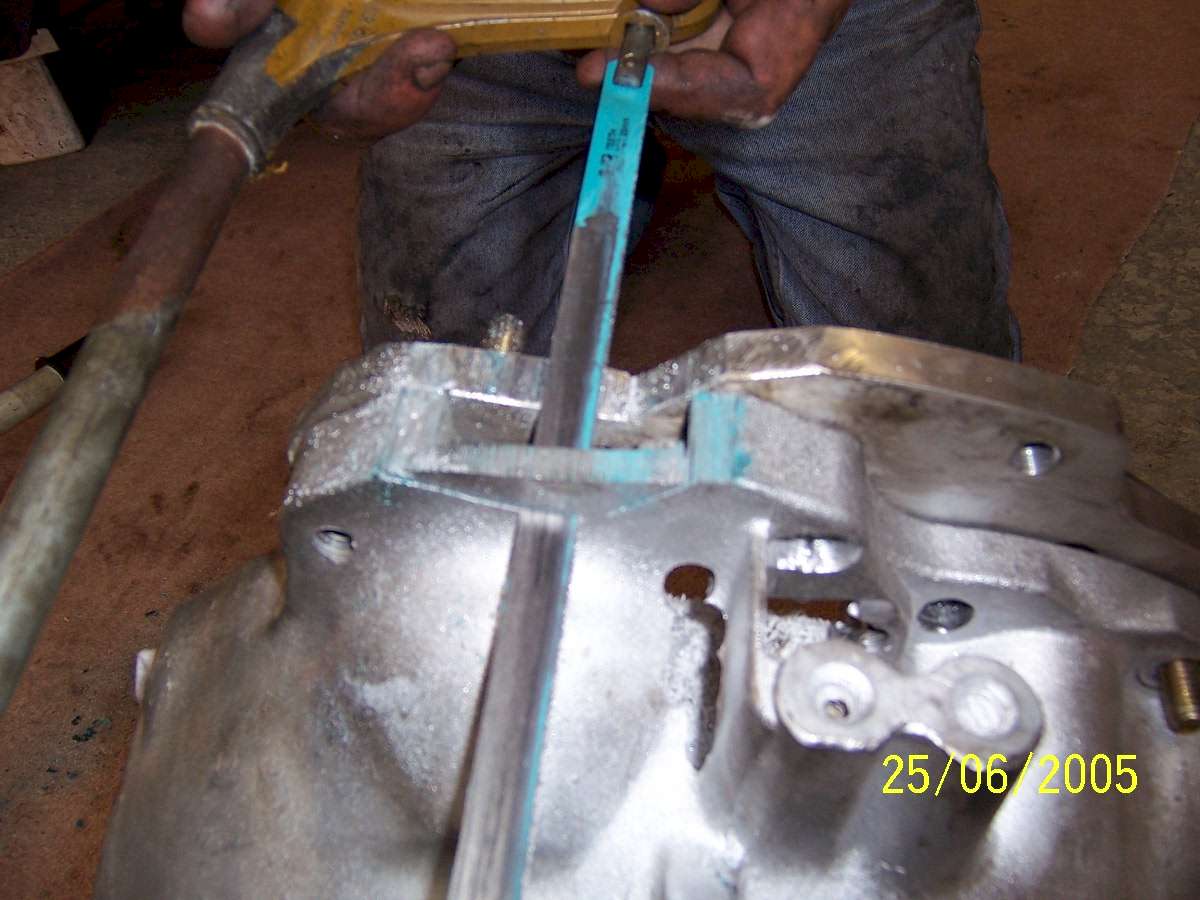
We then found that the rear of the 518 was fractionally too wide to go between the original rear gearbox mountings. Out came the angle grinder, no problem!
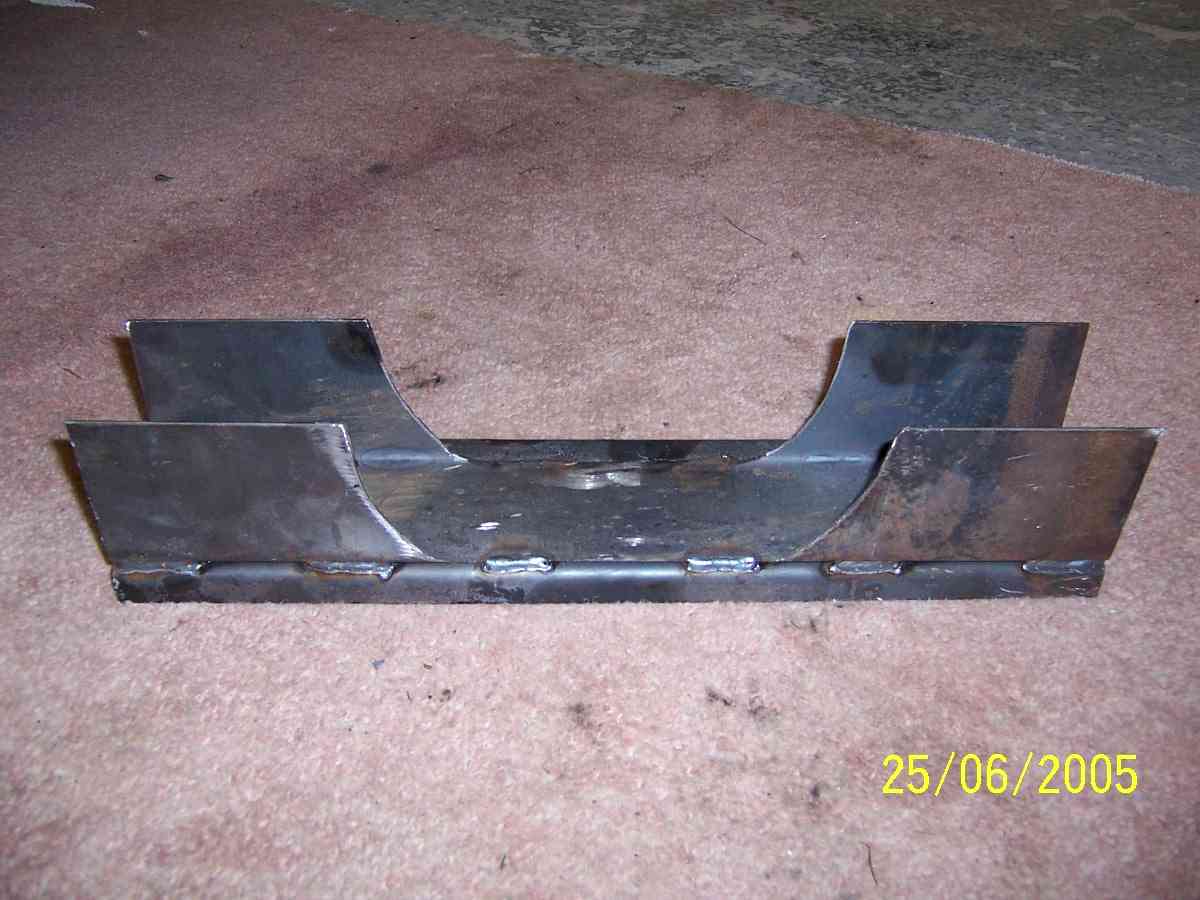
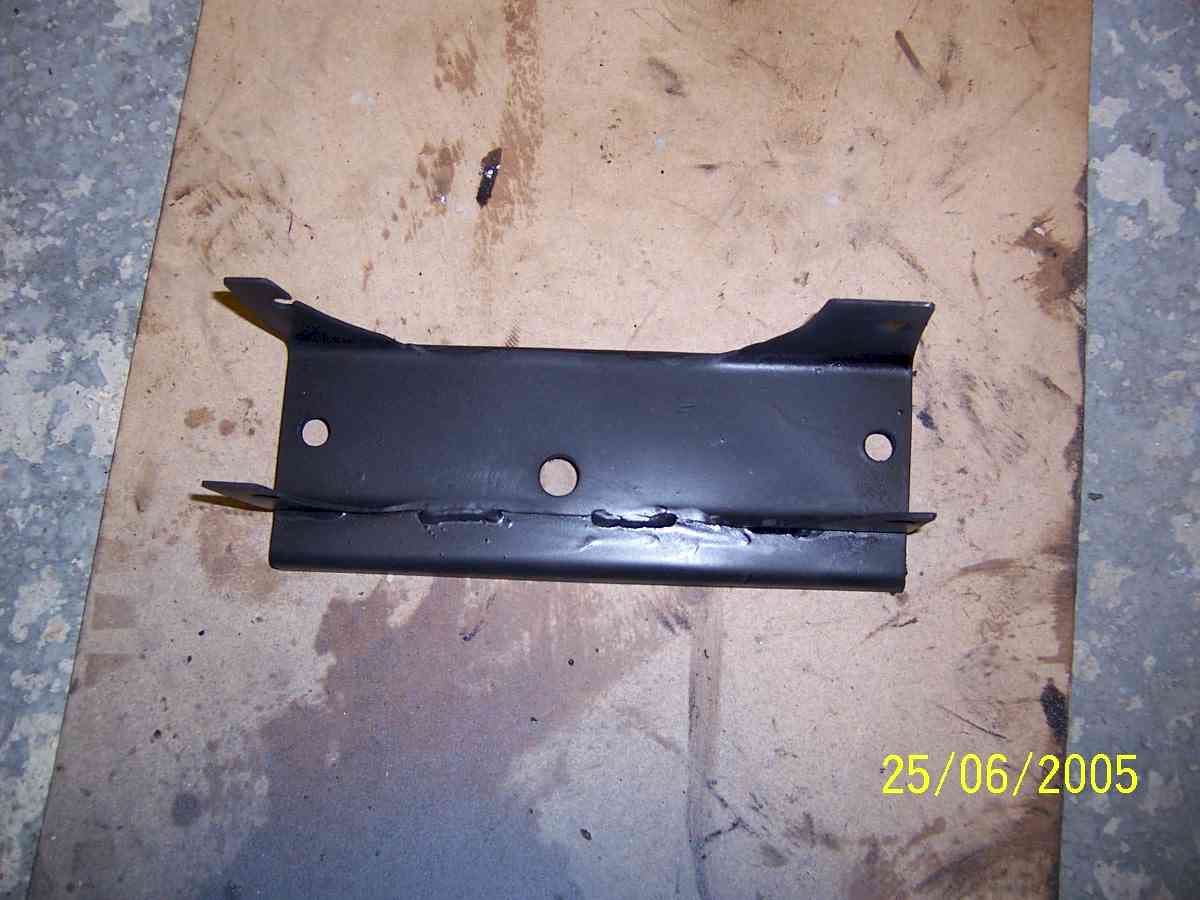
It is important that you don't remove the captive nuts on both sides of the chassis as they will be needed to bolt the new mount onto. Cutting the chassis so that you leave the captive nuts in place will be more than enough clearance. It was then time to make the new rear gearbox mounting. This was made from steel sections welded together.
These where then marked out for the bolt holes, and drilled to suit. 3 coats of paint were applied for corrosion protection.
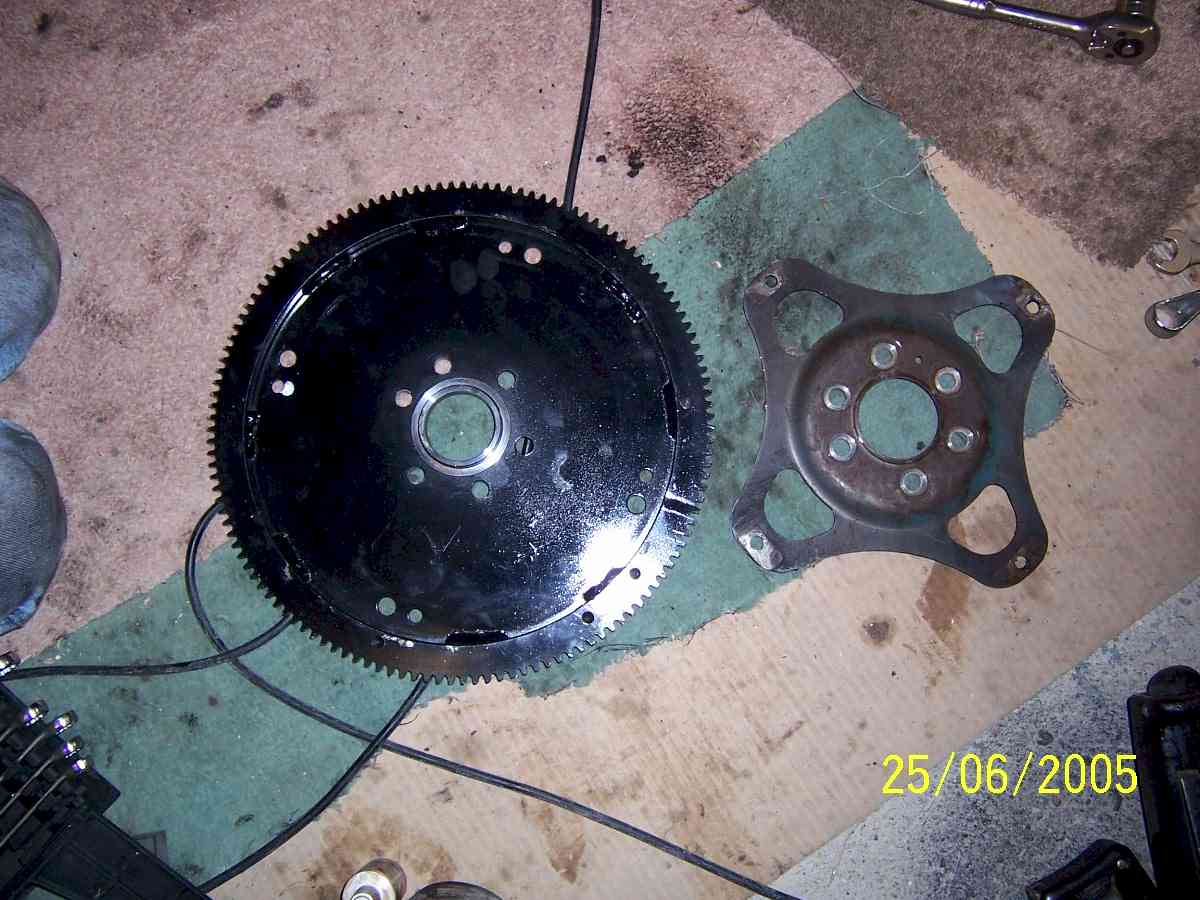
Now the gearbox would fit into the chassis, we fitted the new Flexplate. This was very different to the old one as it now has the starter motor ring gear on it.
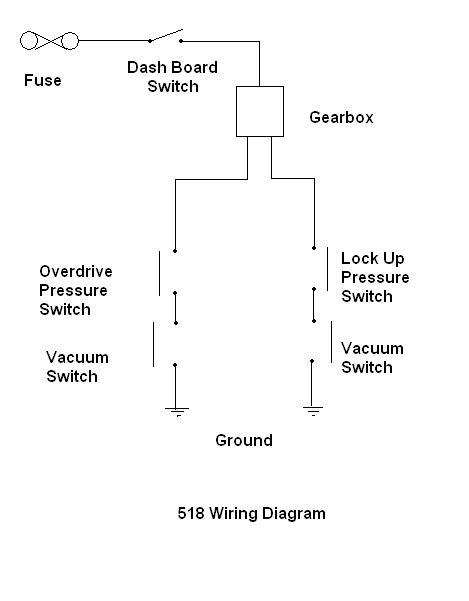
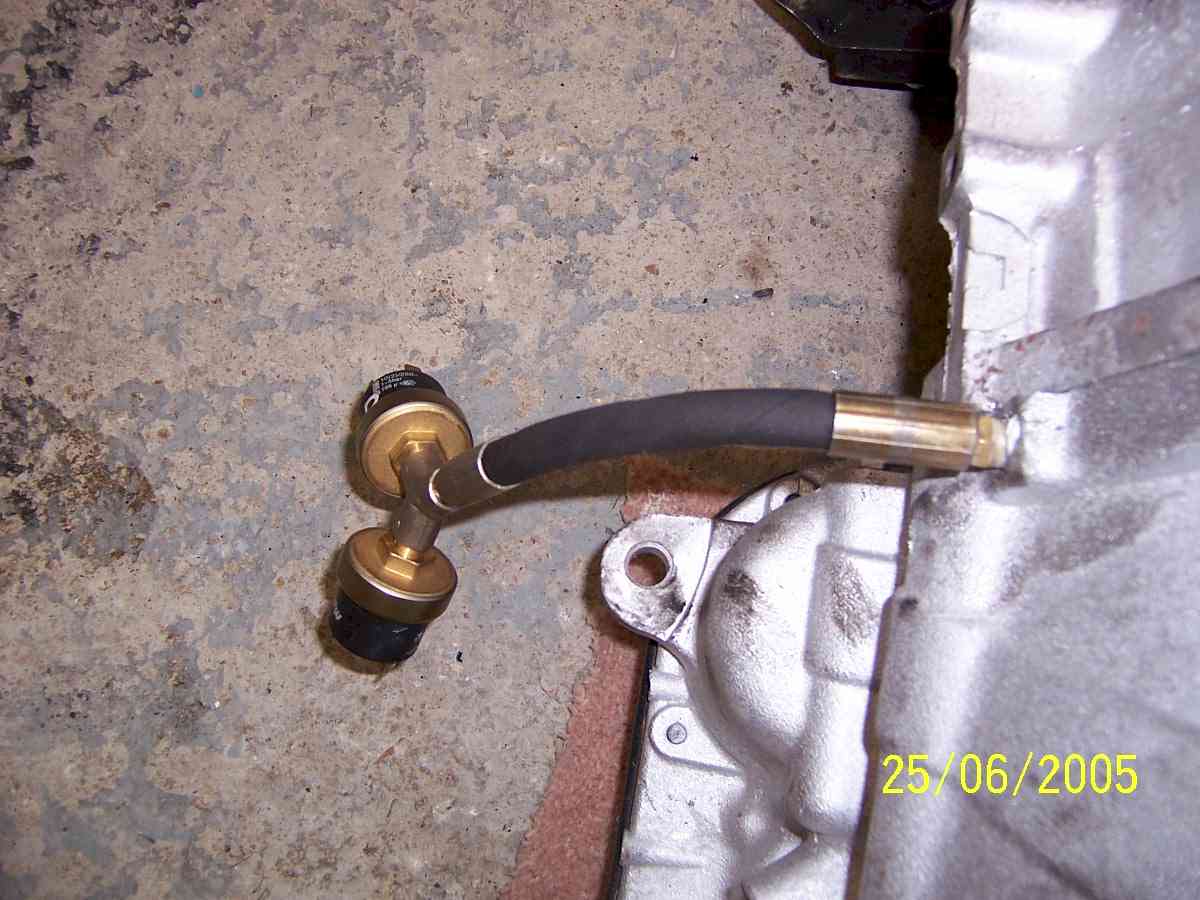
Once this was bolted in, we fitted the gear box to the block, bolted the Flexplate to the torque converter, and fitted the new rear mount. A rubber washer was used to insulate the bolt as it passes through the mount to prevent vibration. The system works by using 2 pressure switches mounted on the gearbox, and 2 vacuum switches operated by manifold vacuum. When the gearbox reaches a certain hydraulic pressure, the electrical contacts on the 1st pressure switch close. This switch is in series with a vacuum switch, and If the manifold vacuum is high enough (i.e. at cruise) the overdrive will cut in. The same happens with the torque converter lockup, but this is at a higher hydraulic pressure, so the 2 do not happen at the same time. The pressure switches are adjustable so you can select the speeds you want the operations to happen at (see Diagram 1)
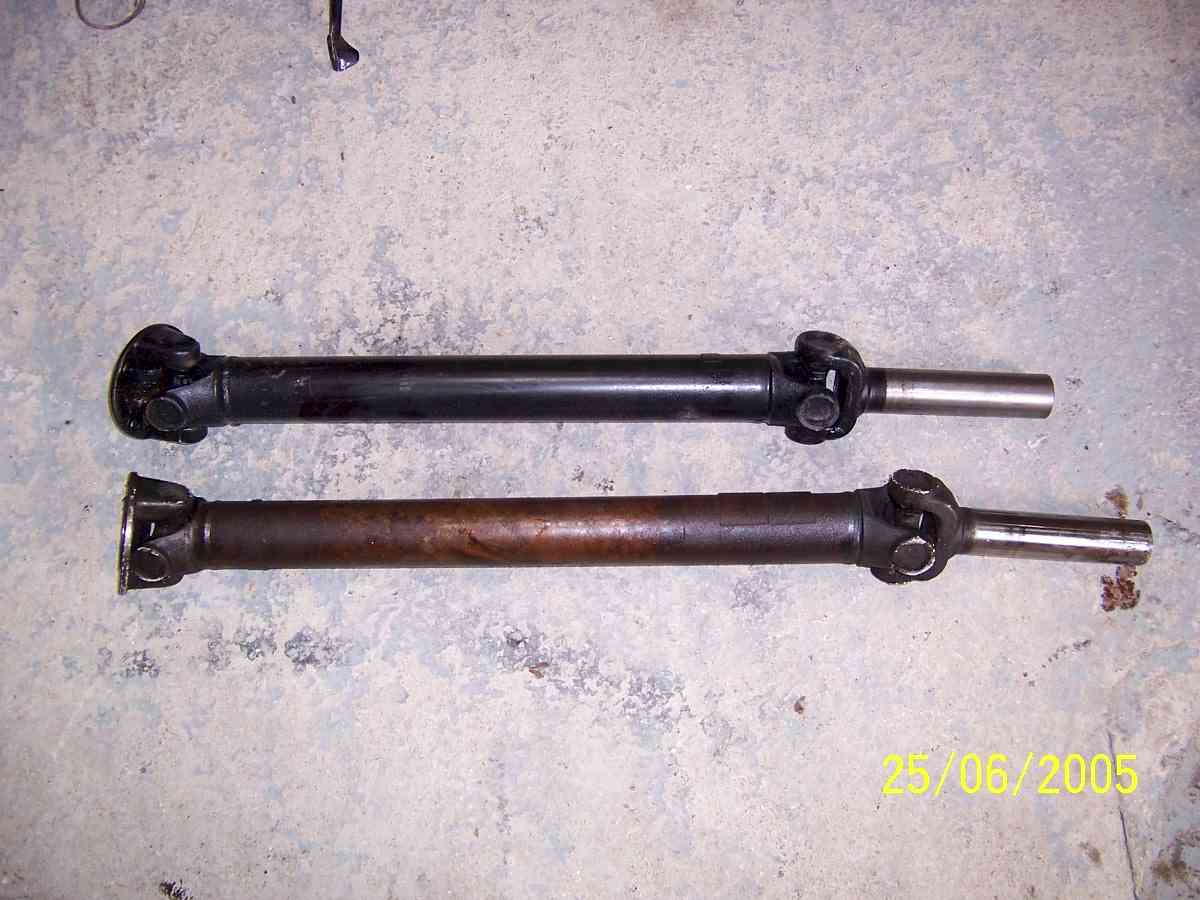
Now the gearbox is bolted in place, we can fit the prop shaft. The 518 is longer than a 727, so a prop shaft shortened by 3-1/2 inches was used.
This was sourced from The Propshaft Clinic (01274 305399) www.propshaft.co.uk for £59 plus VAT The dip stick for the 518 stuck out of the bonnet by about 2 feet, so we fitted it, and measured how much we need to cut off. It was cut off with a plumbers pipe cutter so as we wouldn't get swarf into the box. We then used the piece we had cut off as a template to shorten the dipstick itself.
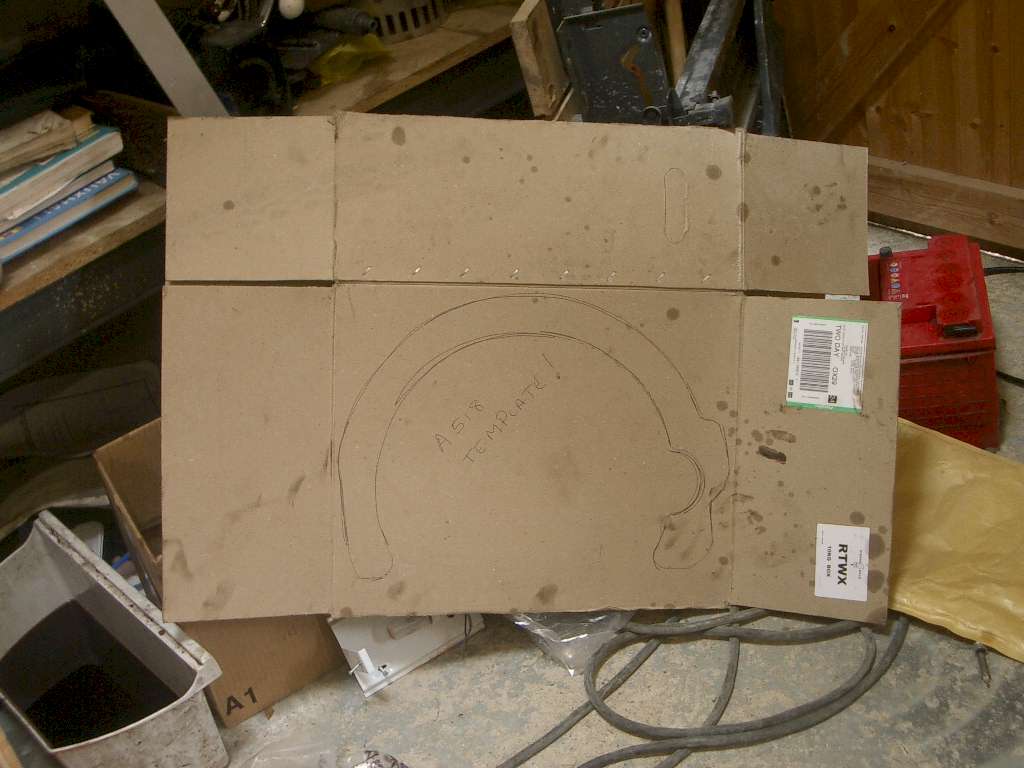
All that was left to do now was to wire up the switches, and fill the gearbox. Chrysler strongly recommend the exclusive use of ATF+4 fluid in the 518, and advise against the use of synthetic fluids. Steve brought 10 litres of ATF+4 from the local Chrysler dealer (£50!!!) and the car was ready for testing. The system worked first time, and only a slight vibration from the new rear mount and the adjustment of the pressure switches was needed. The rear mount required the centre bolt hole enlarging to allow the rubber washer to insulate the bolt from the mount. The car is now doing 70mph at a modest 1850rpm, compared to the 727's 2700prm. This will give a noticeable improvement in fuel consumption, and the interior noise levels in the car were vastly better. We will add more information as Steve gets more experience with the new box, and can work out his new MPG. P.S, we have a template of the adaptor plate modifications for when we recover enough to do the other Monday Club cars....
|
|
|


 The logo of Transmission Centre