|
|

Home Jensen Monday Club |
|
|
|
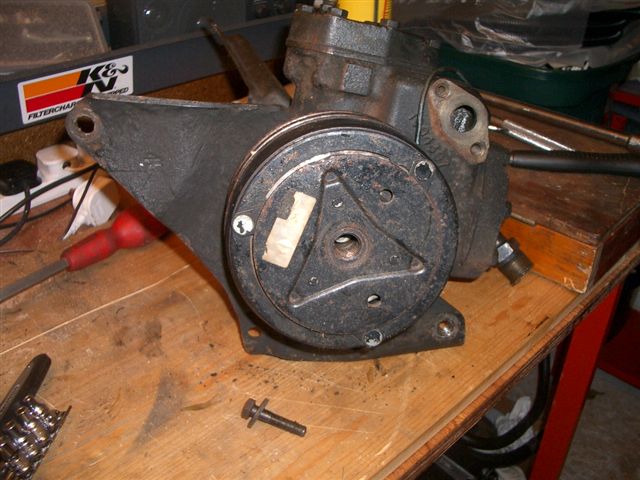
After problems with the air conditioning clutch assembly during our recent Scottish trip, Chris has set about sorting the pulley and clutch out. Here is how he did it. There are three main parts to the A/C pump, they are: a) The main compressor body b) An electro-magnetic clutch c) Twin pulley There’s a sealed-for-life bearing pressed into the casing of the pulley. With the clutch disengaged this allows the twin-pulley to spin freely with virtually zero load on the engine. Inside the pulley, bolted in a fixed position to the body of the compressor pump, is an electro-magnet. A clutch-disk on the front face of the pulley is bolted to a tapered shaft via a woodruff key; it’s the tapered shaft that turns the compressor. When the A/C is engaged this magnet energises and pulls the body of the pulley and the outer clutch disk together. The engine then spins the pulley which in turn spins the clutch plate which in turn spins the tapered shaft which turns the compressor. The load on the engine is reputedly 15hp (anyone care to confirm/deny). The main bearing on my compressor failed during a trip to Scotland . The electro-magnet was destroyed by the heat of the bearing and the clutch and pulley became fused together. The clutch was freed from the pulley by chiselling off the rivets holding the clutch-plate in place; the electro-magnet was then removed and the bearing was packed with grease and bolted back. It ran at 3,000RPM for 7 hours to get me home but was almost falling off by that point. To replace the pulley/clutch/magnet: a) disconnect battery b) remove the centre bolt – this holds the pulley to the tapered compressor shaft. c) slacken the alternator and remove the two drive belts d) remove the twin pulley (may need to be levered off the tapered shaft) e) there are three small bolts holding the electro-magnet to the body of the compressor. Remove these and disconnect the +12v feed. The electro-magnet can now be removed.
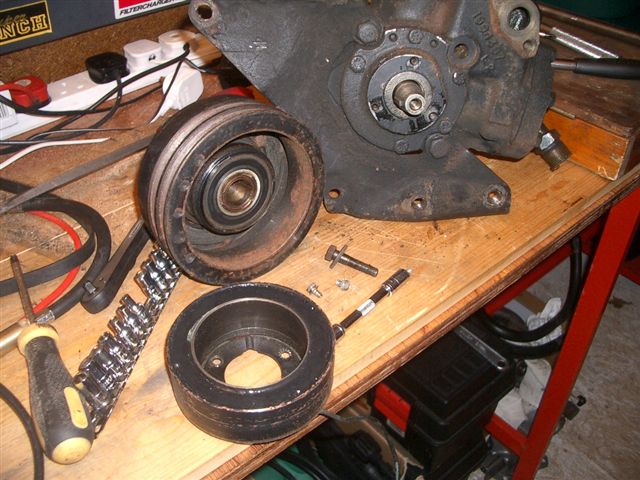
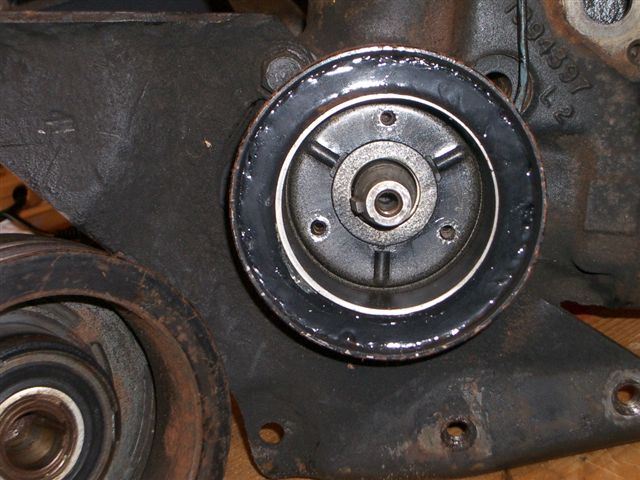
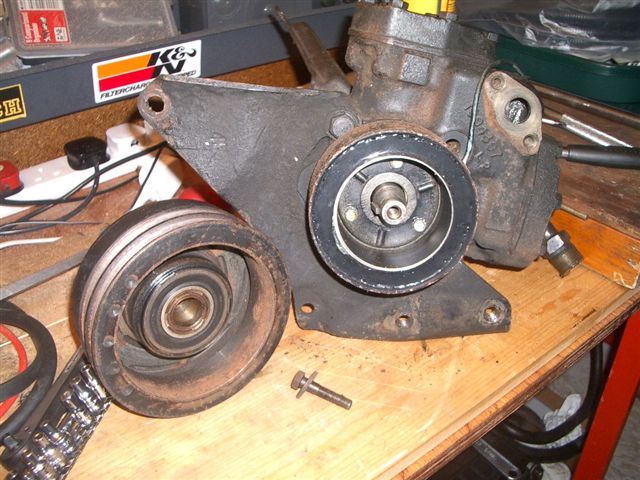
Replacing with “new” parts is now a reversal of the above steeps. When finished the pulley should spin freely with the outer clutch-plate not moving at all. When energised, the pulley and the clutch-plate will be held together and both will turn at the same time. Centre bolt removed. NB You can do all this with the compressor still in the car and the A/C pipes attached. Just took these pictures of a spare compressor on the bench. Once the centre bolt is removed the pulley can be levered off the tapered shaft. Electro-magnet is fixed to the body of the compressor by three small bolts (removed in this picture) – don’t over tighten ! Everything apart so you can see all the components. The pulley bearing is stamped with NACHI 303GS1-2NSL. I haven’t tried to source this yet as I had a spare compressor – however, https://www.nachi.de looks like the most likely source.
|
|
|