|
|
|
Jensen Monday Club |
|
|
|
The Holley Commander Digital Fuel Injection System. Recently I decided to gain some of the benefits of modern car technology in my daily transport; my MK3 Interceptor. I was experiencing 'pinking' (pinging) problems, due to higher compression pistons, and high torque camshaft. I intended to upgrade the car by fitting fuel injection, and hopefully remove the pinking problems at the same time. I had heard good reports of the Holley analogue system, but decided to go one stage further with a fully digital system. Investigation led me to the Holley Commander 950TBI (Throttle Body Injection) with a 700 c.f.m. capacity. The catalogues gave this model as being correct for the Interceptor's horse power range. I managed to get one by personal import (somebody carried it for me in their suitcase) from America. The cost of the kit was $1,350. I also needed an optional throttle bracket for $10 and a throttle body to manifold adaptor for $17. The adaptor was needed because the body uses a square mounting bolt pattern whereas the standard manifold is rectangular, as an alternative you can get an aluminium manifold with the correct pattern (with all its other benefits) for about $200. With post and packaging, duty and VAT the figures are about the same, but in pounds. The kit consisted of: The throttle body, computer, fuel pump, two fuel filters, lambda sensor with mounting, MAP sensor (air mass), coolant temperature sensor, idle air control motor, fitting hardware, lots of wire (luckily in a loom), a floppy disc for setting up and timing and a comprehensive manual. If you do hit problems that are not covered in the manual there is a help line located in the United States, so don't forget the time difference. Later I thought the fuel pump was a little noisy so I bought a new one with the correct flow of 60 gallons per hour (that means it could empty a tank in 20 minutes) and pressure rating. Now it was time to work on the car itself. The fuel pump was fitted first and mounted in a homemade bracket under the floor in-between the chassis members. This needed a power feed from the ignition and while doing this I did the wiring for the computer. This needs a permanent live as well as an ignition controlled feed.
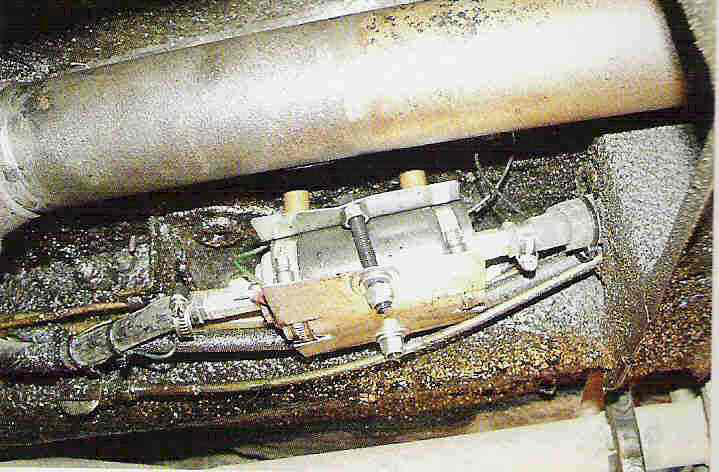
Fuel Pump in situ. It was recommended that the throttle body and fuel pump needed larger diameter feed pipes so I upgraded to 10mm diameter tubing, including modifying the pipes in the sender unit at the fuel tank. The return fuel lines could stay the same size. This meant that the mechanical fuel pump was now redundant. Mine is still in situ but can be blanked off. One of the filters protects the pump and the other is downstream to protect the injection units. The Lambda probe, or oxygen sensor was next. The positioning of this is a balance between sensing mixed gases, and reducing any time lag. The distance from the exhaust valves to the sensor is one of the measurements that goes into the computations. I have tubular manifolds (headers) so I welded the mounting nut on the large single branch of the nearside pipes.
Lambda Sensor Mounted in Header pipe Fitting the water temperature sensor can either be easy or hard. The later Interceptor water pump housings have a spare mounting point next to the gauge sensor. If you haven’t got this then you will have to drill and tap one. The MAP unit (air mass sensor) was fitted on the outside of the heater blower unit. Near here I drilled a hole, suitably protected with a grommet, through the bulkhead for the large wiring loom. Take great care drilling this hole as lots of wiring and equipment is located in this area behind the bulkhead (firewall)!
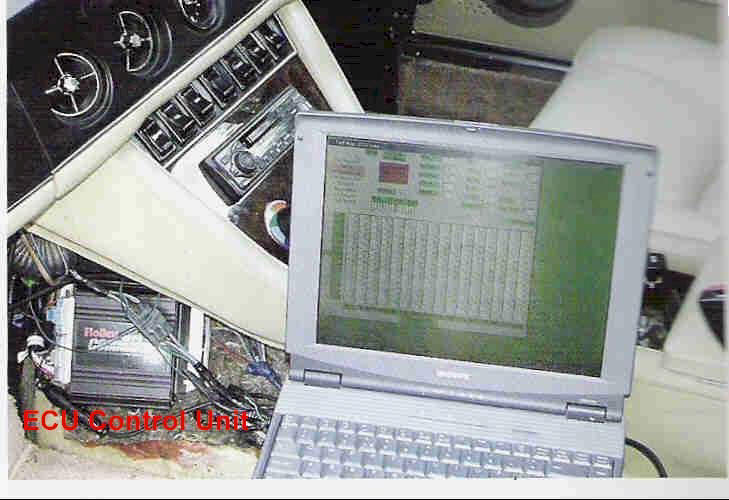
The fully programmable computer not only controls the fuel curve but also all the ignition variables, therefore the standard ignition unit is superfluous. The manual says that the distributor shaft can be welded solid (i.e. no centrifugal advance) but I found I needed the advance to align the rotor arm with the distributor cap (you could possibly weld the distributor with the advance on). The computer ignition can then be adjusted to compensate for this. I have gone the ‘whole hog’ and fitted an upgraded ignition system with a crankshaft position sensor. This is a magnetic pick up mounted on the crankshaft pulley, which give signals to the fuel injection computer on the exact position of the crank, allowing for very precise ignition control. This was augmented with an MSD ignition system, and MSD high power ignition coil. None of these ‘mods’ by the way affected the rev counter, however MSD "Multi Spark" systems are not compatible with the Jensen rev counter, and highly complex additional equipment is required to make the rev counter work with Multi Spark ignition. Now the ‘business’ part or "ECU" computer was mounted. Mine is on the passenger side of the glass fibre transmission cover, under the trim. This is very convenient for accessibility and later tuning, as I have run a serial lead to connect to the laptop next to the passenger seat.
ECU mounted in transmission tunnel housing, with laptop plugged in. With the Throttle Body and adaptor fitted onto the manifold, throttle cable attached, all that was left was to wire the system together. This took some thought, but the routeing I took has ended up looking very neat.
Fuel Injection Throttle Bodies in Situ. If you turn the key now, nothing happens, as it’s time to start loading the computer with all the settings it needs! The manual states that an IBM-compatible laptop computer with Windows 3.1, 95, or 98 will be needed; I suppose a PC could be used for initial setting up, but a laptop is more easily operated in the confines of the car. The disc has the preliminary settings for most engines but not for the Chrysler 440. Using approximate figures will get over this problem, and even priming time is adjustable. Once the engine can be started, the fun starts! There are different pages in the programme for fuel and ignition, and on these pages you can set your own parameters, or "cell points". This will allow more refined adjustments for the rev ranges you are interested in. As the engine runs, a highlighter shows you your current revs and air flow on a two-dimensional graph. An additional window shows you the air/fuel mixture (from the Lambda probe) from weak to rich. You then adjust the figures at the highlighted point to correct the mixture. This gives you the flexibility to set the car up for power or economy, and separate programmes can be stored, and loaded, to quickly alter the cars settings, depending on the way you which to use the car. A day at the drag strip will require a different programme to a 500 mile cruise! A similar graph shows you the ignition advance curve. Both these pages can be viewed on a three-dimensional graph, so that any peaks and troughs can easily be seen and smoothed out. You can also set the idle speed as well as the idle mixture. An idle speed set to 750rpm will remain constant, even when selecting drive, or turning the A/C on. Obviously you can only make the adjustments during the low rev range and off-load conditions at this time, and estimate the others. But, with a laptop, you set off down the road and make all the adjustments, real time, throughout the operational envelope, via an assistant in the passenger seat. What better ‘rolling road’ tuning can there be! Fine-tuning is the secret of perfect performance, and I have even got zero fuel flow during over-run with throttle off, right down to the idle speed. The tuning is done with the air filter on as even this can alter the readings, and with this in place there is no height difference to a carburettor, and no one can tell you have a non standard installation. Have I achieved what I set out to do? I think I have, but I let Alan Smith, the Jensen Owners Club Chairman, drive the car, to get his impressions; here’s what he said: - “Being handed over the keys to somebody else’s car you never know what to expect and I hadn’t driven this car before to make a comparison. The car started immediately the key was turned and you can see the revs reduce from ‘hot idle’ soon after. Pulling away and manoeuvring out of the car park I immediately got the feeling of a positive throttle. On the road I was glad it was a quiet night, the engine interprets everything you do with the right foot correctly. I say the right foot because even braking seemed positive; this is probably due to the 22 inches of vacuum produced. I believe performance has been improved throughout the range. Steve also reports a 15% better fuel consumption. Even the noise is smoother with no grumbling or hesitation; but don’t worry, you still get a magnificent growl when the foot goes down! Yes! The work was worth the effort and the car is even better than a modern car”. I have proved that a competent enthusiast can do the conversion, but if you think this is beyond your capabilities and still want the benefits you can get it done for you. With experience I have programmed several discs to download all the adjustments "in one go". Fine-tuning does take longer, but you get the most out of the system doing this. You pay the money, you make the choice, but it will be worth it! Steve Payne.
|
|
|