|
|

Home Jensen Monday Club |
|
Kick Down Cable |
|
I had brought some time ago a cable version of the gearbox kickdown assembly, and now seemed like a good time to fit it.
It’s seems a bit more “elegant” than the original mechanical rod set up, and it’s also in stainless steel, so shiny! 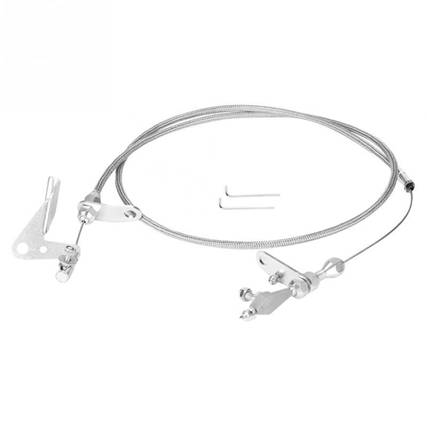 It’s made by a company called Lokar, and seems to be available from Jegs, Summit, etc. https://www.lokar.com/throt-cable-kickdowns.html This is an overview of the fitting on my car, but the full installation instructions are below. Please follow the manufacturer’s instructions. https://www.lokar.com/assets/instructions/INS0046-ChryslerKickdown.pdf I started by removing the Mopar mechanical linkage and kickdown rod from the carb 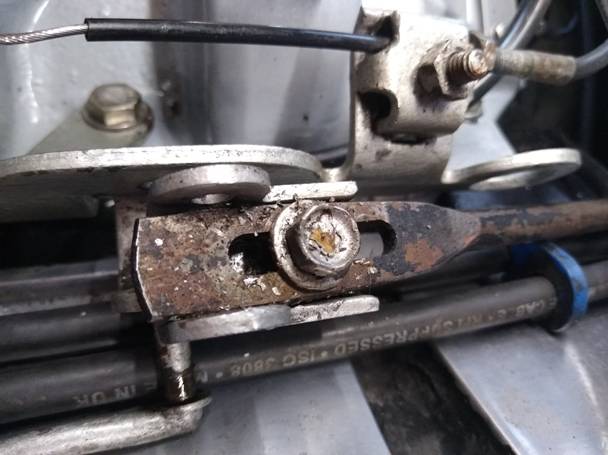
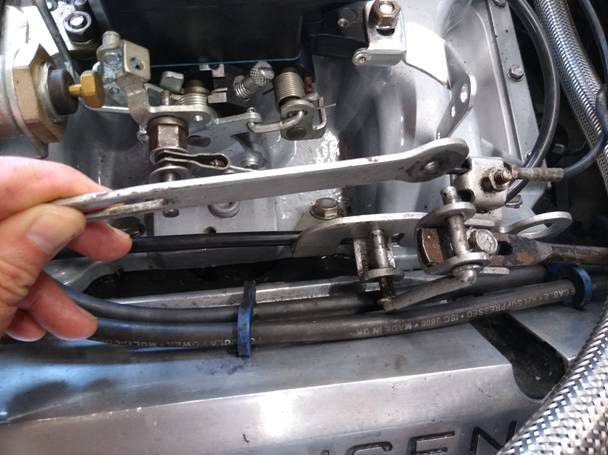
Next remove the spring clip that holds the kickdown rod onto the kickdown lever on the gearbox and then the rod can be removed. This is tricky as there is very little room between the chassis tube and the gearbox, and then the rod is quite a convoluted shape, so takes a bit of wiggling.
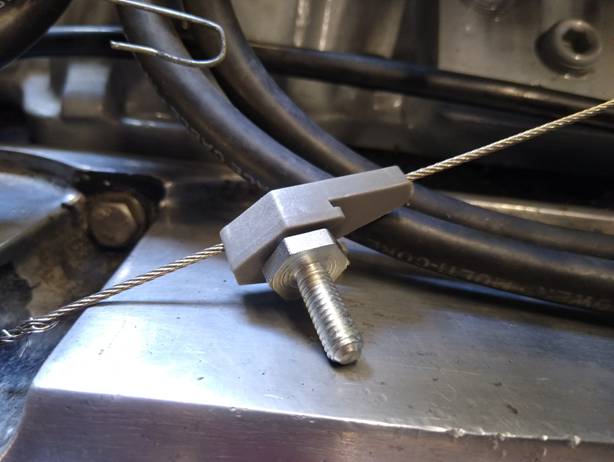
The next step is to disassemble the cable itself. This is done by removing the “Cable End Stop” which is secured by Allen head grub screws, and the “Kickdown Throttle Body Fitting”, which the cable passes though. DO NOT REMOVE THE “Ferrule” FROM THE OUTER SHEATH. SEE FITTING INSTRUCTIONS. 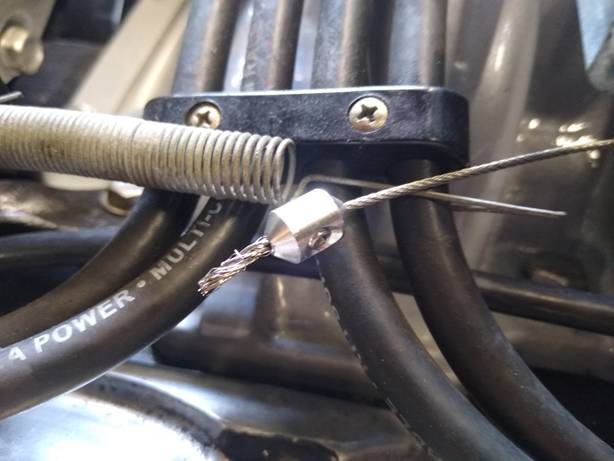
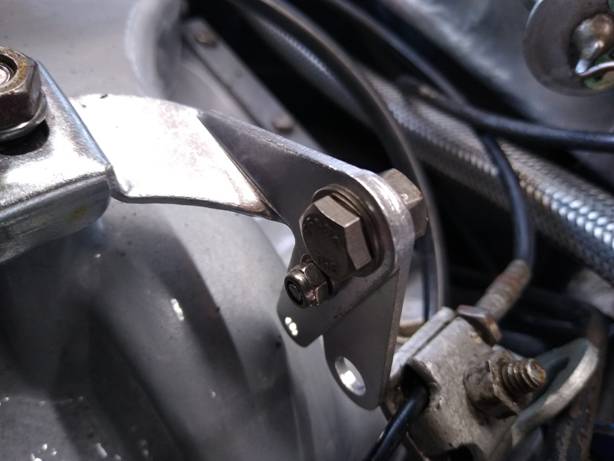
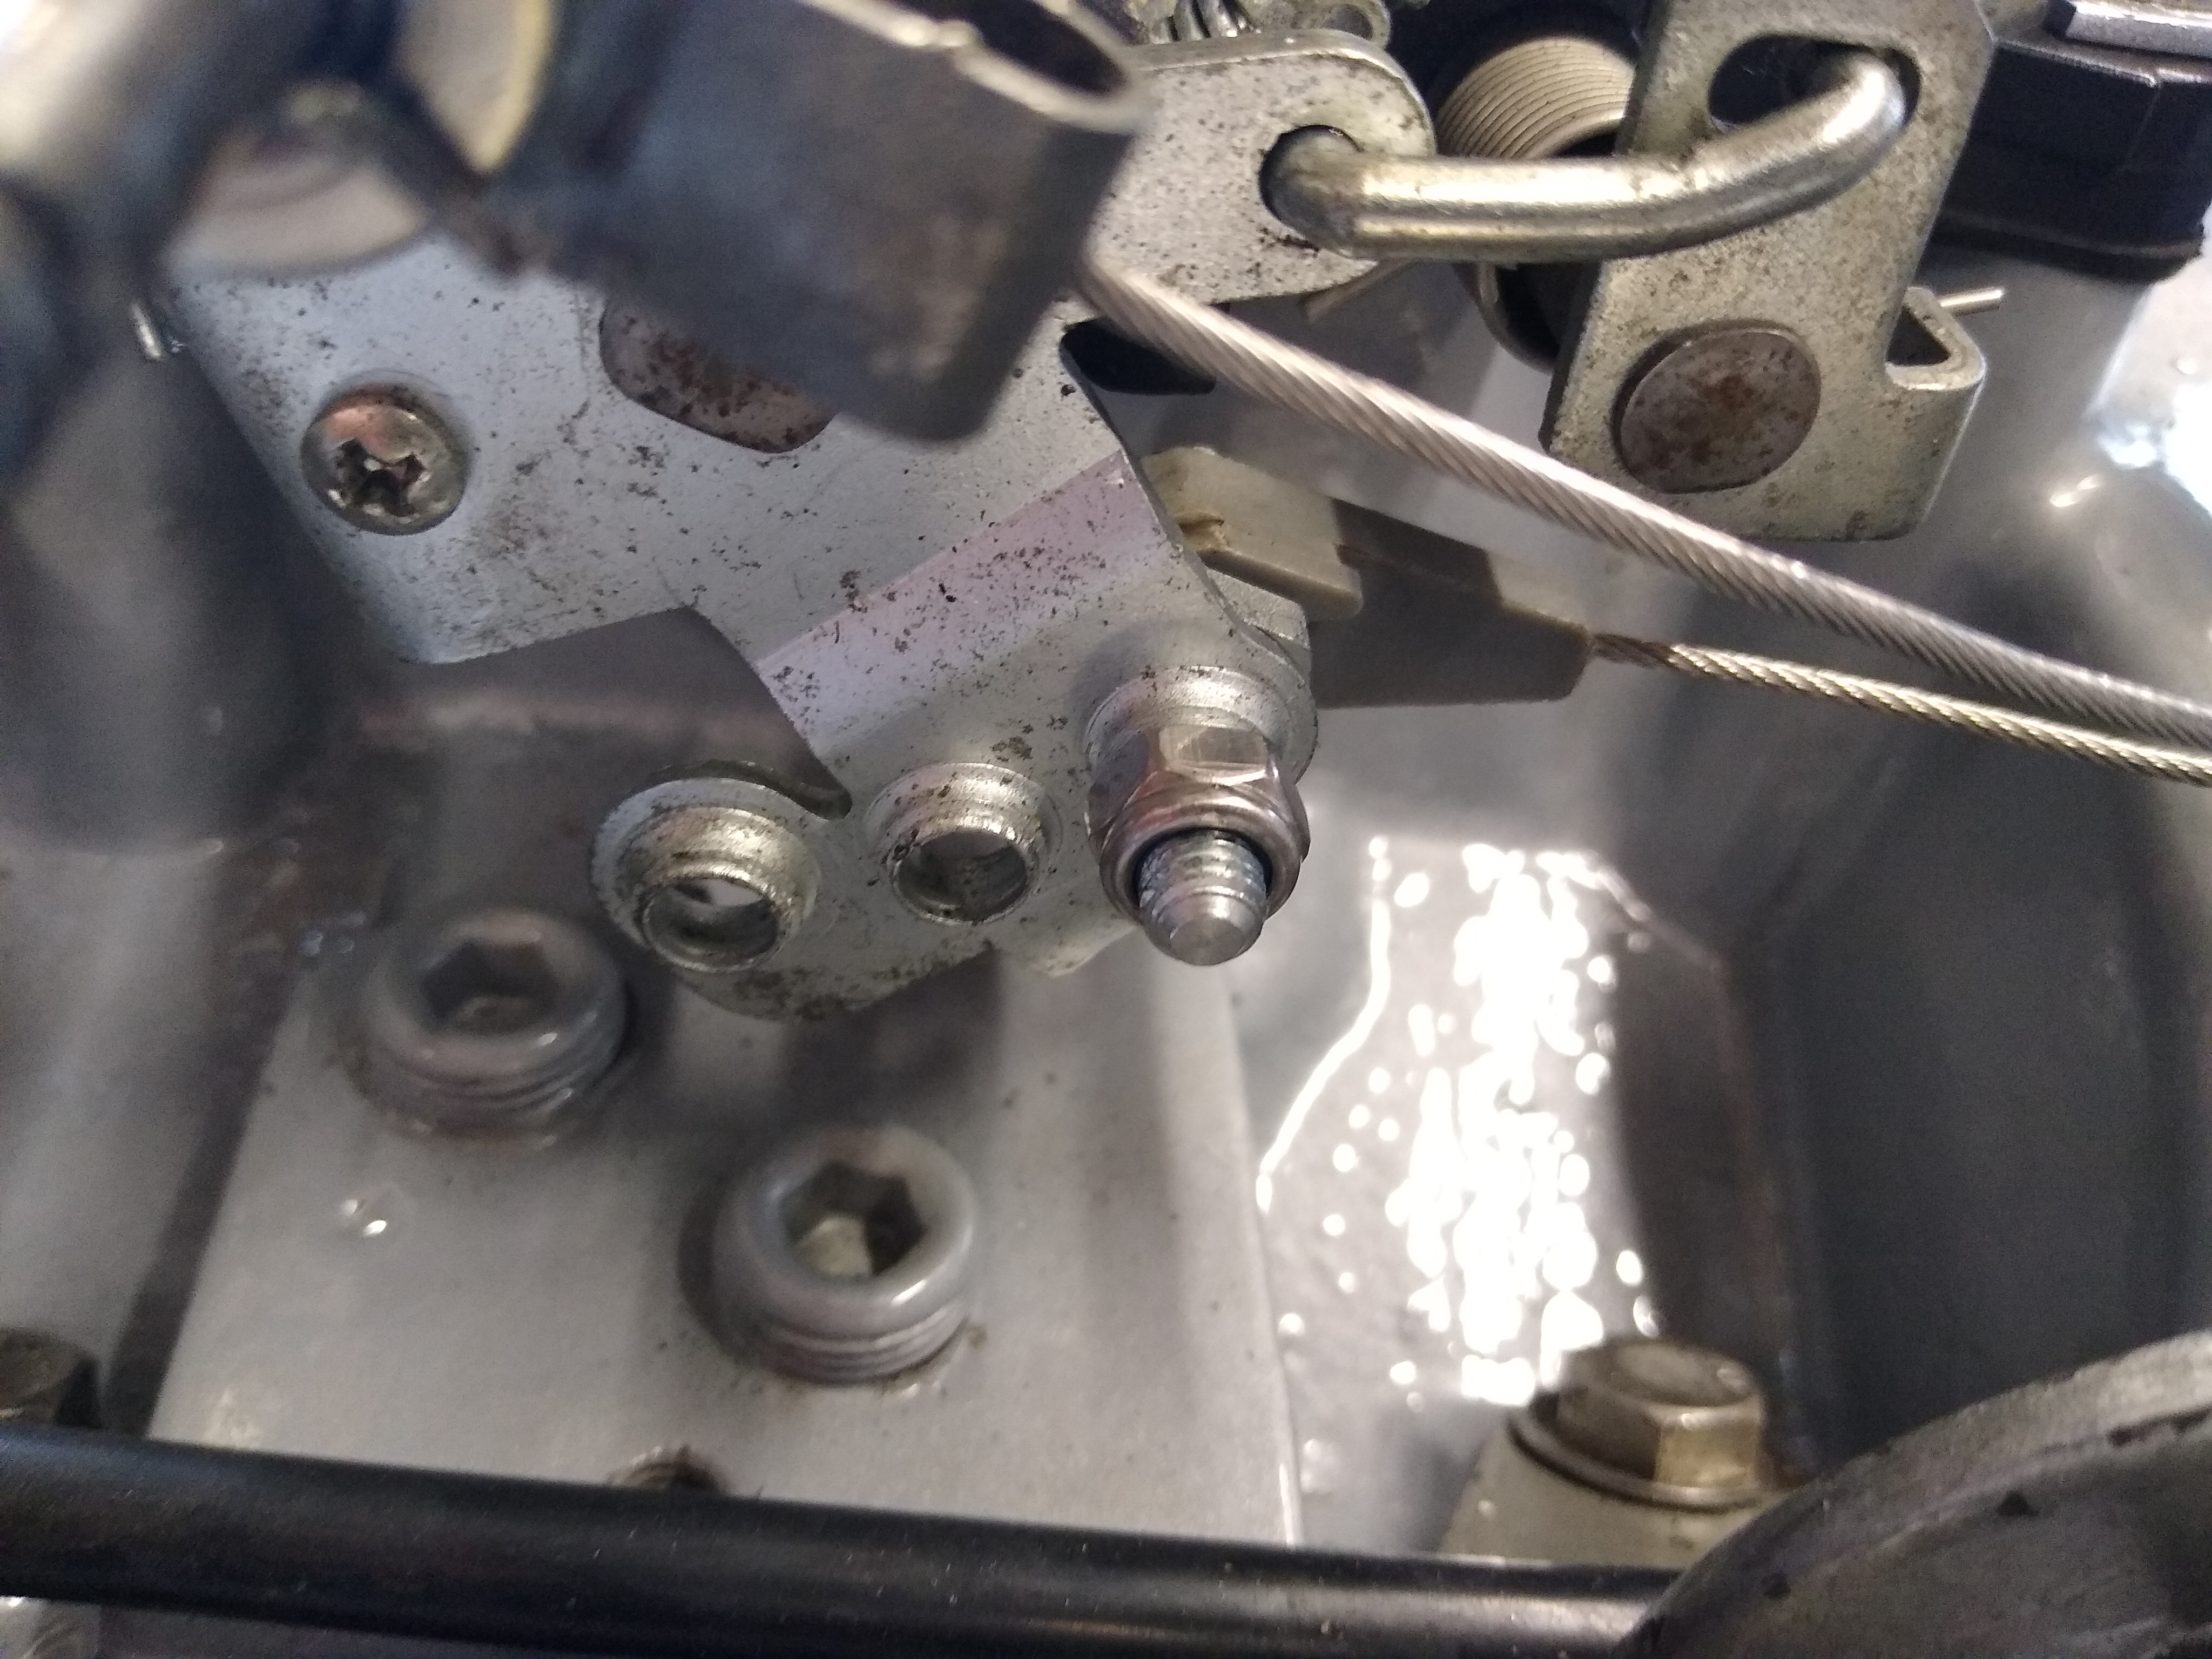
Once they are removed, pull the cable out from the outer sheath. Be careful with the end of the cable as it will start to fray (see picture above), and this will make it difficult to feed back into the outer sheath, and the end stop and kickdown fitting when it’s time to reassemble. You can now feed the outer sheath down to the gearbox following the route the old kickdown rod went. Once in place the securing bracket can be fitted to one of the bolts that hold the tail section of the gearbox in place. The old rod system used to push the kickdown lever, but this system pulls it instead, so make sure when you select the bolt to secure it to, it has a clear and straight a line to the kickdown lever as possible. On my car this was the bolt nearest to the gearbox cooler fitting (see picture below) Bracket secured with gearbox tail section bolt. 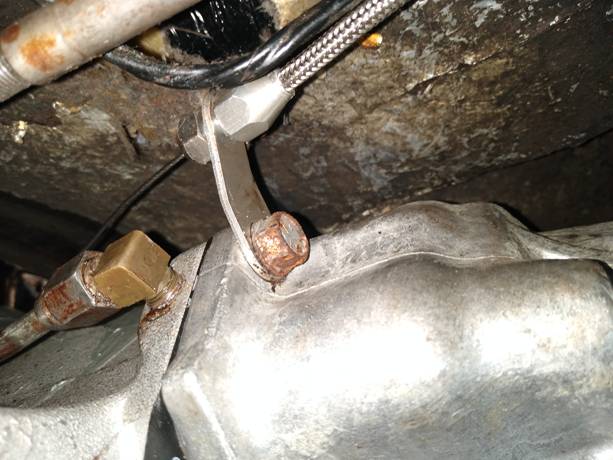 Once the bracket is secured, you can now cut the outer sheath to the desired length. This cable is design for Mopar gearboxes, but they were fitted to a wide variety of cars, so it is supplied long enough to fit the longest car, and can be shortened to fit smaller vehicles like a Jensen. Follow the manufacturer’s instructions to do this, but I found it useful to wrap the outer sheath with some masking tape before cutting with a cutting disc in a 9” grinder. The tape with help to stop the stainless steel braiding from fraying. I also secured the Ferrule from slipping down the outer sheath with some masking tape. 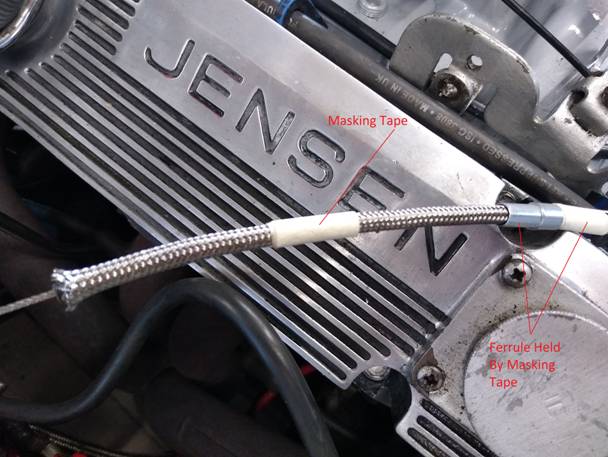 Once the outer sheath is cut to size, the cable can now be threaded back though. This is where any fraying of the end of the cable will make things tricky. Once the cable has been fed back into the outer sheath, the cable can be fitted to the kickdown lever. This is VERY fiddly! Make sure that the cable fitting can move smoothly, has as straight as possible line to the gearbox fixing bracket, and it not snagging on any pipes or brackets. Cable fitting attached to kickdown lever. 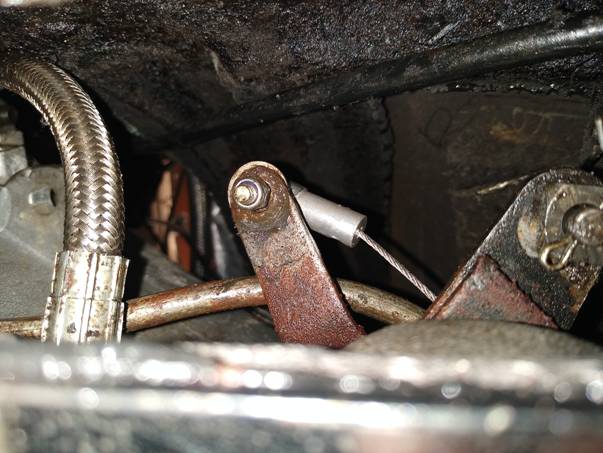 The securing bracket on the carburettor can now be installed. As I am reusing the original throttle cable, the securing bracket was fouling the original throttle bracket, so a small modification was required. 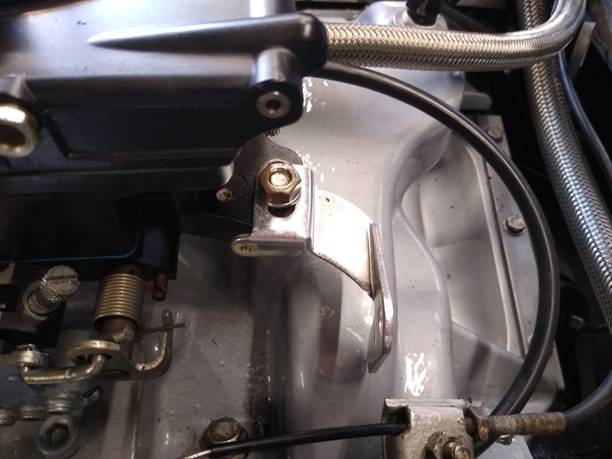 Tab cut off bracket to clear the throttle bracket 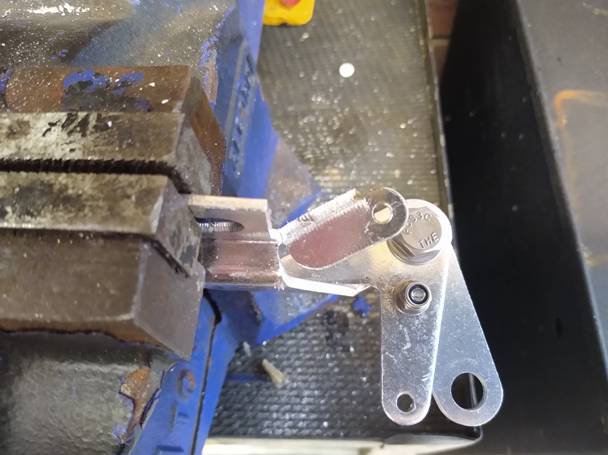 To prevent corrosion, a couple of coats of silver paint were applied. 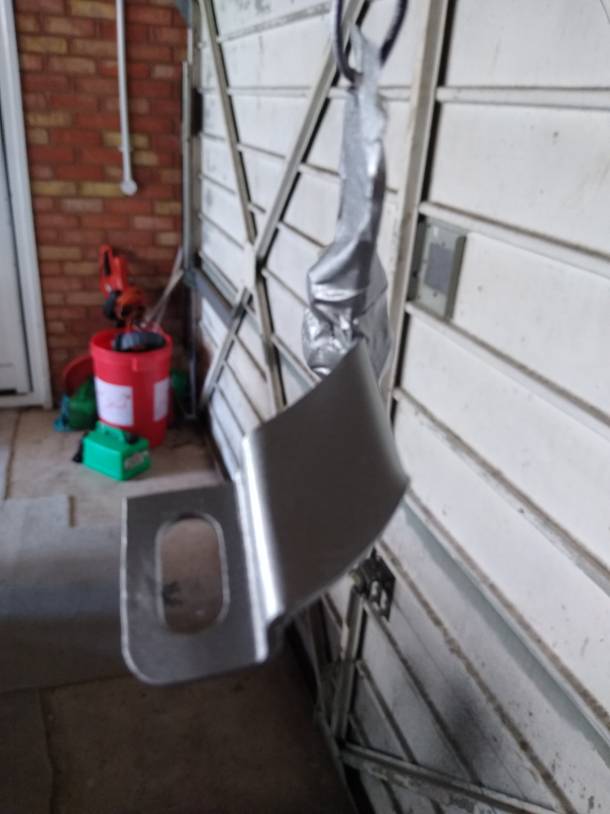 This bracket is a dual purpose item, which can also accommodate the throttle cable that Lokar also make (the Lokar throttle cable would go into the top hole in the photo below). I was going to use the existing throttle cable, so I used a bolt in the hole that the Lokar throttle cable would fit in. The bolt was just to stop the bracket from moving. 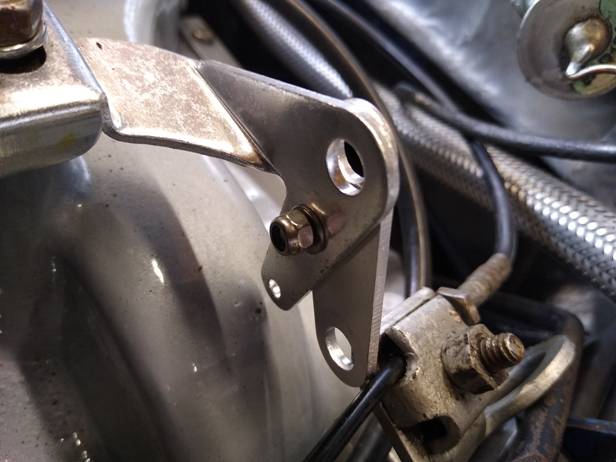
The cable adjustment fittings can now be put back onto the end of the outer sheath, and located into the securing bracket.  The “Cable End Stop” and the “Kickdown Throttle Body Fitting” can now be refitted to the cable. Again, try and minimise any fraying of the end of the cable as it will be very trick getting it back through these two items.
I’m using a Street demon carburettor which has the nice feature of having 3 holes on the throttle linkage mechanism, which gave me so easy adjustment. I tried the furthest hole away to start with, but on road testing the car this was causing the kickdown to operate to early and to also hold the gear changes too long. A simple move to the nearest hole cured this problem. 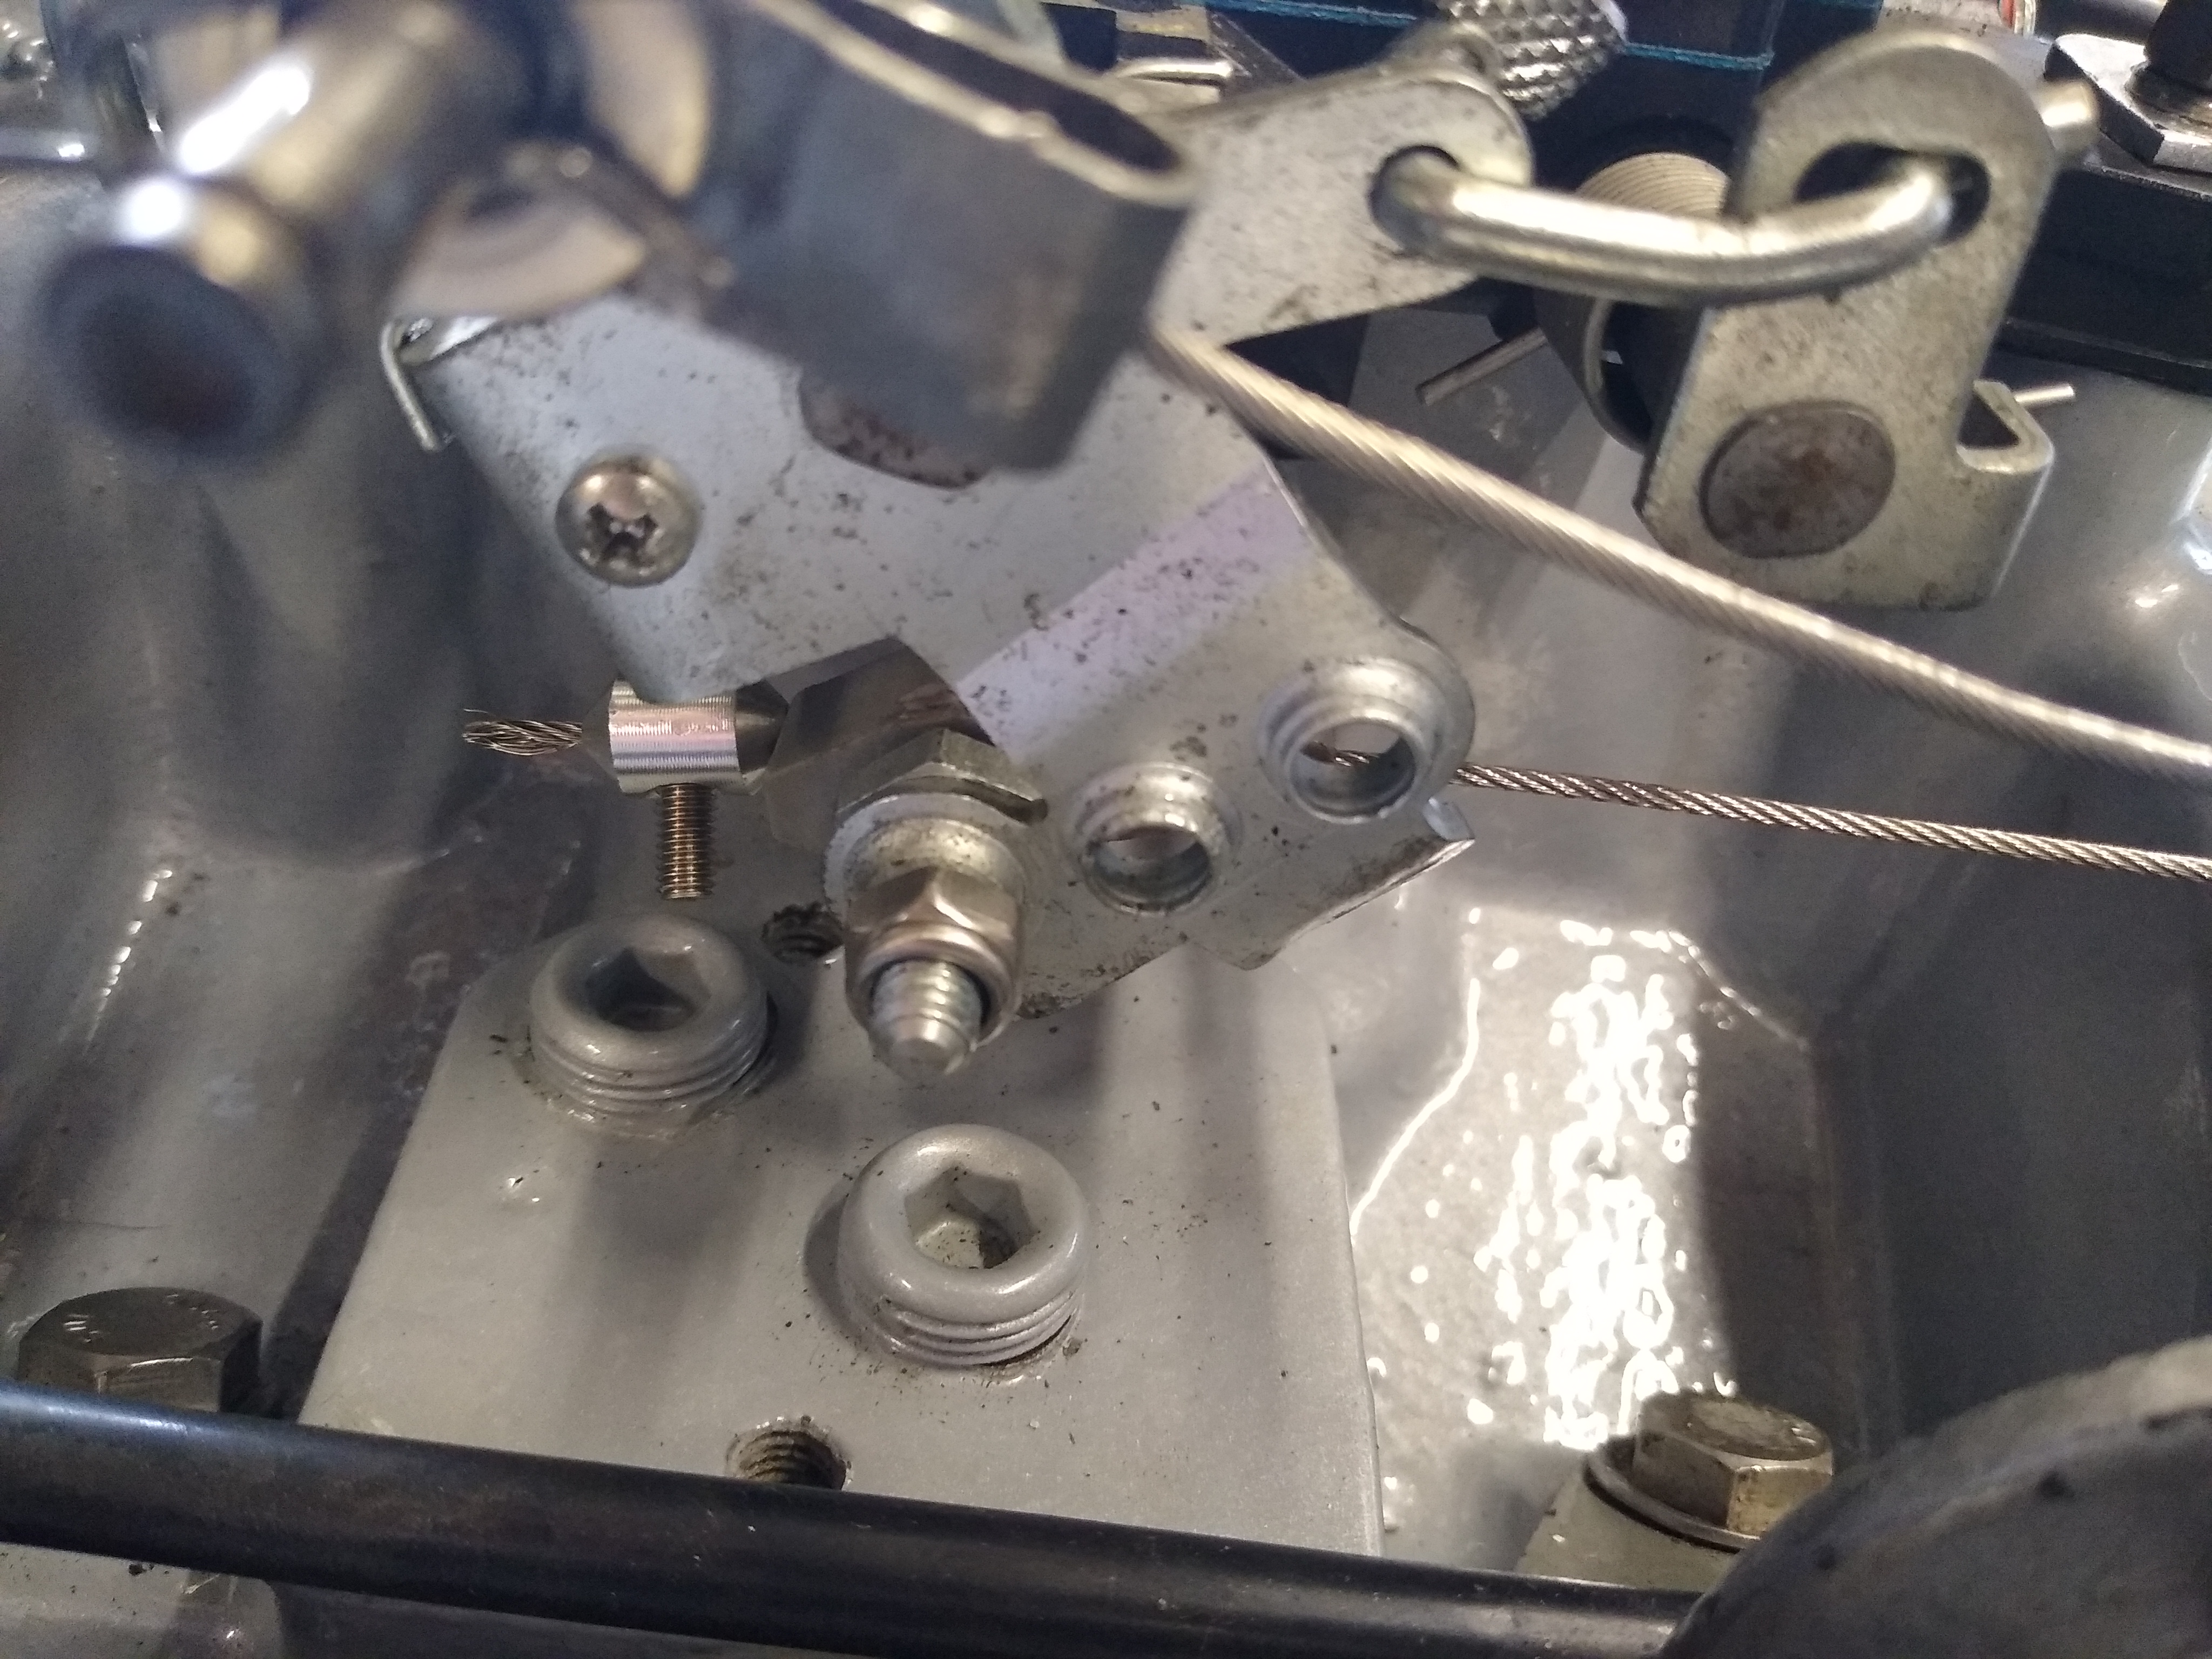
Moving to the nearest hole meant there was some “slack” before the cable started to pull on the kickdown lever. This meant the gear changes were operating at the normal RPM rev range, and the kickdown was at larger throttle openings, like with the original mechanical rod system. Further adjustment is made with the outer sheath adjustment nuts. This is done by making sure that at wide open throttle position, the kickdown lever was pulled fully open. This is done by simply winding the adjustment in or out until the kickdown lever is fully pulled open at wide open throttle. Care should be taken with this because as well as operating the kickdown, the kickdown lever also sets the operating pressures in the gearbox, so if the adjustment is way out, you can create problems with the box. If your car is driving well on the original rod system, then make a few measurements of the movement of the kickdown lever with the rod in relation to throttle positions, and try and replicate that with the new cable. This will give you a good baseline to start with. 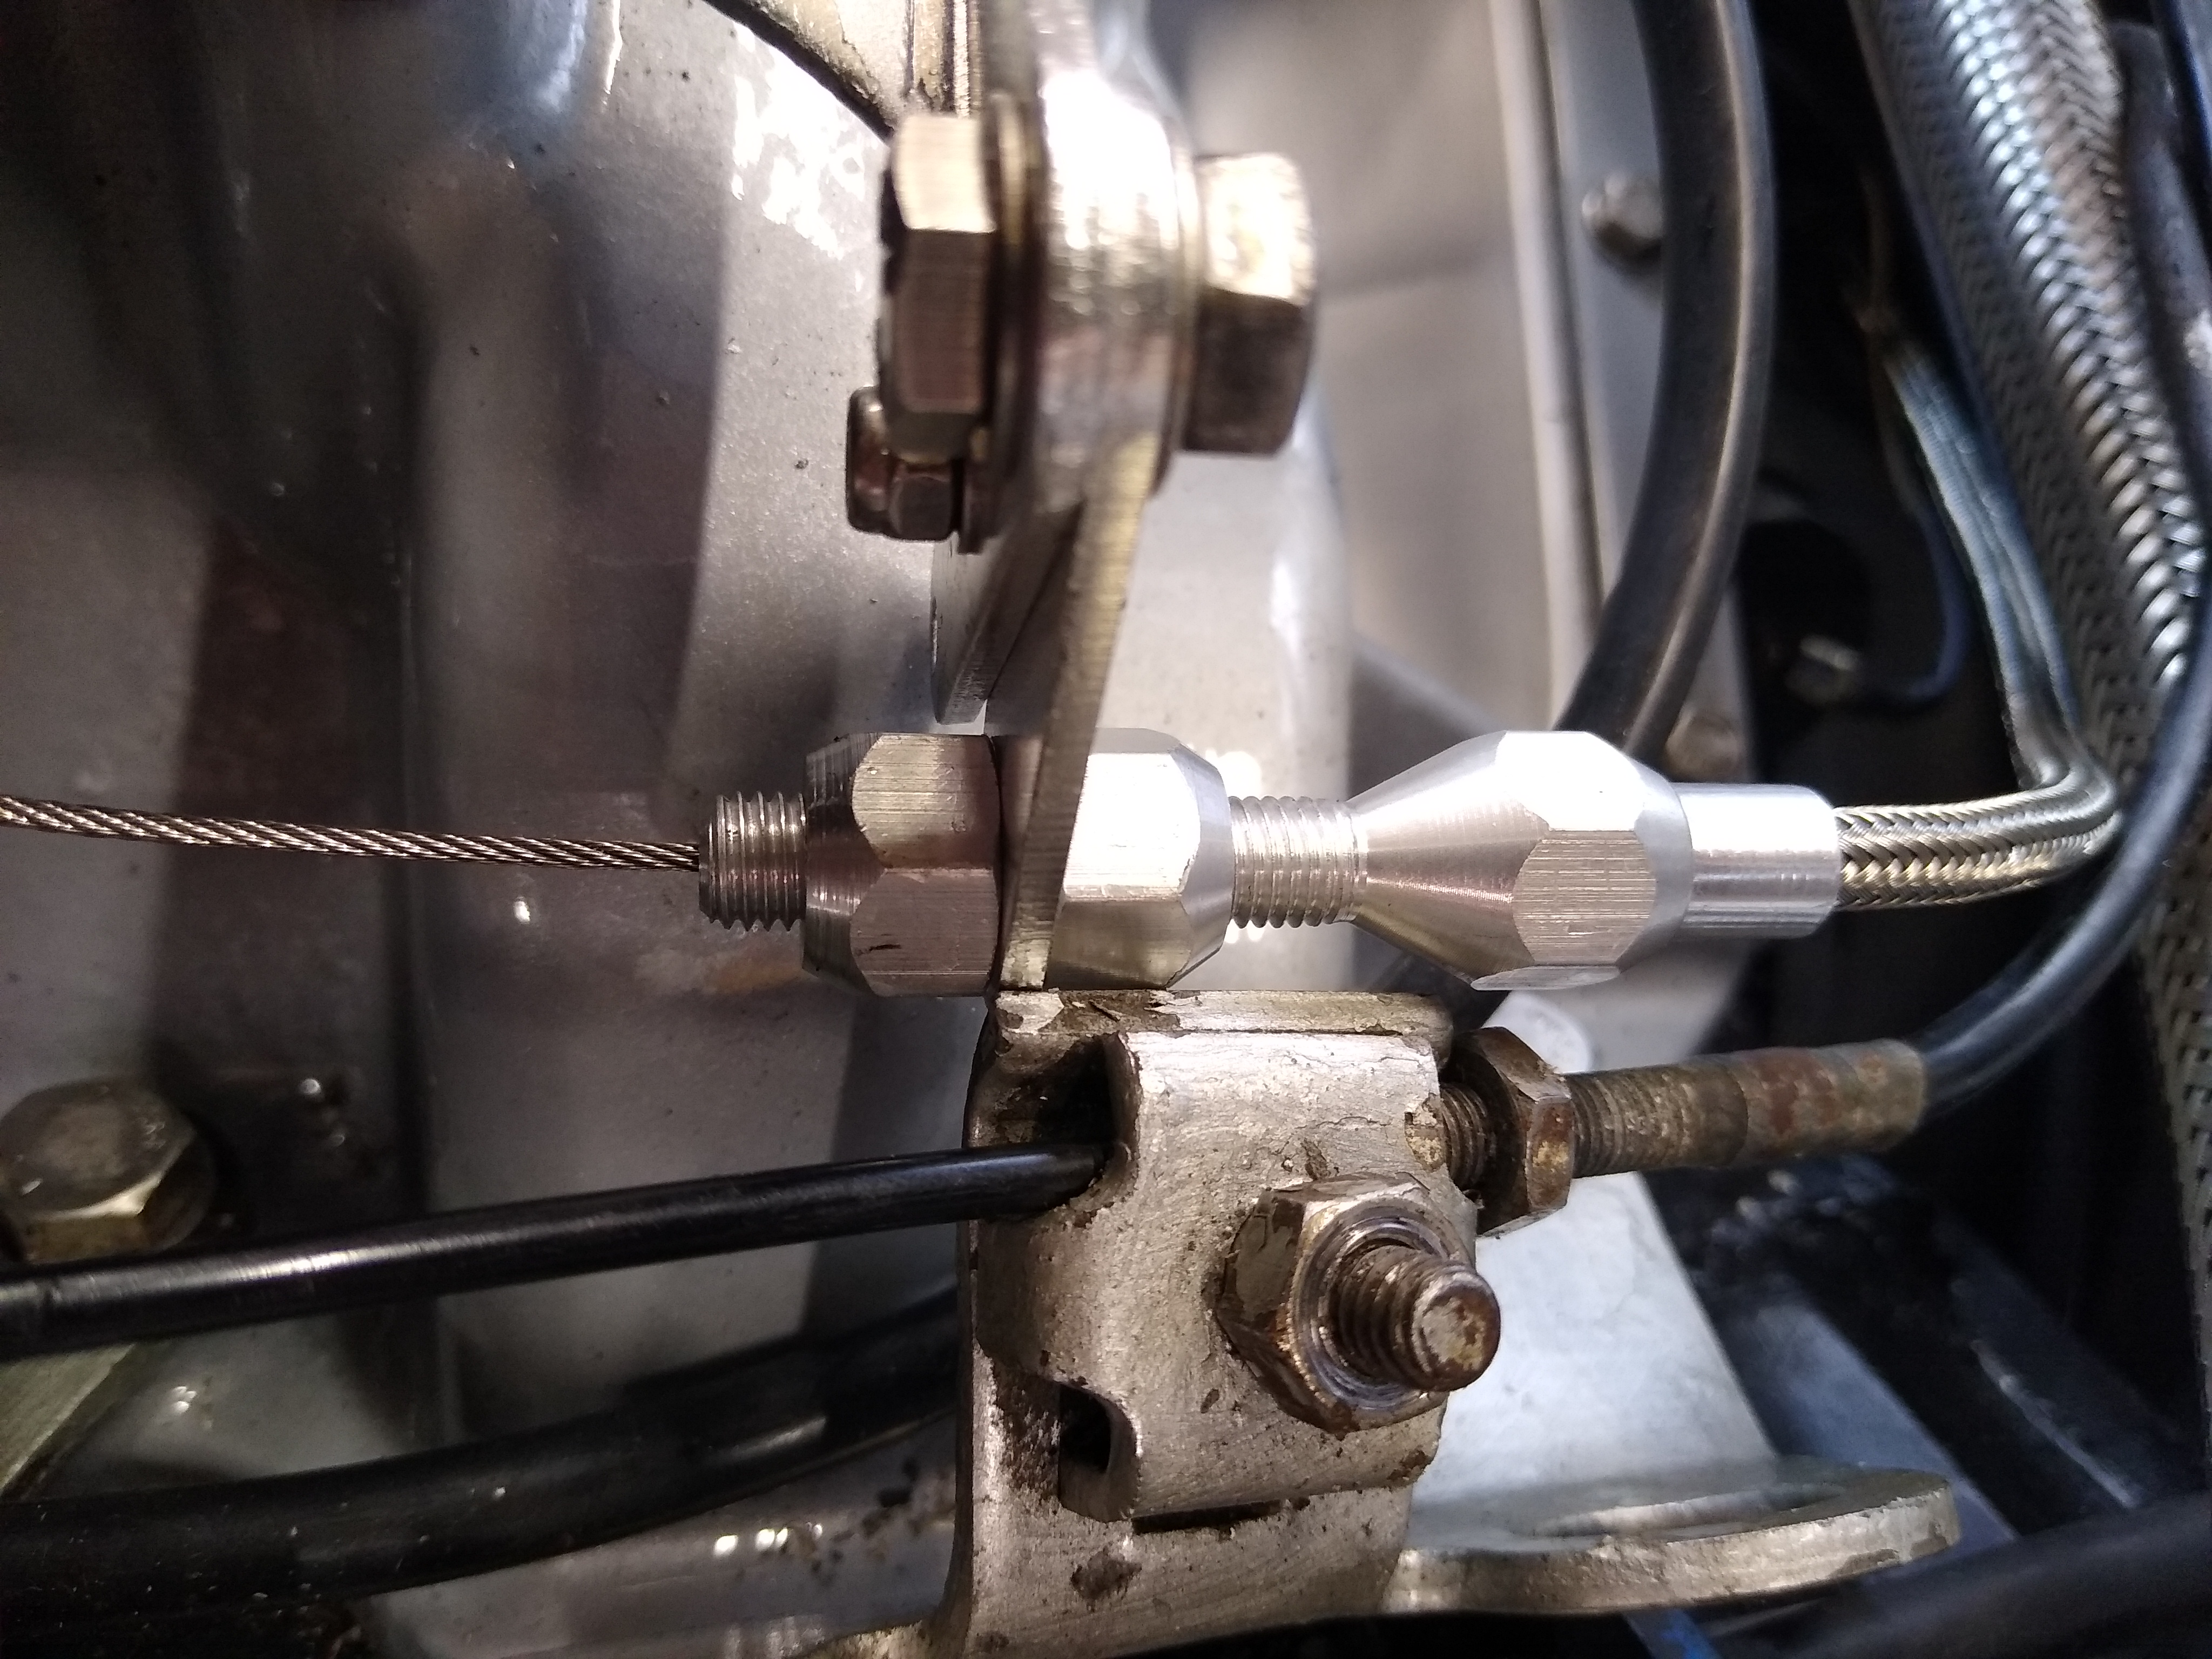
|
|
|

 Spring
clip shown
Spring
clip shown