|
|
|
|
|
J ensen Monday Club |
|
Act One – Scene One; Harley Street, London. D octor: "So what seems to be the problem ?"Patient: "Well, I don’t seem to be able to "pull" anymore, everyone’s passing me by, and I’m only 32 years old ! I hate mornings, especially damp cold mornings. I feel lethargic and there’s blow-by gasses coming out of every opening. I also have a raging thirst for hydrocarbons" Doctor: "Ah, I think what we have here is a classic case of piston ring abuse. I bet there’s brown stains all down your bores and pressurised oil seeping from your head covers ?" Patient: " Oh no doc, what’s the prognosis ?" Doctor: "Well I’m not really qualified to take this further – it could be serious, but I can refer you for a thorough "internal". But I’m afraid there’s a very long waiting list – they don’t just take on any old case – there’re a bit bonkers – they have to like you first. My advice is, don’t turn up empty handed – take red wine, lots of red wine, huge amounts of red wine, I’m talking cases not bottles, oh, and don’t forget the Cuban cigars…"
Act Two – Scene One: The Birmingham Operating Theatre of the Jensen Monday Club
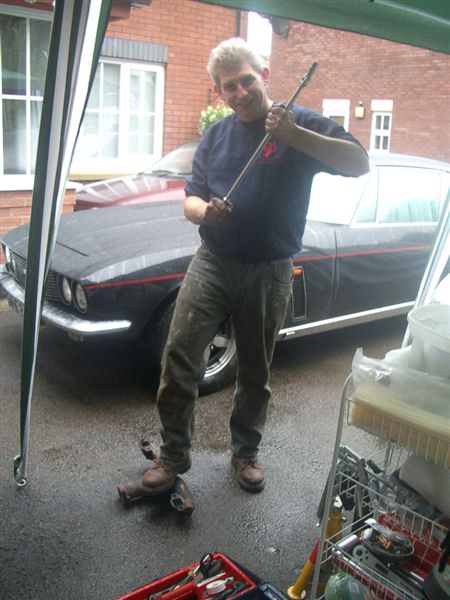
The most important thing when re-ringing an Interceptor is to book a couple of day’s holiday and also some nice weather – ah, sunshine at 6:30 am – the perfect start:
You also need a clean tidy operating table
again, a perfect start.
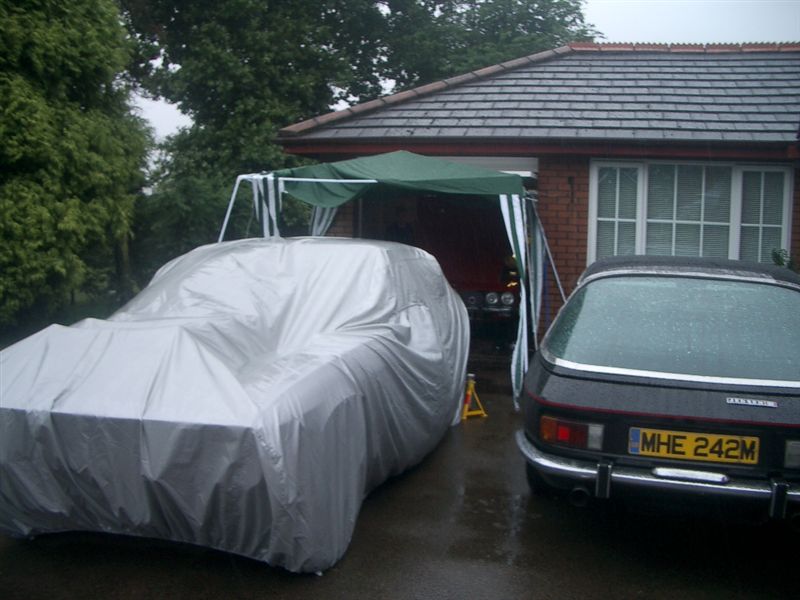
Typhoon! What, a Typhoon, an actual Typhoon forecast for Birmingham – you’ve got to be joking – that’ll never happen here…
…so the best laid plans – get laid…
and we spend the next hour clearing up:
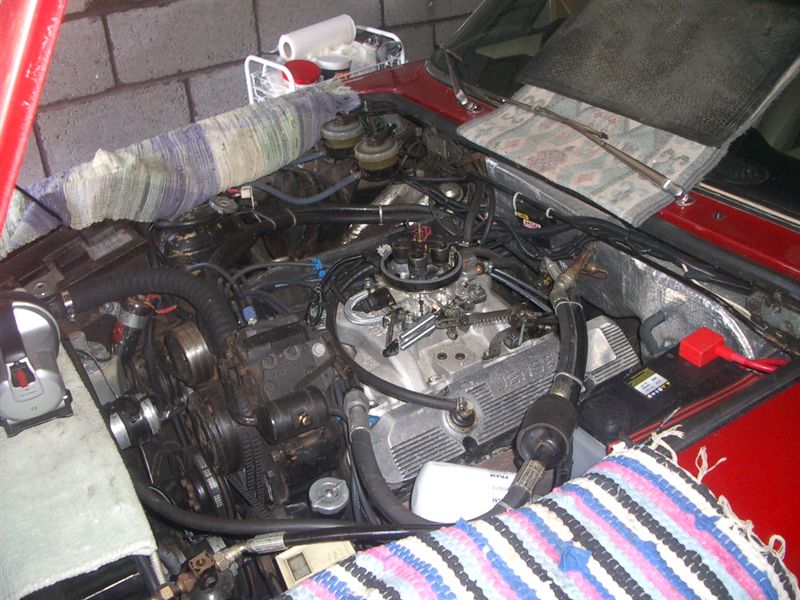
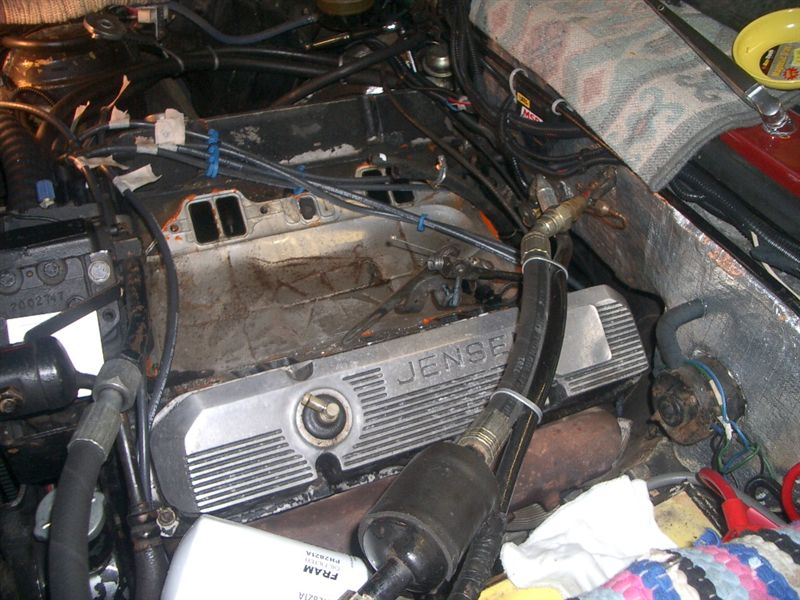
The first step is to get the inlet manifold off:
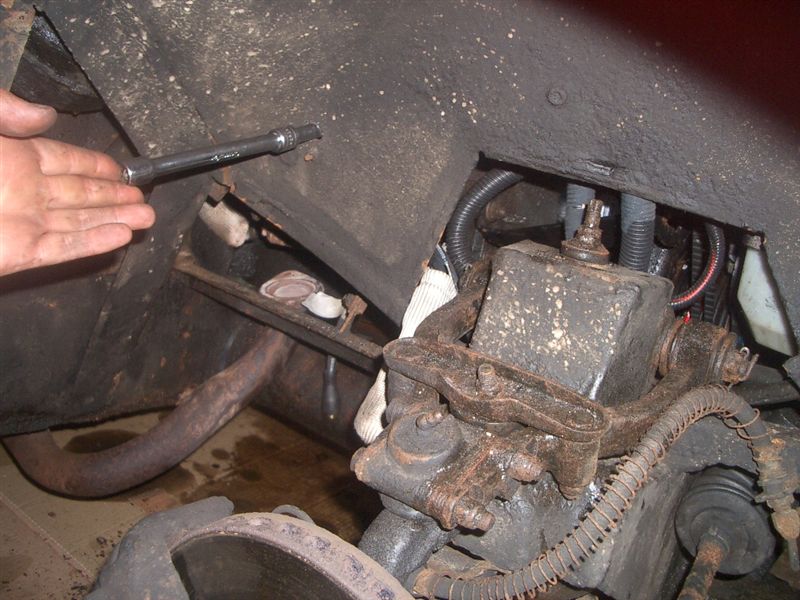
It’s all going swimmingly well now that the rain has stopped blowing horizontal, now it’s just a straightforward downpour. The first real challenge was getting the exhaust manifolds off. They can’t have been touched since they left the factory. Loosening one engine mount bolt and removing the other lets you jack the engine up on a tilt for better access. It still took about five hours to get both off. We spent about an hour just on one stud/bolt. It was rusted solid (despite a week of pre-soaking with penetrating oil) and the nut was rounded. In the end we hammered an undersize socket onto the nut – this necessitated drilling a hole in the inner wing for access with a socket drive shaft to get room to swing the hammer; here’s a picture of the butchery:
Finally, after some "gentle persuasion" with a breaker bar Kerry stands triumphant over the freshly slain manifold. You might think he’s smiling but that’s his permanent grimace from the blood stained knuckles.
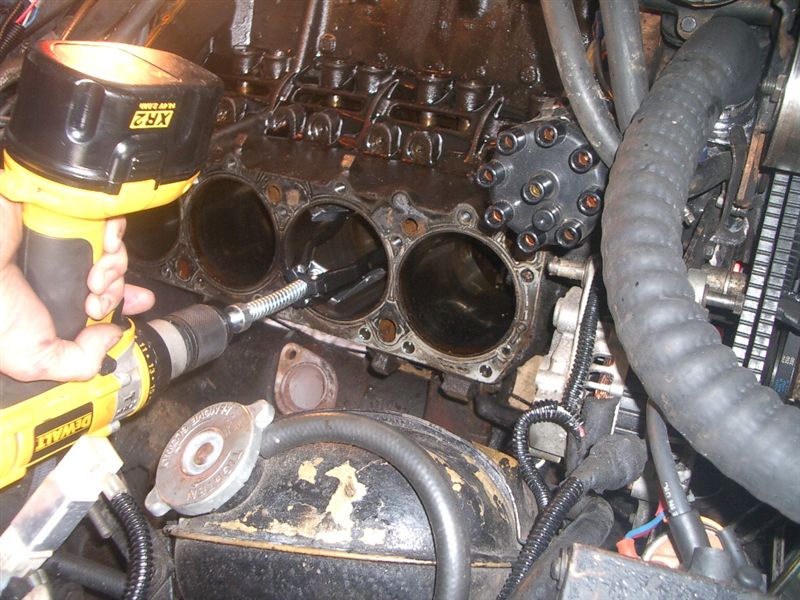
And you can now almost see the sunshine glinting off the puddles. Removing the heads was the next step – this was easy, compared to those bloody manifolds. Here’s a picture of a very burnt exhaust valve – no compression on that cylinder then.
So the heads are off surely it’s going to be easier now - but it was just then the second storm front moved in for the kill. Here’s what happens if you try to re-ring an Interceptor on your driveway during a typical British summer:
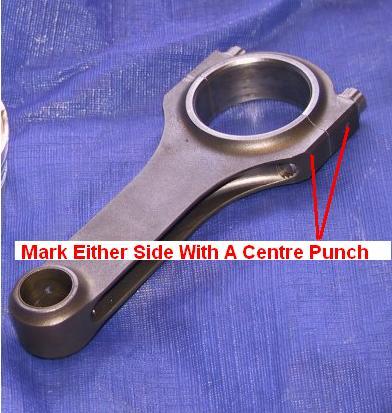
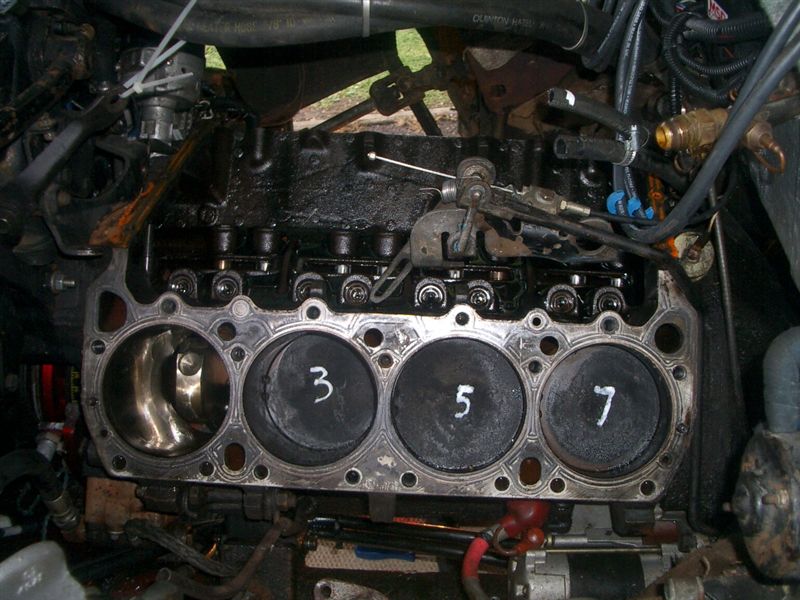
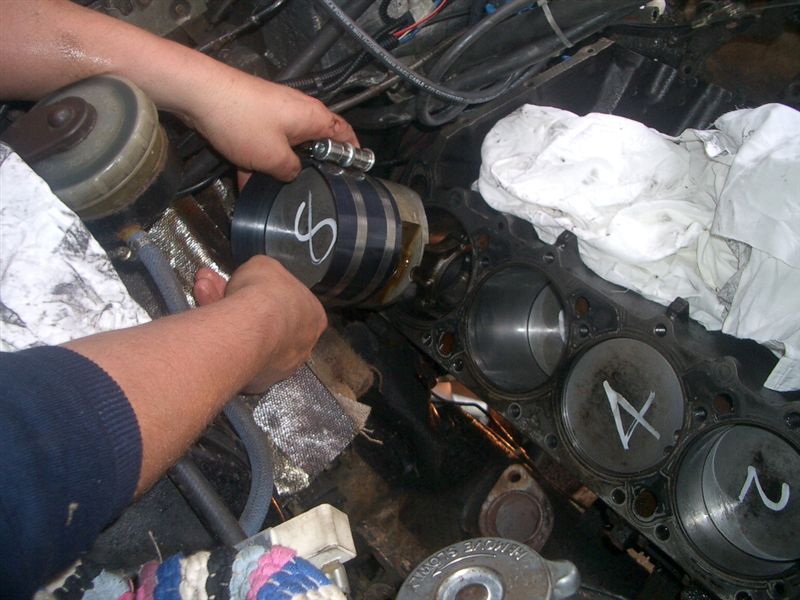
A bit damp then! This is where we stopped at the end of the first day and cracked open the red wine; "cracked" was the condition we were in when we staggered to bed at 2:30am the following morning… This was a big mistake, ‘cos lying on your back in the wet with a hangover undoing conrod bolts at 7am the next morning is definitely no longer on my "must do" list. This bit is the most essential of all the tasks required to do this project. You MUST mark the big ends and big end caps so you put them in the same way they came out. They are machined assembled, and if you fit them the wrong way round they will seize the engine. We marked the conrod big ends and the big end caps with a dots from a centre punch so we knew which way they came out. We did this by using 1 dot for No1 piston, 2 dots for No2, etc, and noting which side of the car, i.e. drivers side, the dots were on. Failure to do this will spell disaster!
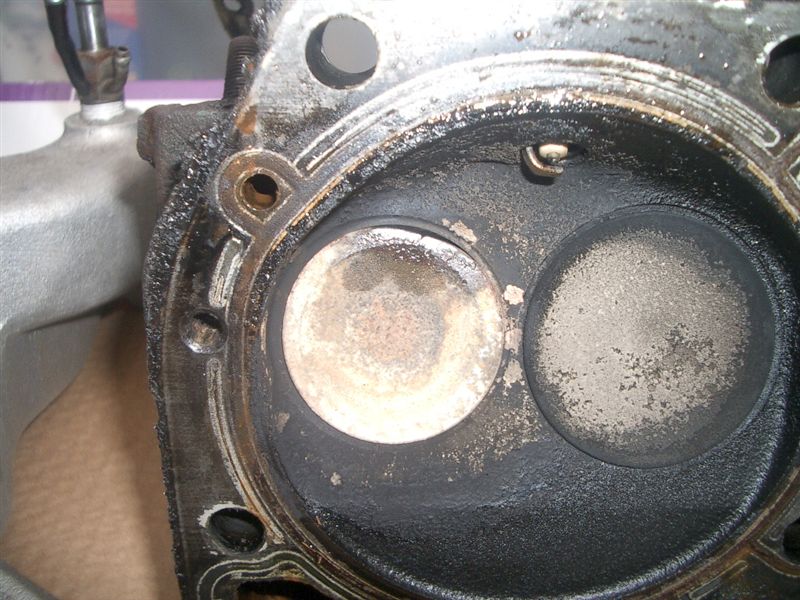
Once we got the first piston out we could see (below) how the bore was worn and very shiny smooth, probably lots of petrol getting past (on compression) and lots of oil from the pressurised crankcase/sump area due to the excessive blow-by.
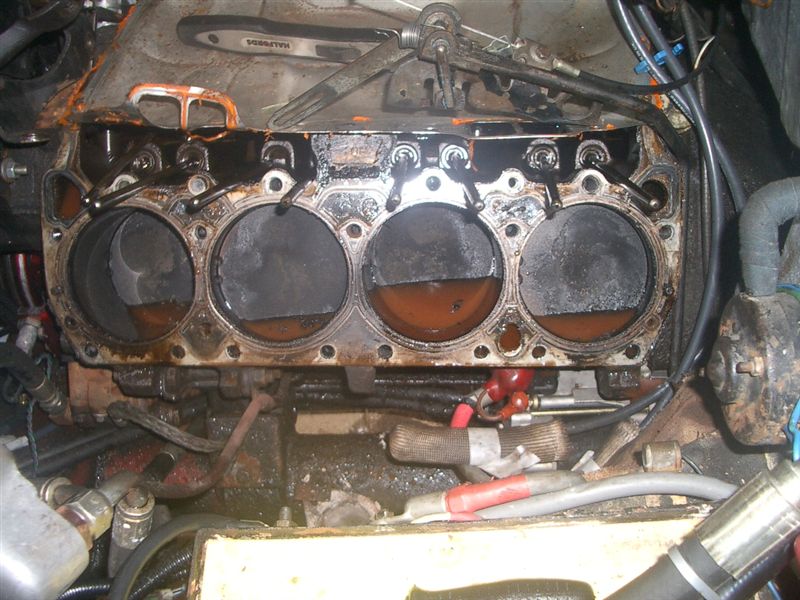
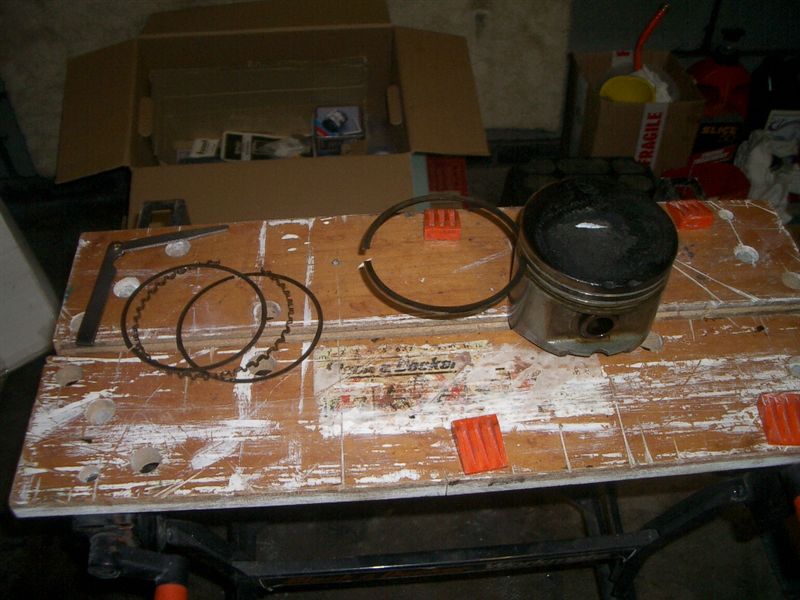
You can also see (above) the coked up state of the tops of the remaining pistons. There was 12thou clearance between the pistons and the bores. 13thou seems to be the maximum allowable tolerance before a rebore is required (please correct this if you know otherwise via the "Contacts Page"). So looks like we caught this one just in time. Removing the remaining pistons was easy enough with two people – even two people with hangovers. Here’s a piston out and being measured for ring groove wear. As long as the new rings fit the grooves without too much up-down movement (enough not to fall out unsupported) then that’s good enough for our street use.
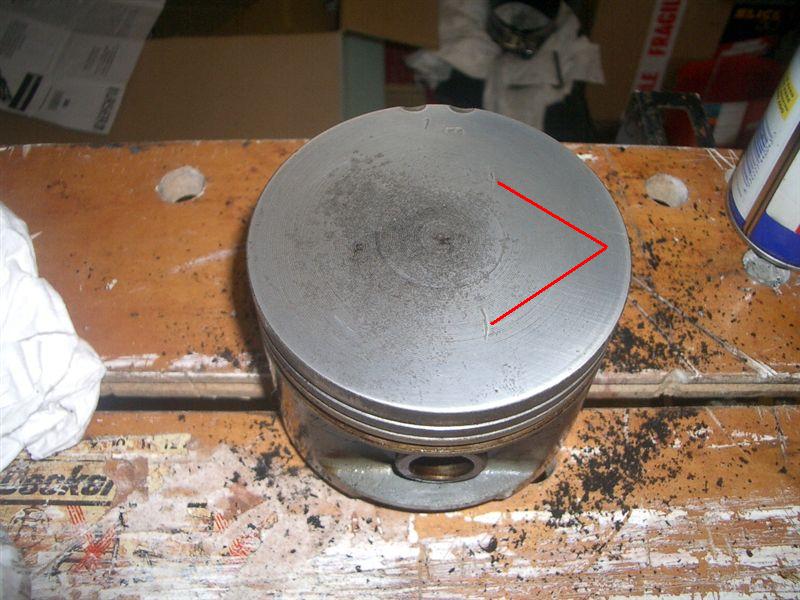
Here’s a piston (below) after having been cleaned up. Some evidence of pinking and also two semi-circular dents (look carefully at about 5 o’clock and then directly above). These were on all eight pistons in exactly the same place – our guess is a timing problem some while ago where the valves and pistons have become too "friendly". The marks were buried under a very thick layer of carbon so probably happened some while ago.
The next job was "glaze busting" (a.k.a honing) to create a rough surface for the new rings to key into during run-in. We used a spring loaded tool in a hand drill.
This worked very well for the first three cylinders – and then the tool (good description) broke. We managed to buy a new tool to carry on with but it wasn’t as rough as the original – and then that one broke as well so we had to improvise with emery paper – took ages – right up to tea time. But everything always seems easier after a nice cup of tea. Each piston was numbered as it was removed, then cleaned and then had its new rings installed and then back into the bore using a ring compressor and lots of engine oil (below). Again much easier with two people.
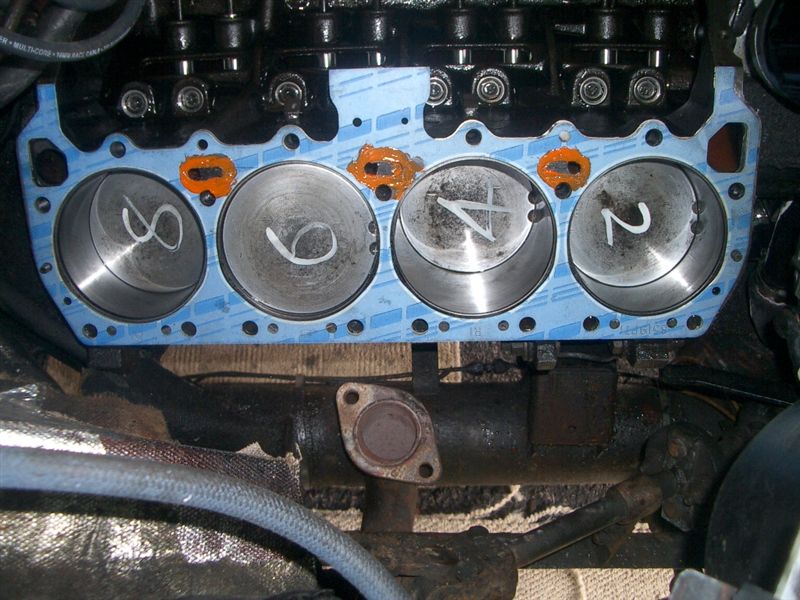
Next step was the new head gaskets. There's more detailed info here: "The Cure" about pre and post-emission gaskets. However, the summary is that the post emission gaskets were used to increase head temperatures (to improve combustion efficiency to meet emissions regulations) by having smaller water passage transfer slots thus reducing the water flow and increasing the temperature. The way the water flows between the head and block is that the holes in the head and the holes in the block do not align directly with each other. There is a slot in the head gasket that links the two holes together, effectively creating a very small chamber who's volume is determined by the thickness of the gasket (i.e. the height) and by the length and width of the slot. Post-emission gaskets have a small slot and therefore restricted volume therefore restricted water flow therefore higher temps. You can buy equivalent pre-emission gaskets in thin steel from the usual UK Jensen suppliers, these are post-emission gaskets that have had their slots stamped out to a larger size; but we prefer to make our own from the thicker fibre gaskets because the thickness of the fibre gaskets increases the volume of the slot. You can see orange instant gasket which we put around the slots just as a precaution in case the heads/block are not exactly flat. Probably overkill with a five bolt pattern but better safe than sorry. We've not taken the heads off an engine that has been done in this way yet so we don't know how effective or necessary the gasket sealant is; however Steve has done over 30,000 miles on his without issues so we're not anticipating this being a problem. There is probably some small loss of compression ratio using thicker gaskets (never bothered to calculate exactly how much - anyone know ?) so you have to make a choice between water flow and some loss of compression. Given the state of tune (modest) and the under bonnet temps (high) we prefer to go the increased water flow route - but if you're drag racing in Iceland then metal gaskets may well be just the job for you.
From now on it’s just a case of "assembly is the reversal" etc. this took until the end of the third day by which time it was all back together and fired up. TMC 259L is fitted with Holley fuel injection. This is very flexible and can be used to tune out various idiosyncrasies and compensate for unusual conditions. This had been done to the nth degree with the old engine to allow for the fluctuating vacuum, a dead cylinder etc. etc. Now that the characteristics of the engine had changed completely the fuel map, ignition timing etc. all needed to be adjusted. This took quite a while. At one point we couldn’t get the computer to switch the injectors on immediately after cranking. In trying to fault find this condition we poured some fuel direct into the throttle body – big mistake – don’t try this at home folks unless you like the smell of burning petrol on your driveway… The start of the fourth day and some clearer thinking after a good night’s kip had the engine fired up and running sweet. It’s now done 500 miles and had a complete change of fluids. There’s still some tinkering to do with the EFi to get it starting better but so far so good. It’s a completely different car with about 25% more power than before – so, well worth the tornadoes, flood, fire, hangover, and blood ? – you bet.
|
|
|