|
||||||||||||
|
This article, I believe it has been posted by a US JOC member, and if using it on the site infringes his copyright, please let me know and I'll remove it. Rear Axle Removal
So you want to remove the
rear axle? If you're like me, you look at this task and thought that the
rear springs could easily break something. Well, as it turns out, it's
probably not nearly as dangerous as working on coil springs. What follows
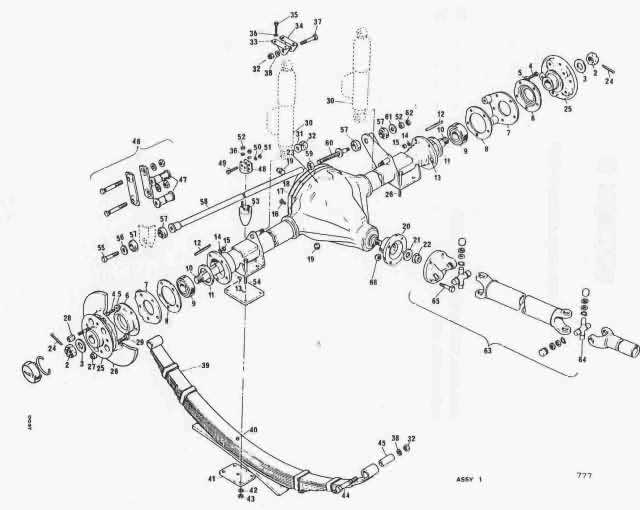
is a short write up on how to remove the rear axle. Special thanks to Brian sceptre@aapt.net.au for his initial instructions and to TJ Higgins tjhiggin@hiwaay.net for clarifying certain things. And, although I didn't use it, Dave Martin david@desem.co.uk designed a special tool for removing the springs safely, see this link for more info. With that out of the way, let's proceed. As you know, the Interceptor has a solid live rear axle suspended by leaf springs and shocks. The lateral movement is controlled by a Panhard rod. The rear axle also carries the rear brake lines, the brake wear sensor wires and the parking brake mechanism.
Jensen Interceptor MKIII Rear Suspension
|
||||||||||||
|
Before you start banging away on all these, assemble your tools. You will need:
It also helps to have a stack of wooden blocks of different sizes. Air tools, if you have access to them, are also very useful. Preparation The Interceptor rear suspension is attached to the body through the shocks and the mounting bolts at both ends of the springs. The Panhard rod is also attached to the body. To prep for removal, you must detach the follow items:
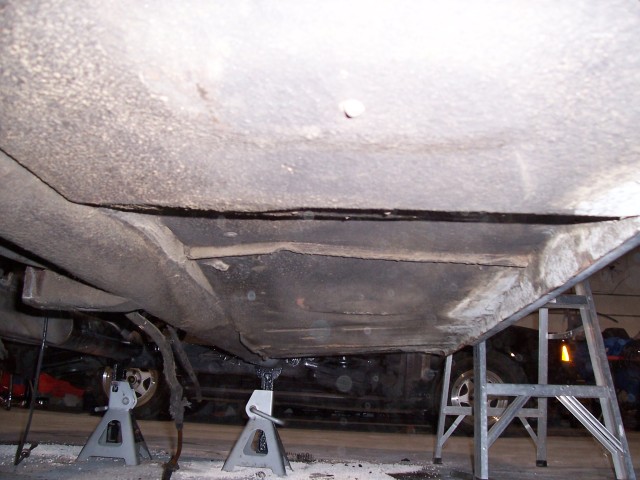
But first, we need to get the car off it's wheels in order to access a lot of this. While the car is on the ground, loosen the wheel nuts. Jack the car up and support it with four jack stands. Place these under the frame tubes, as far forward and back as possible. Make sure you are on level ground when you do this and check the car (by attempting to rock it) before you remove the wheels. Make sure you have at least a foot of clearance between the lowest part of car rear of the axle.
|
||||||||||||
Remove the rear wheels. If you have a digital camera, now is the time to take pictures. Take as many pictures as you can, of anything and everything which has a bolt and that you can see from the underside of the rear of the car. Now that you are all pictured out, grab a can of your favourite penetrating oil (note: WD40 is NOT penetrating oil), I use PBlaster, since that's what the Fiat guys swear by and we all know Fiat's rust more than any other car made.... Remember all those bolts you took pictures of? Now's the time to blast them with that penetrating oil. For Christ sake, wear safety glasses when doing this. There's nothing worse than penetrating oil and 30 year old grit in your eye. If you thing you are too cool for safety glasses, I suggest a pair of these. Not only will you look cool, but they'll also protect your eyes. I use a full face shield, but whatever floats your boat. If the bolts/nuts are really, really dirty, don't bother with penetrating oil. If you have an impact wrench, you can probably just jam your socket on the nut and have at it. If you don't, you'll need to clean it off. A wire brush and some degreaser should to it. Don't try to clean everything, just the bolt head or nut. Then shoot it with PBlaster or whatever you're into. Make sure you also soak the exhaust hardware. Now would be a good time to take a break. Leave the car for a while (24 hours is good) so that the penetrating oil can do it's thing
|
||||||||||||
| Removing
the exhaust
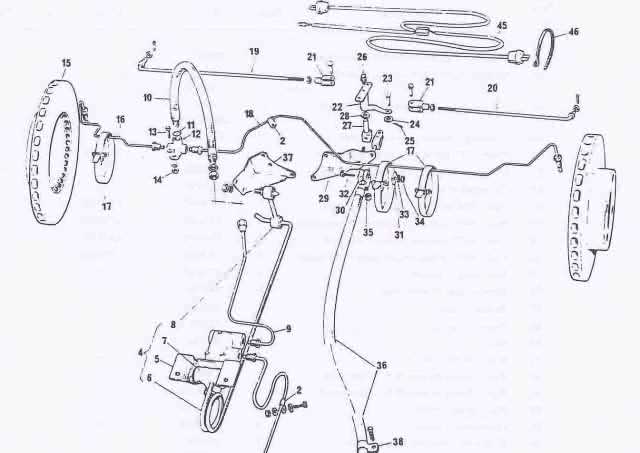
The exhaust is pretty easy to remove, although all the hardware is probably frozen together. You will need to undo the junction at the front of the car, and the three support points in the rear. Depending on how hacked together the whole thing is, you may have to cut off some mounting hardware. An air powered grinder is good for this, if you don't have one, I suggest that you purchase a Dremel or a RotoZip. The Dremel is a very useful tool for anyone working on cars, and the RotoZip is similar but much more powerful (a good replacement for a air grinder). Both will make your life FAR easier. If you have nice tips, the one thing I would suggest is that you either remove them first or wrap them in something thick. Make sure you support the exhaust as you are removing it as it is quite heavy. Sorry, no pictures of this. If you can't figure out how to remove the exhaust, I would suggest stopping here and taking it to a specialist shop. Undoing brake connections Now that the penetrating oil has had time to do it's thing (you did leave it overnight, didn't you?), it's time to undo the brake connections to the rear axle. There are four connections that need to be undone. All of them have to do with braking in some fashion and most of the connections are located around the differential.
The four connections are undone in the following locations, referencing the numbers in the above diagram:
Now that you've disconnected all the lines, we'll move on to the more tricky bits. Removing the Driveshaft Thankfully, I did not have to do this, but there are instructions in the factory manual (which I don't have in front of me right now...) and you should follow those + common sense. A couple of quick notes about drive shafts in general:
Since I haven't actually removed the shaft in my car (it was removed when I bought it), I can't comment further.
|
||||||||||||
|
Disconnecting Shocks
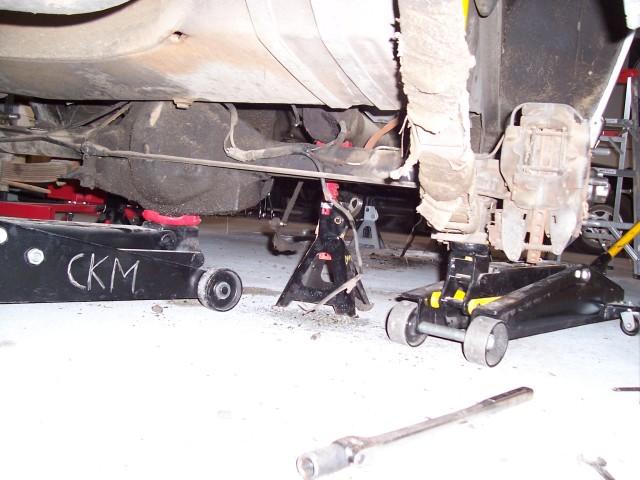
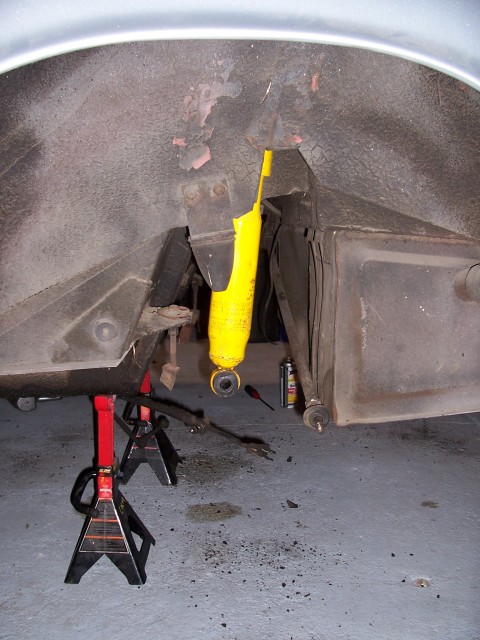
After disconnecting everything from the axle, it's time to start taking the suspension apart. At first glance, it looks like you should be able to just unbolt the leaf springs and removed the whole thing. That is NOT the case. In fact, you would most likely hurt yourself if you went this route. This is because the shocks, while fully extended, are still holding the springs up. So the first task is to disconnect the shocks.
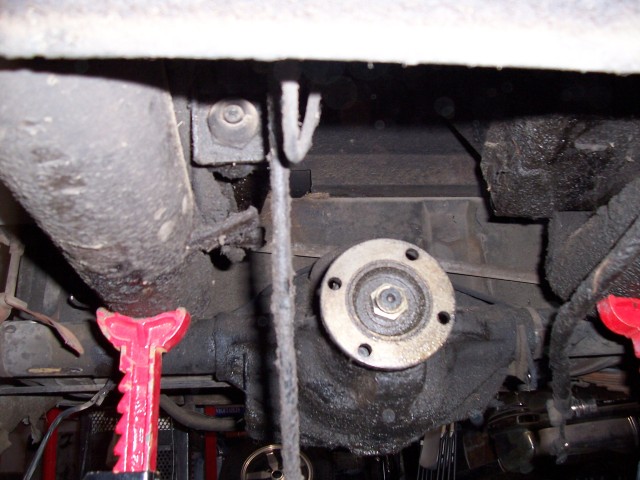
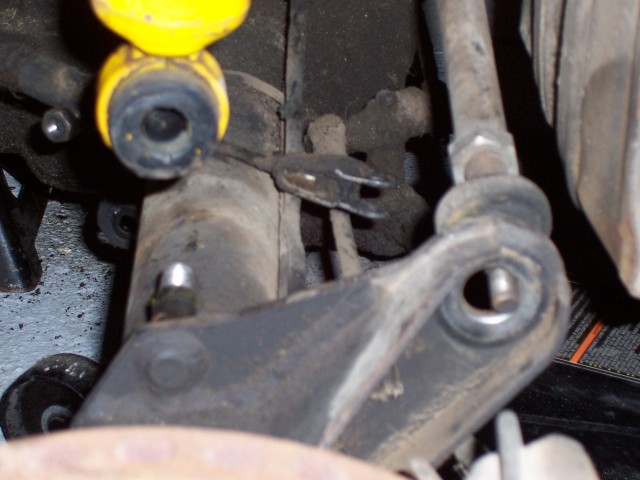
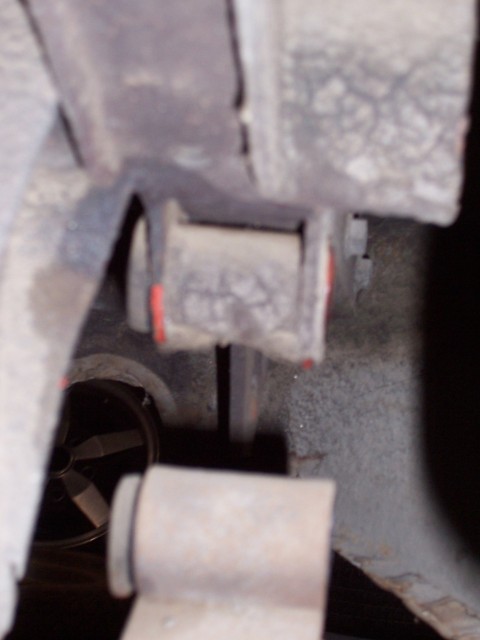
In order to disconnect the rear shocks, you'll have to compress the rear suspension a bit. To do this, put a floor jack under the diff and lift it a bit. The trick here is not to lift too much as you will start lifting the car off the jack stands (which you did put under the frame rails, didn't you?). Lifting the rear suspension about 2 inches seems to do it. Once the tension is off the shocks, you can unbolt and remove the lower nuts (the bolt is welded to the axle carrier). It's a little awkward as they face the centre of the car, but I used a 3/8" impact wrench and they came off easily. If you don't have an impact wrench, you should use a socket. A long extension, along with approaching the nut from the opposite side (e.g.. come in from the passenger side to do the driver's side nut) may make it easier to get leverage. I used this strategy successfully to undo transmission bolts on an RX7 from the rear of the car (with a 6 ft extension !!!). In any case, once the nut is removed, bag and tag it and the associated washer, you can then push the shock off the mounting pin.
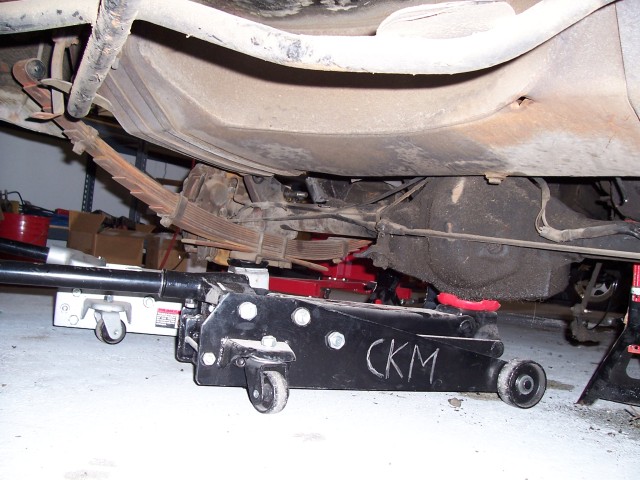
Do the same for the other side. You'll also need to disconnect the Panhard rod. You can see it to the right of the shock in the above picture. Don't bother pulling it out, you don't need to. Make sure you bag and tag the nut and washer for the Panhard rod.
Once the Panhard rod and both shocks are disconnected, you can lower the floor jack that 's holding up the diff. DON'T FORGET THIS STEP, IT'S VERY, VERY IMPORTANT. OTHERWISE THE SPRINGS WILL BE UNDER HIGH TENSION!!!!!! Once lowered, you'll see how low the springs hang when they are not being supported by anything.
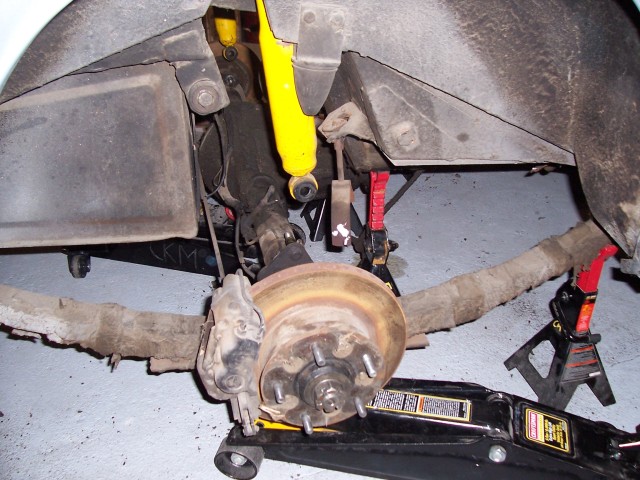
Now is a good time to check that you have enough clearance to remove the axle out the rear of the car. This is your last chance to re-position the jacks while everything is still attached. Detaching the Leaf Springs Now comes the most delicate part of the operation. Full attention, careful preparation, patience and deliberate actions are needed here. It's not so much that the springs are under a lot of tension, it's more that the assembly weights enough to kill or crush you, and you are unbolting it from it's supports. The first thing you need to do is to position a floor jack under the rear diff. Jack it up enough so that it supports the weight of the assembly, BUT NOT SO MUCH THAT YOU ARE COMPRESSING THE SPRINGS!!! Remember those wooden blocks I mentioned earlier? Here's where you need them. Put a stack of them under the leaf springs with maybe a 1/2 to spare. I used a couple of floor jacks instead, but I don't expect you to have 3 floor jacks available (although it does make life easier...). You should also position the extra jack stands you have to support the leaf springs fore and aft of the axle tube.
Once everything is in place, you can start removing the spring bolts. I first removed the forward ones, but I think you should actually start with the rear hangers.
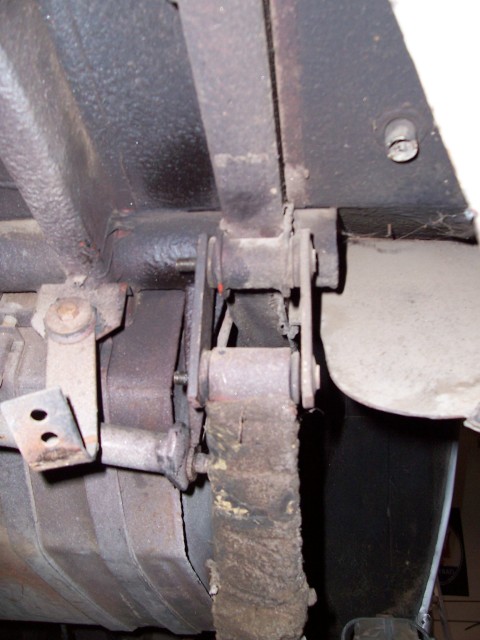
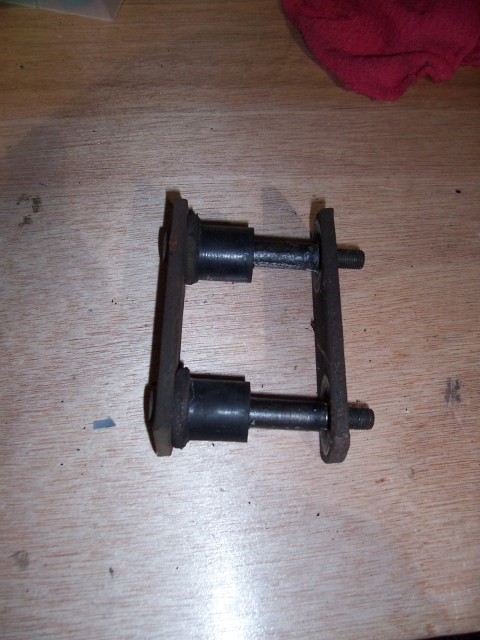
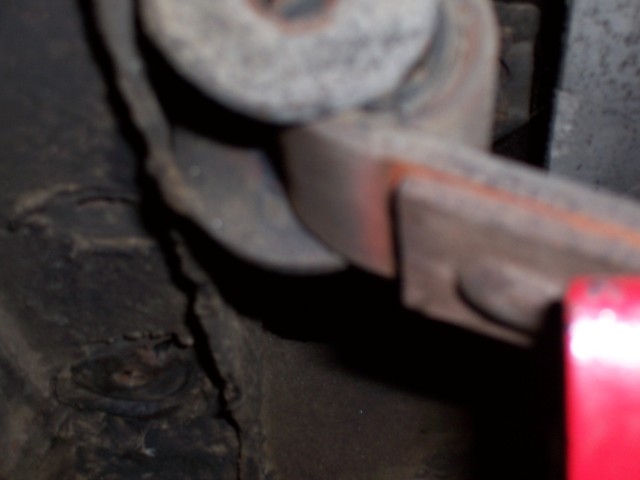
The rear hangers are actually a kind of U-bolt. Basically, they are two flat plates with a set of bolts welded through one of them. You remove them by undoing both nuts, removing the loose plate and then prying/driving the "bolt plate" out of the spring and body mount.
You may have to use quite a lot of force (and your brass drift) to pound the hangers out. Be careful as you are doing this and don't have any part of you body under the spring just in case it suddenly drops. My hangers were mounted with the nuts towards the centre of the car, so I pound towards the outside.
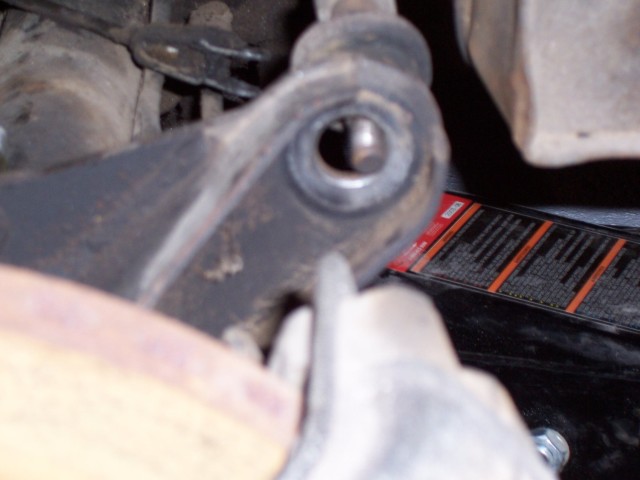
Once you have the rear hangers off, move to the front. Undo the nuts, and start pushing the bolt out of the body mount. You can then use your brass drift to pound the bolt out the rest of the way.
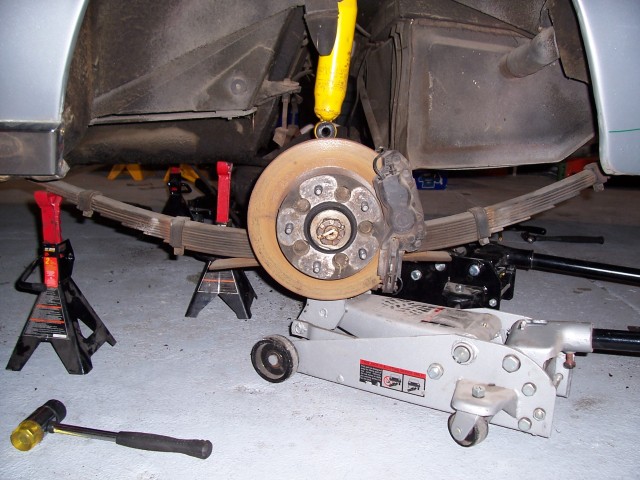
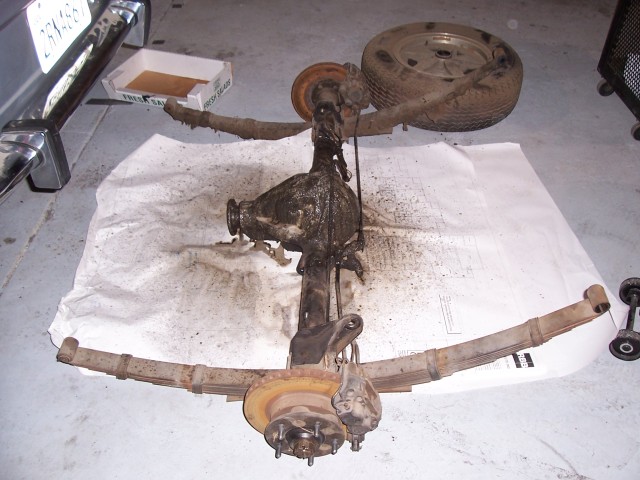
Once you've removed both hangers and both bolts, the only thing holding your suspension in place is the wooden blocks and the jack. Do one last check to make sure you've disconnected everything (double check the factory manual list...), and do a cleanup. Move all your tools out of the way, clear the area behind the vehicle, and pickup any rocks or misc. bolts. Jack up the diff slightly so that you can remove the wooden blocks and the jack stands from under the springs. Be very, very careful that the entire assembly does not tilt to one side or the other. Having an assistant here would be useful (although I did this alone). When everything is removed, drop the floor jack to it's lowest height. Check to make sure the top of the diff will clear anything under the rear of the car. You did bring the spare tire carrier back up, didn't you? If everything is OK, slowly pull the floor jack towards you, the whole assembly should come out.
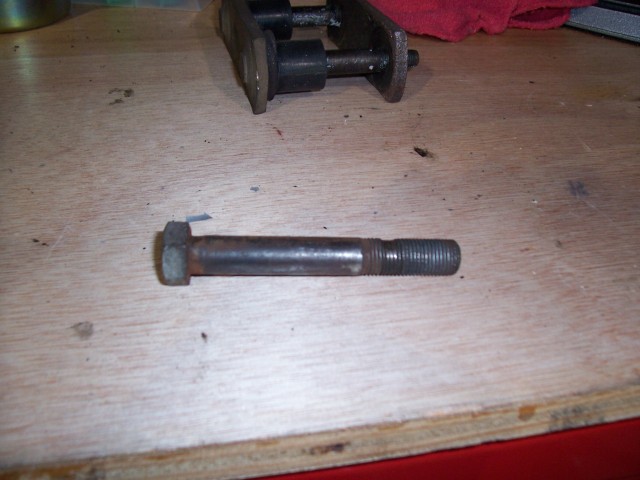
What you do with it now is up to you and, as they say in the book "Assembly is the reverse of disassembly". One final note. Look at your bolts closely. One of my spring bolts was pretty worn, even though the car only has 53k miles.
Good luck on your suspension removal and I hope you found these guidelines useful. Please let me know if I made any mistakes. BTW, total time for all this is 3 hours if you are quick, much longer if you are not. I would budget at least a whole day if this is the first time you do something like this. Chris - Interceptor 140/8964
|
||||||||||||
|
|
||||||||||||