|
|
|
Jensen Monday Club |
|
|
|
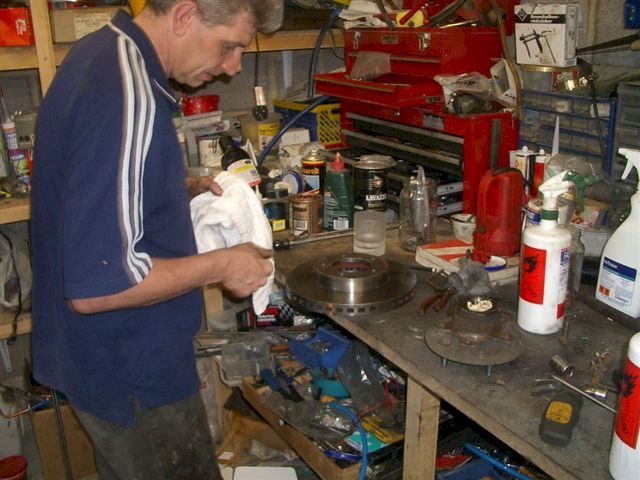
136-8779 was being pressed into service for an annual holiday. This would involve touring the Peak District of the UK, so a service and a good once over was called for. Just before I got chance to service the car the brakes started making the most horrendous noise and vibrating so badly the windows rattled. More than just a once over then... We were having a Monday Club meet at Steve Payne's place, so a good chance to sort the brakes. A quick look revealed the problem...
The rear of the disc was like the dark side of the moon! These discs were very expensive, and were only 3 years old, so I was a little miffed at how little wear and tear they had experienced. Then I remembered Castle Coombe track day, Santa Pod drag strip, the early morning blasts in the country lanes where I live, and didn't feel quite do bad! I had never experienced any brake fade during "spirited" driving, so they had done their job. Luckily Steve had a set of new discs in his stock of spares, so a few quid changed hands and we were off. The brake pads had only been on a week and were Green Stuff Kevlar, so no need to change them. I had made an interesting discovery when fitting the pads. I had previously tried everything to bleed the brakes to remove trapped air as the brakes had always been spongy and lacking in power. This had involved the usual tricks of bleeding the master cylinder, jacking the rear end of the car up so the master cylinder was higher at the servo end, taking the master cylinder off and tipping it up so the servo end was higher, etc, to try to get the air out. None of this had worked, but what had worked was the old brake pads were almost down to the metal, so the brake pistons were almost at full extension. I was expecting the master cylinder brake fluid reservoirs to overflow as I pushed the pistons back to get the new pads in, but they didn't, which I found strange. What I did find was that after pushing the cylinders all the way back in, the spongy peddle was now very firm, and the brakes were powerful to the point of being able to lock the wheels*. I think that air must get trapped in the callipers, and no amount of bleeding will get it out. I think moving the pistons to their fully extended then fully retracted positions allowed the callipers to fill with fluid. I can't prove it, but I would be interested to hear from anyone else who tries it an finds it helps. (Since publishing this article, Aussie Jensen owner Stuart Campbell has mailed me with his experiences with extending and retracting calliper pistons)
"You asked the question if anyone else had experienced bleeding
brakes by
pushing the pistons back in. I do it this way on my Harleys as I
have
made my own bars and sometimes the brake could be better so I
remove the
pads, operate the brakes then push the pistons back in
The only problem with doing this with cars is sometimes there is
crap in
the Master Cylinder and this can cut the seals, same as if needing
to
bleed the brakes pushing the brake all the way out can cut the
seals as
there can be crap in the last part of the cylinder.
I recently replaced the brake lines in Int 3 and found the master
cylinder to
be a bit dodgy and I replaced it with a new one. No good going fast
if
you cannot stop"
Sounds like the idea works, but as Stuart points out, you need to be careful. As I had finally got the air out of the system, I didn't want to undo the brake lines and have to go through the bleeding process (and it is a bleeding process!) again. This would involve removing the callipers while still attached to the brake pipes.
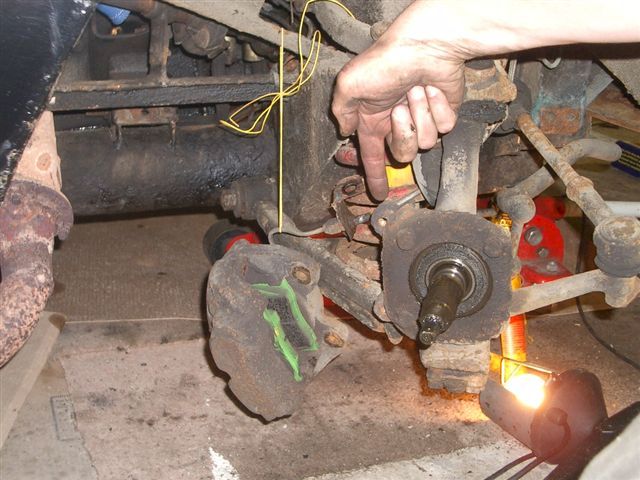
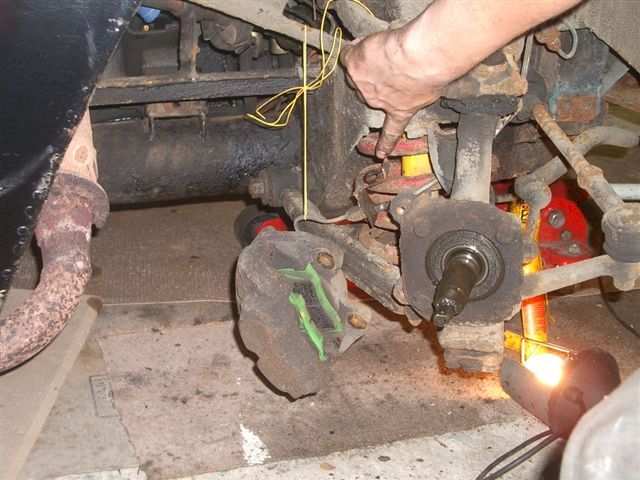
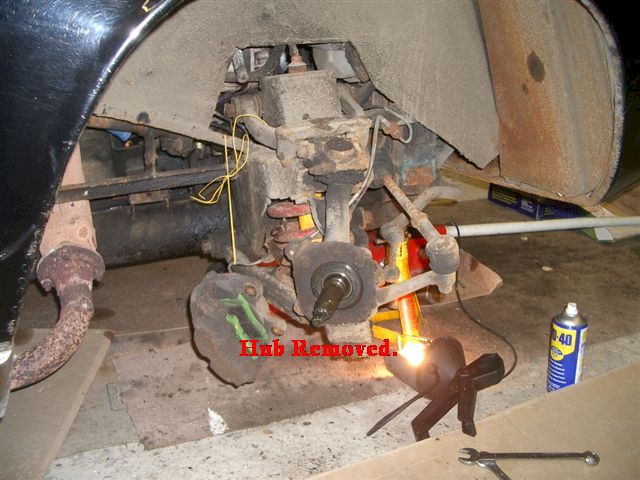
The first job is to jack the car securely, and remove the wheels. Next remove the grease cap from the wheel hub, and remove the cotter (split) pin that hold the hub nut in place. The next step is to remove the 2 bolts holding the calliper onto the hub
And then to undo the bracket that secures the brake pipe to the suspension.
I know, I know, I am using the brake pipe to tie the calliper up! Don't try this at home, and use the calliper bolt holes to tie it up. You can then remove the nut, and the hub pulls off the spindle. Take care not to loose any of the washers involved, and to wrap the hub in clean rag to stop dirt getting into the bearing.
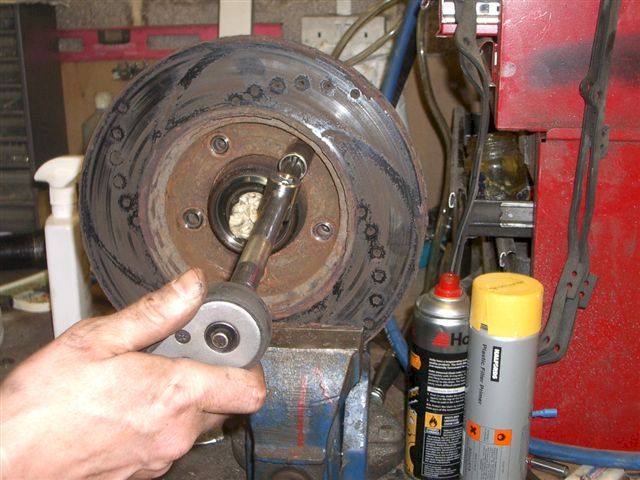
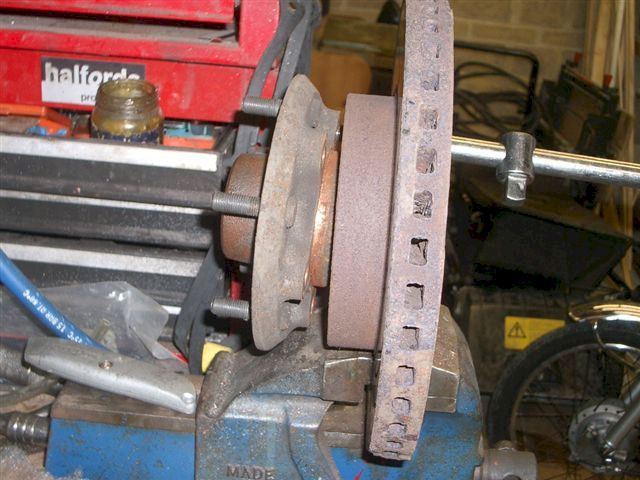
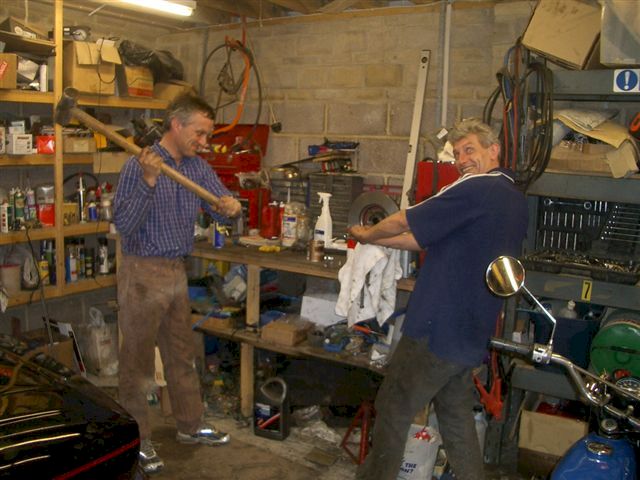
The next job is to indo the 5 bolts that hold the disc to the hub. 9 bolts came out no problem, 1 was stuck fast.
Time for "The Fine Adjustment Tool"...
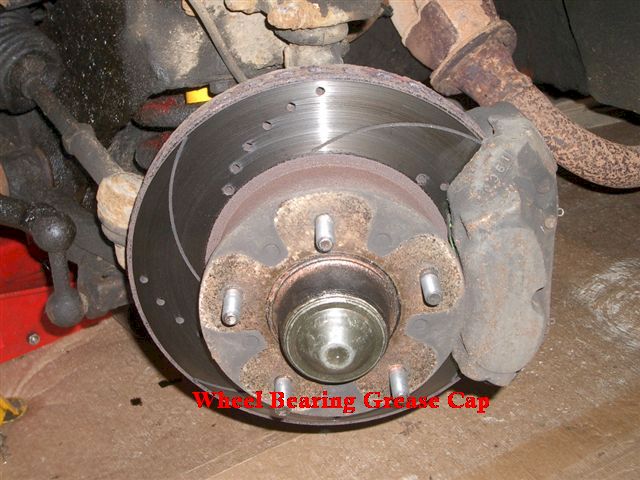
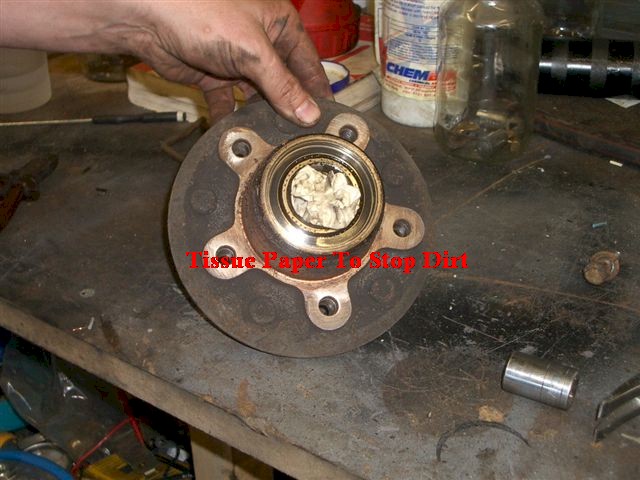
Here is the hub after it has been removed from the disc. Note the tissue paper in the bearing to stop dirt getting in. It is a good time to clean out all the old grease and check the condition of the bearing. If it is ok you can then re-pack it with fresh grease, and give it a final grease via the grease nipple when it is re-fitted.
You must also make sure the face of the hub which goes against the disc is clean, free from particles of dirt, and is flat, as any imperfections will cause the disc to run out of true, and will cause all sorts of problems with vibrations. The next job was to clean the new disc ready to be fitted. Discs come with a coating which prevents them from going rusty. It will also prevent you from stopping if you don't get it of with solvent!
The re-fitting is simply the reverse of the process described (minus the fine adjustment tool!). Please refer to this page on torque settings for the hub nut and braking before you refit the hub. Getting the torque wrong can lead to fatal consequences, so CHECK you know what settings you need to use. The brakes were perfect during the holiday, which is more than can be said for the starter motor... But that's another story! * Since writing this article we have done some work on the brakes of Chris Miller's car and here is what we found (this is an e-mail we sent to the British Steel Jensen forum): We noted on my car that extending the calliper pistons out past where they would normally travel too made the pedal on my car much firmer. Chris Miller's car always had the best brakes of the Monday club cars, but he experienced the spongy pedal problem after changing his servo.
We tried extending the pistons on his callipers to see if it would
get rid of the sponginess. While we did this we observed what was
going on with the callipers, and this may shed a little light on the
problem.
We first removed the brake pads, and put pieces of wood the same
thickness as the metal back plate of the pads between the callipers
and the disc. This was to prevent the pistons over extending. DO NOT
try this without some method of stopping the pistons over extending.
On removing the brake pads the first thing we noticed was that the
inner pads (nearest the engine) were significantly more worn than the
outer. This is what had happened on my car, and Steve Payne has also
noticed this.
We then operated the brake pedal to push out the pistons. The
callipers have 3 pistons, a large single piston on the inside of the
calliper (nearest the engine) and 2 smaller ones on the outside
(nearest the wheel). The large single piston moved first, and moved a
significant amount before the smaller pistons started to move. This is
probably why the inner pads are wearing faster than the outer as light
braking will only put pressure via the single piston. When the smaller
pistons started to move, the top one moved first, quite sometime
before the bottom one.
After we had extended the pistons onto the wood, we noticed that
the brake fluid in the reservoir for the front brakes had DROPPED by
about a 3rd. We suspect what is happening is that air is getting
trapped in the lower of the small pistons, and that as the bleed
nipple is at the top of the calliper on the opposite side, it cannot
get past the top small piston unless you extend the pistons.
The brake pedal on Chris's car in now back to how it used to be
before he fitted the new servo. We experienced another problem on
Chris's brakes with the brakes loosing power after several operations.
This turned out to be the vacuum pipe to the chassis tube having
collapsed internally, blocking off the reservoir of vacuum in the
tube. This pipe is only a few months old as Chris replaced it when he
fitted his new servo. We think it is heat from the engine which has
caused the pipe to collapse, even though it is quality pipe he used.
|
|
|