|
|
|
|
|
|
|
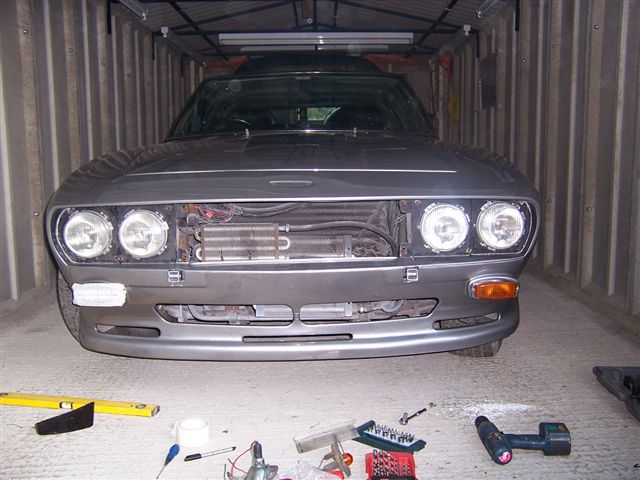
I have had e-mails from Interceptor owners mentioning how useful the details I had included in the strip down of 136-8779 had been when I was getting the car ready to go into the body shop, so I have decided to do another page for the re-fitting now the car is home. I suspect this is going to be a long and slow process, stop drop by from time to time as I update the page. Top re-fitting tips:
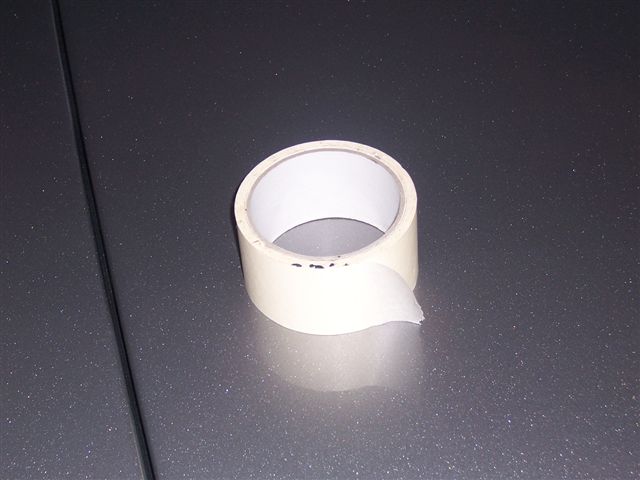
One slip with a screwdriver or drill bit and your shiny new paint work will be ruined, so use plenty of tape to mask of the areas you are working on. Use a double layer if things start getting tricky.
I also bought some body protectors to stop any other damage. It was a bit of a rush getting the new hatch seals fitted in time for the window fitters to arrive and re-install the front and rear glass, so I didn't get chance to take any pictures at the time, but here is a description of fitting the new hatch seals. There are 2 seals around the hatch, one goes part way round the hatch, the other goes all the way round.
Fitting the seal that goes part way round can be done with 1 person, but it's much easier with 2, so try and get another pair of hands to help out. Mask off the entire area where the seal is going to go. It involves drilling into the body work, so you don't want the drill to slip, and the edges of the aluminium bars that hold down the seal are sharp and can gouge the paint.
There may be a better method, and if anyone knows it please let me know and I will add it to this page, but the method I used was to drill the top hole first, and work down gradually bending the bar to the shape of the hatch.
We put the seal under the bar and slid it so the edge of the seal was level with the edge of the body work. This means that when the hatch closes, the seal will bulge out slightly and make a watertight seal. We drilled the hole and fitted a stainless steel self tapping screw. We repeated this down the length of the bar making sure the seal was the same distance from the edge of the body work. Once you have a self tapping screw to locate the bar, it can then be easily bent into shape. Take care with the second from last hole as it has to be bent the most to follow the contour of the body, and the bar is very thin at that point due to the hole and counter sink.
There is a bar for each side of the hatch, and another along the top of the hatch where it meets the roof. This needs to be slightly lower than the sides so you don't have the seal sticking up above the roof. You will also need to cut the flat part of the seal away around the hatch hinges to allow the hatch to lift up. The seal that goes all the way around simply fits over the edge of the metal work around the hatch, and can be knocked on with the flat of the hand or a rubber mallet. Take care it has a metal "spiral" in the round part of the seal, which has sharp ends where it is cut that can scratch paint. If your budget can run to it, then use new seal for the front and rear screens as: a/. If you don't it's a ready made excuse for the window fitter if they leak. b/. They look good. c/. Your old ones will probably be knackered anyway.
You may be able to fit them yourself, but it took 3 fitters to put the rear screen in (it weighs a ton), and the specialist tools and sealers will make a much better job. I had the break the old washer jets to get them out as they had rotted in, so I splashed out on a new set.
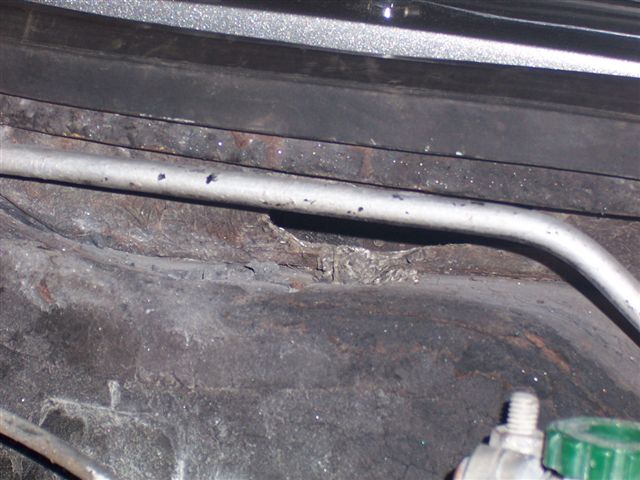
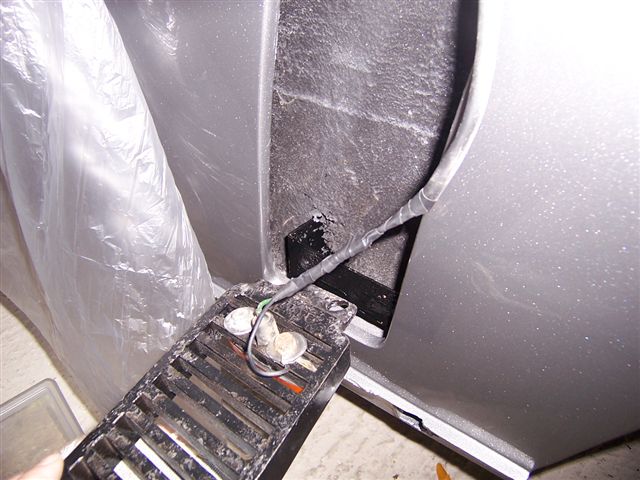
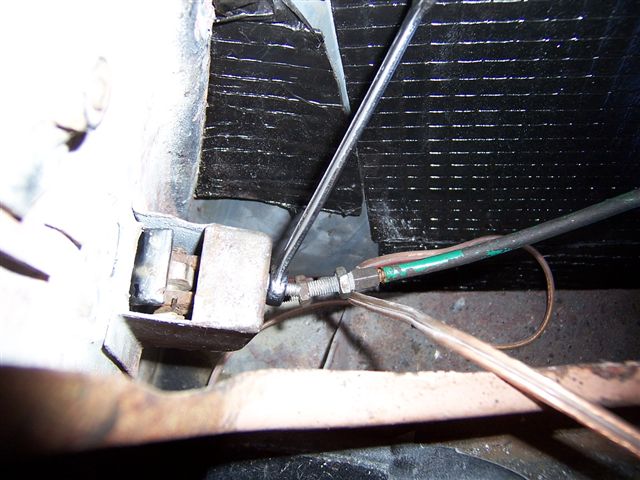
The drivers side was easy to fit as there is plenty of room behind the bonnet latch to get your hand in to tighten it up. The passenger side was not so easy. I'm not sure if it was factory, or a PO had done it, but there was a slot cut in the glass fibre surround which allowed me just enough room to get in. The silver bar running horizontally in the picture is the bonnet release rod.
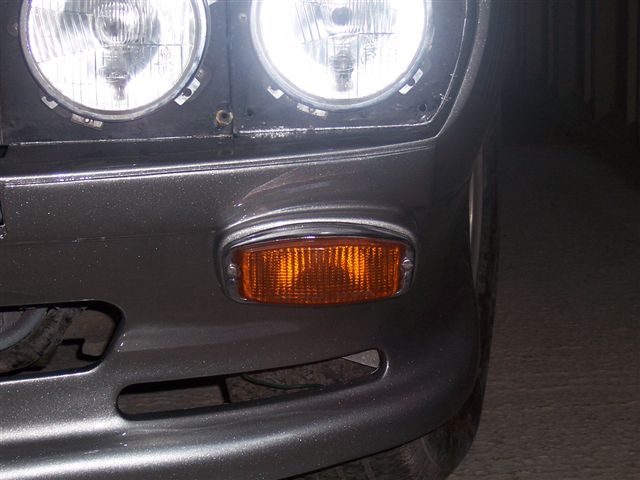
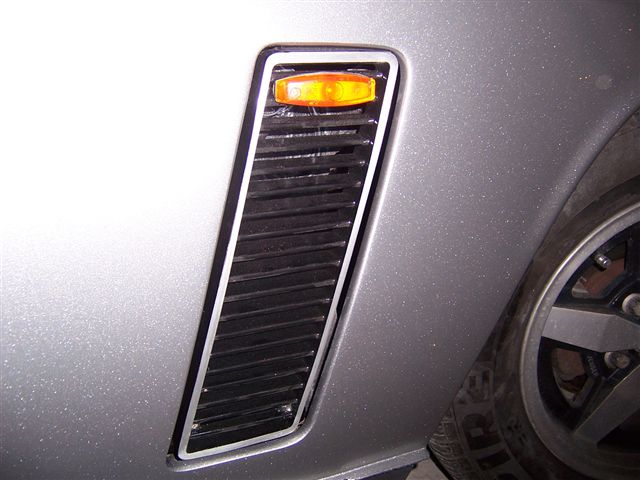
I needed to fit the indicators in the front spoiler. I have side lights built into my headlights, so I decided to fit the LHD indicator only units.
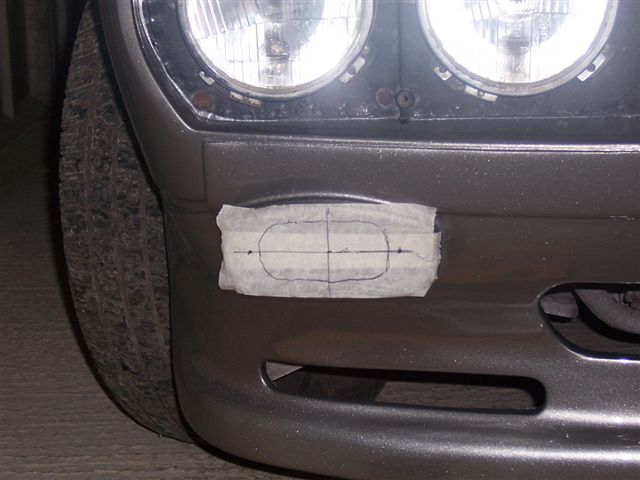
I used the original metal indicator surround as a template to mark out the new hole. Again, lots of masking tape.
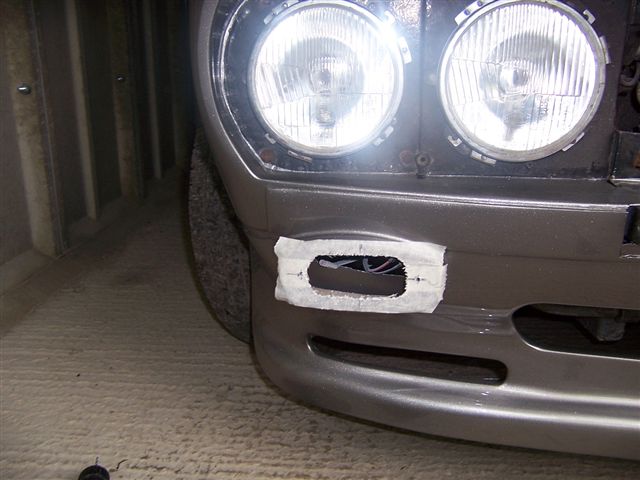
I used a 2mm drill, and drill lots of holes as close together as I could around the edge of the hole. It was then just a case of using the edge of the drill to join the holes up.
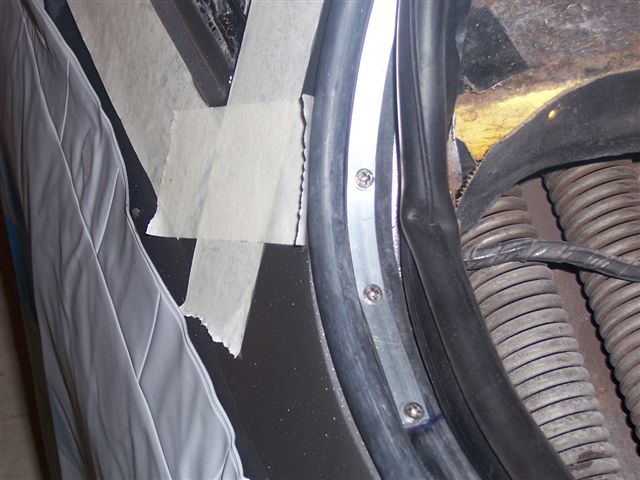
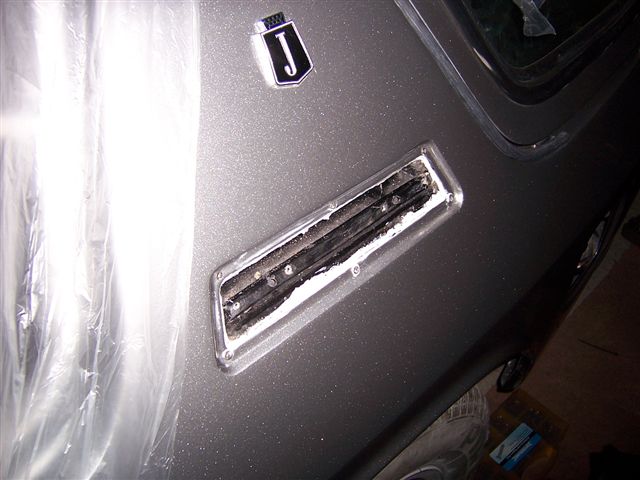
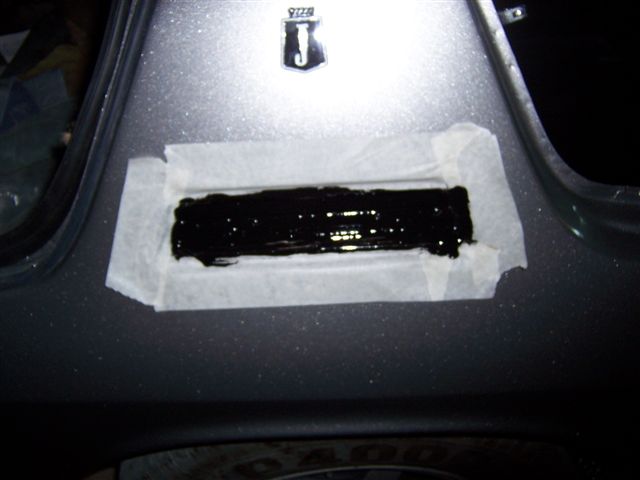
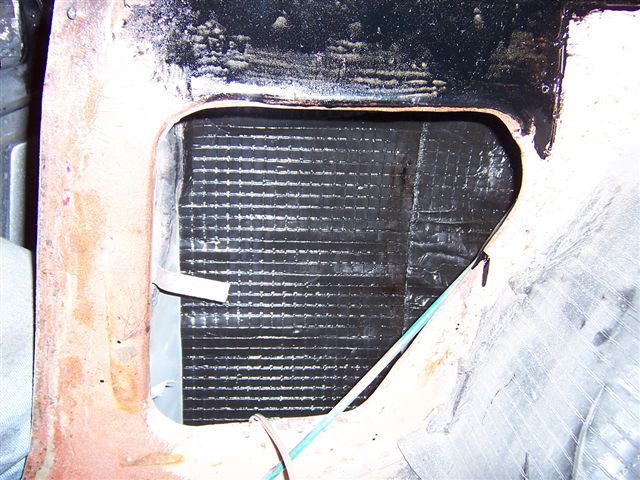
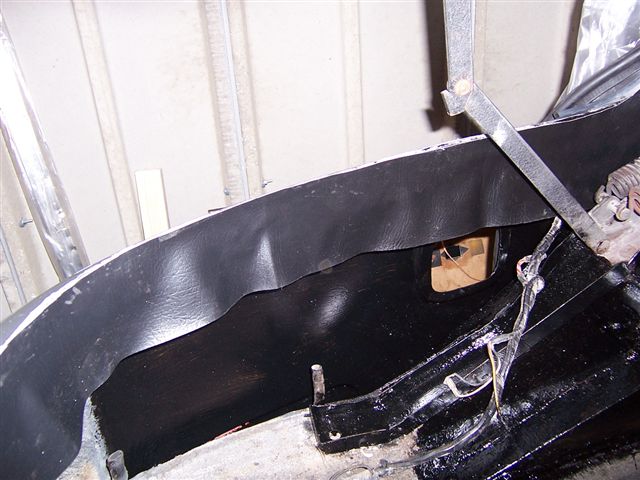
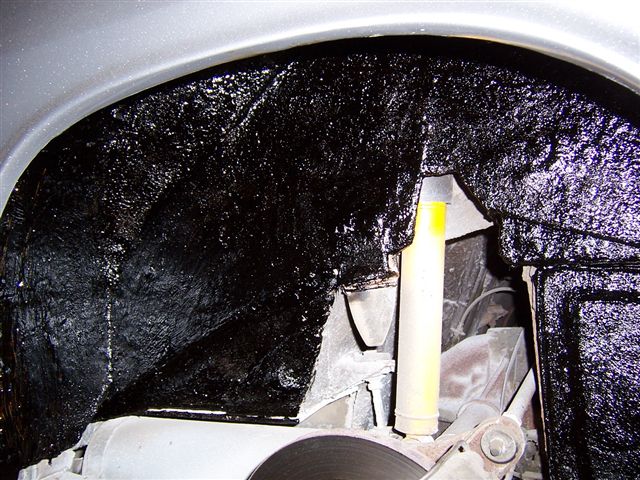
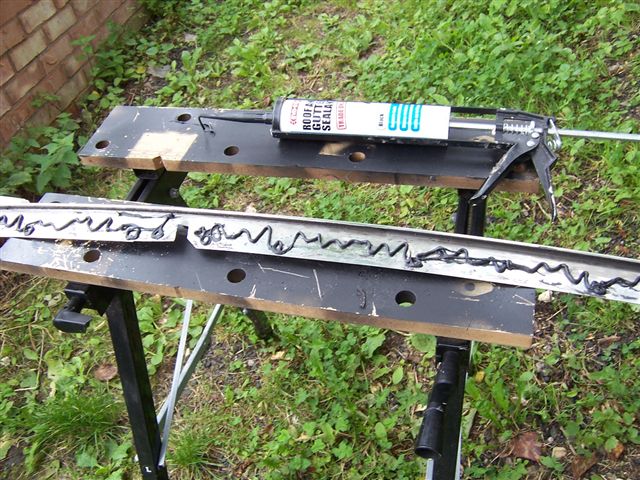
That was enough for the 1st day. Back from a weeks holiday, and I decided to do a little bit more on the car. The old girl let herself down as she wouldn't start when I tried to bring her home from the body shop. 6 months of starting on choke, and driving from one side of the workshop to the other had turned the spark plugs into lumps of coal, so I'll order a new set. I decided to seal the "C" pillar vents as they were heavily sealed from the factory, and sealing them will prevent any water leaking down into the "trap" where the inner arch meets the rear wheel arch, and rotting out your new metalwork. I used a clear bathroom sealer to seal all the way around the air vent (it's white when it is applied, but dries totally clear, and is also paintable so you can give it a coat of satin black).
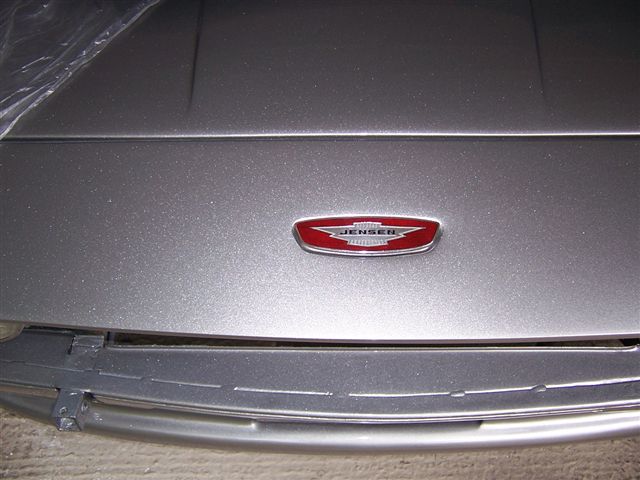
It can also be used to stick badges back on.
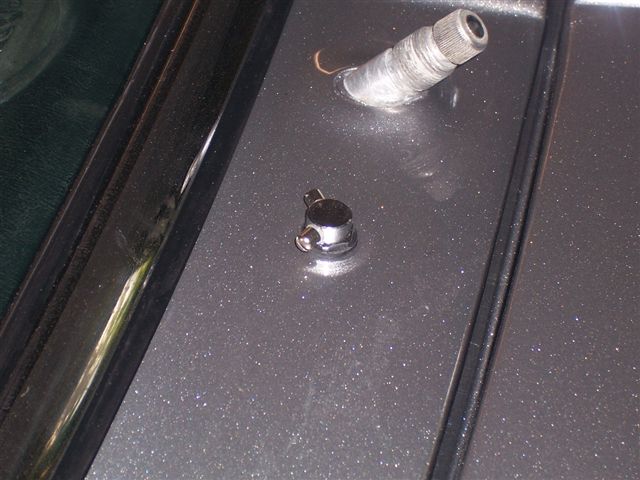
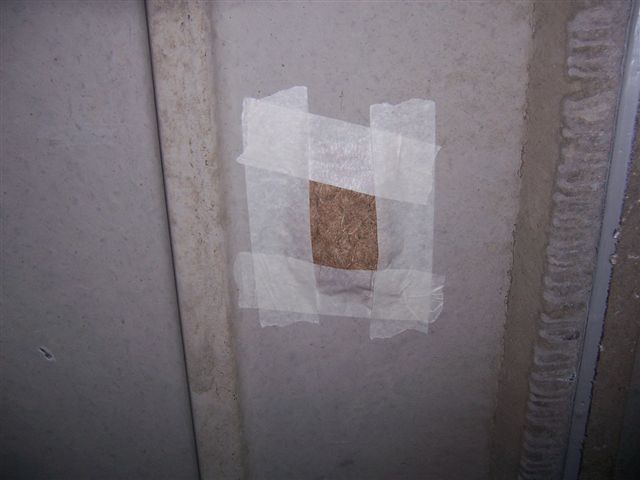
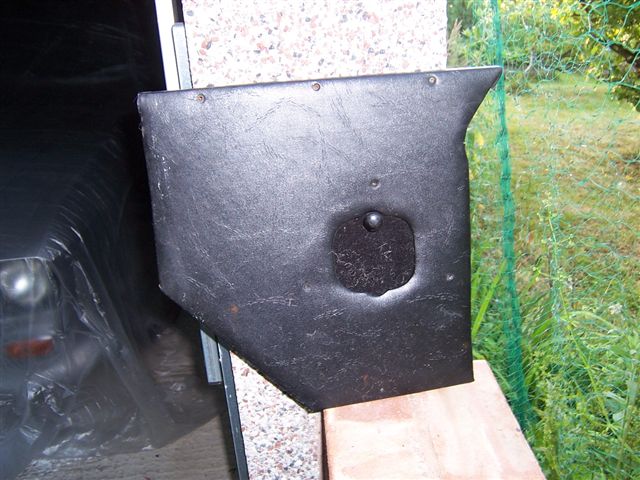
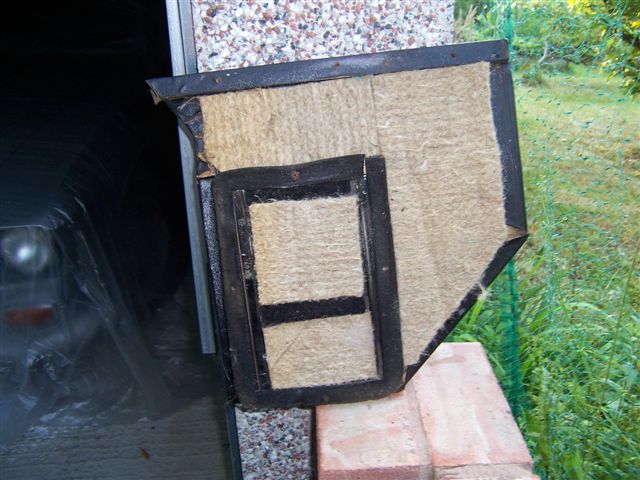
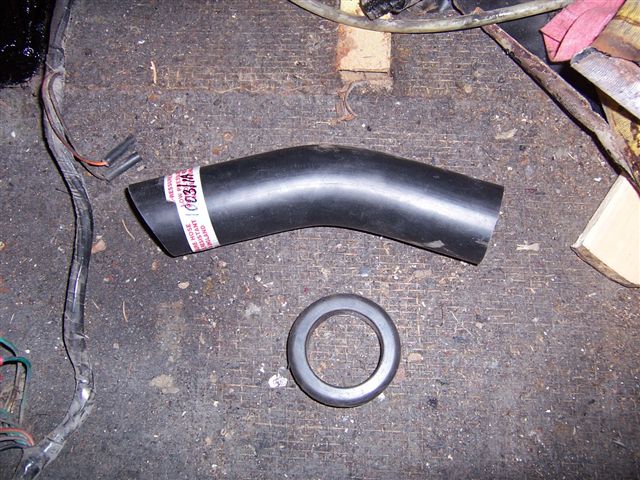
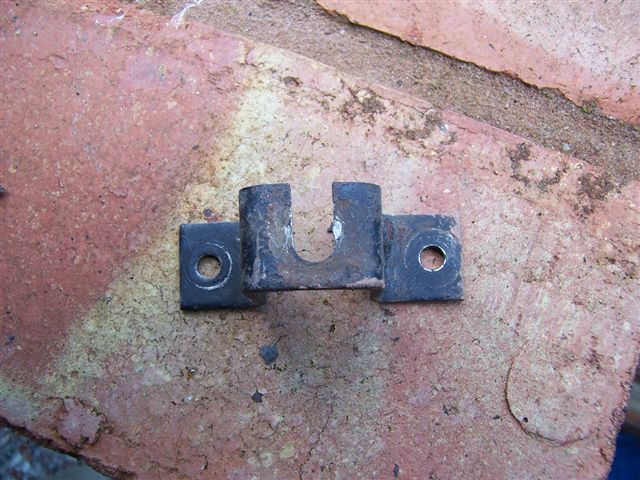
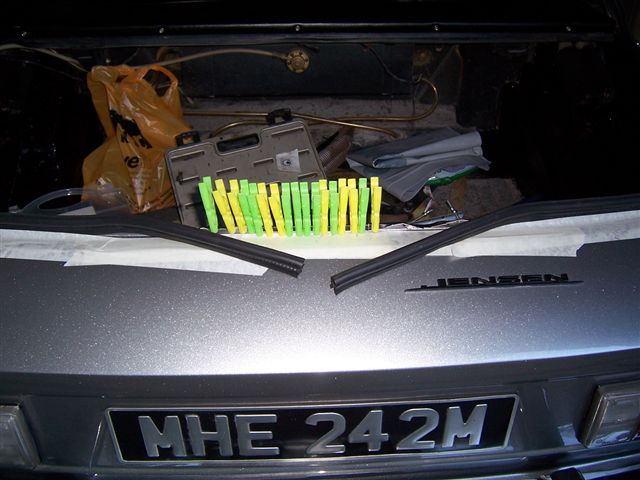
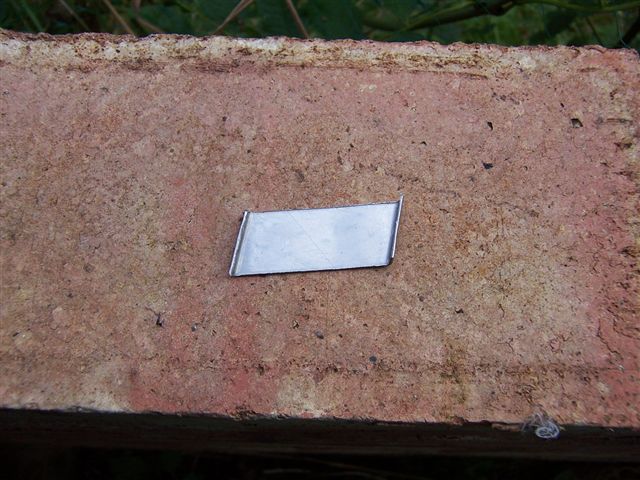
Before we start, 10 bonus points if you can guess what this is?
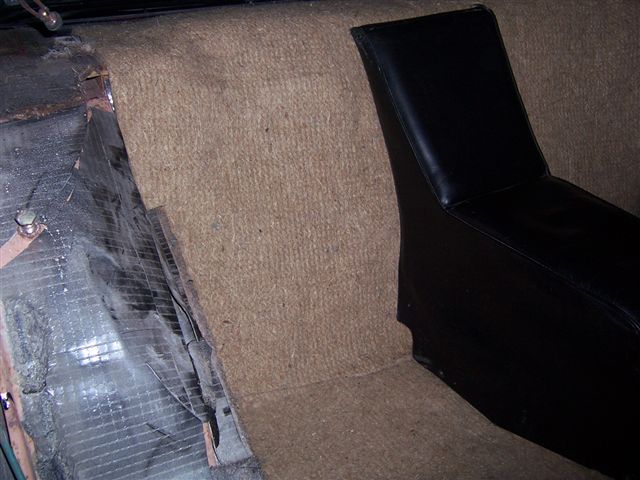
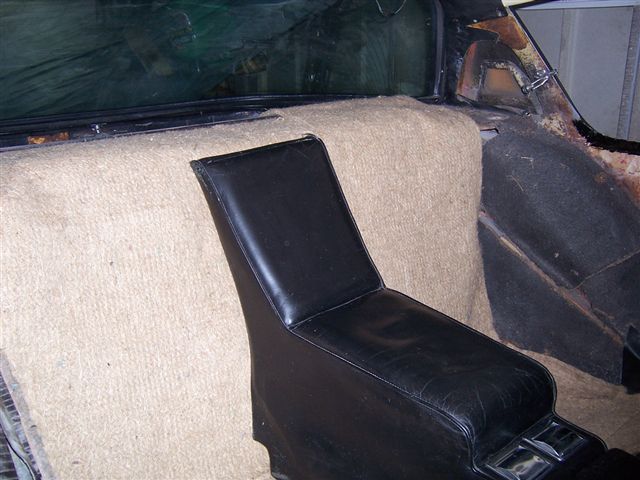
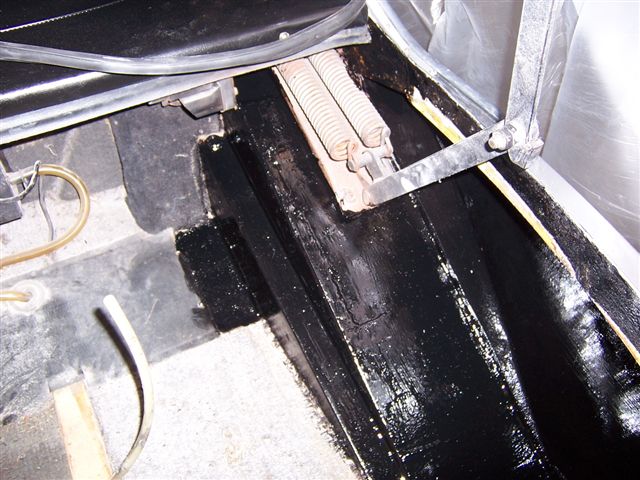
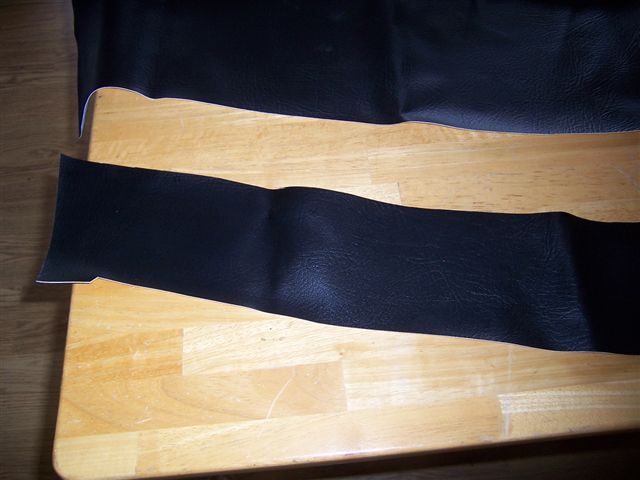
I had decided it was a good time while re-fitting the interior to add some more sound deadening. I had previously used modern self adhesive sound deadening on the backs of the rear seat and the under side of the rear arm rest.
But decided to add some good old fashion sound proofing as well.
I started cutting it to shape and adding it to the underside and rear of the back seats, and under the arm rest.
I had fed the leather with neats foot oil while the car was in the body shop, and given it a good clean with Autoglym leather cleaner, but for a final flourish I used some black boot polish.
I had decided that if it didn't move, it would be soundproofed.
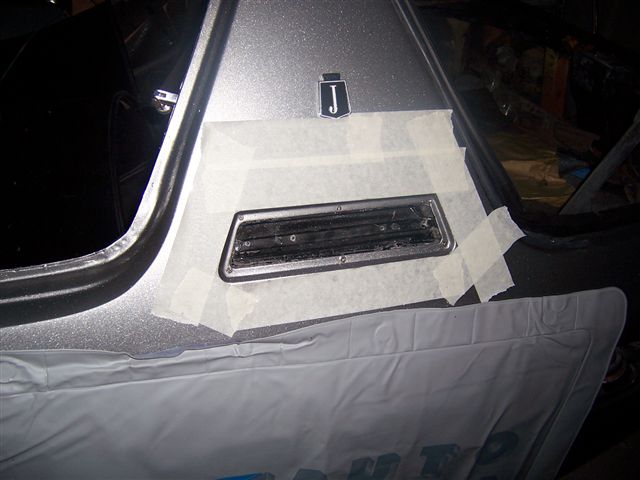
It was time to re-fit the door handles, but before doing that I masked off the C pillar vents, and gave them a coat of satin black paint
And added some sound deadening into the inner rear wings (behind the panel with the rear speakers)
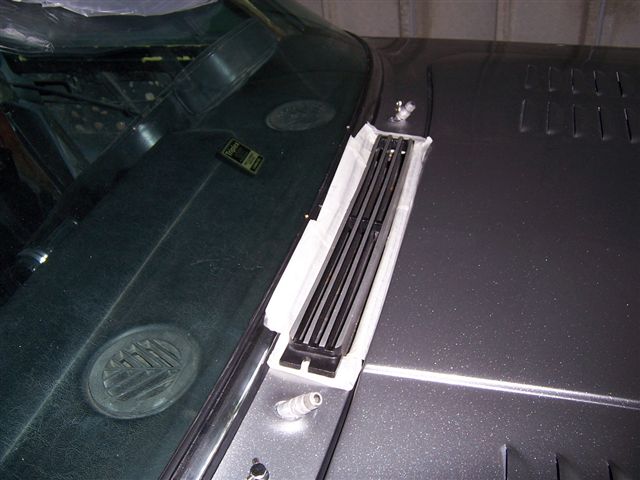
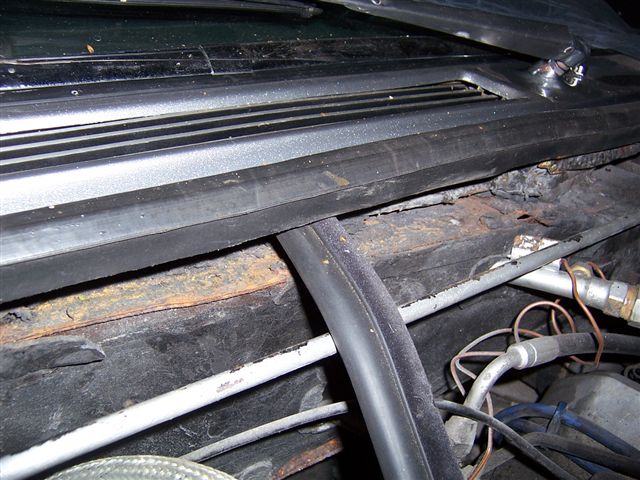
And vent under the windscreen masked and ready for refitting
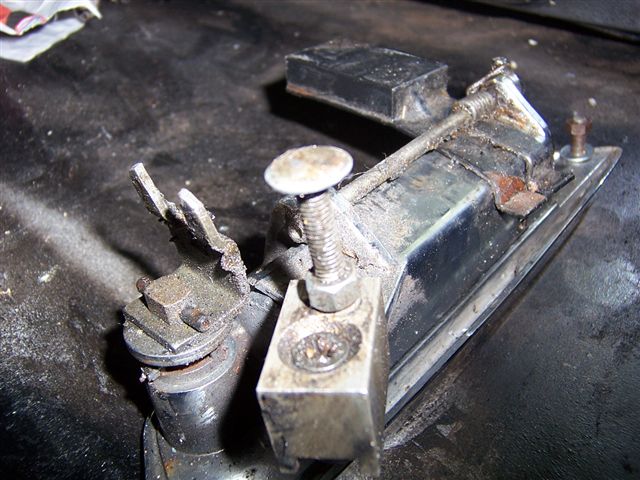
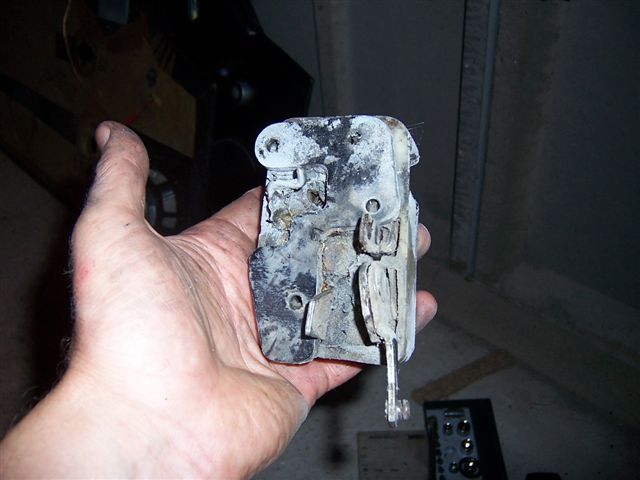
It is a real pig of a job refitting the door handles, and there are lot's of very sharp objects on the back of the handles, so lot's of masking tape around the hole (I used a double layer as the catches are so sharp on the rear. The first thing to do is remove the counter weight.
Then remove the adjustable striker and the block it's held in with
This will make things a lot easier. The counterweight is only held in place by a spring, so comes off easily. You will need to feed the end of the handle which has the key lock in into the hole first, and it's almost a "corkscrew" action to get the handle in.
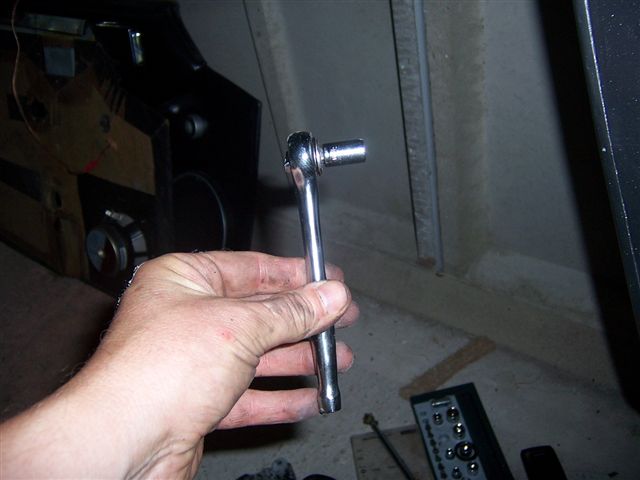
I then used a very small socket set to tighten the nuts on the back of the handle.
The rear of the 2 nuts is very difficult to get at.
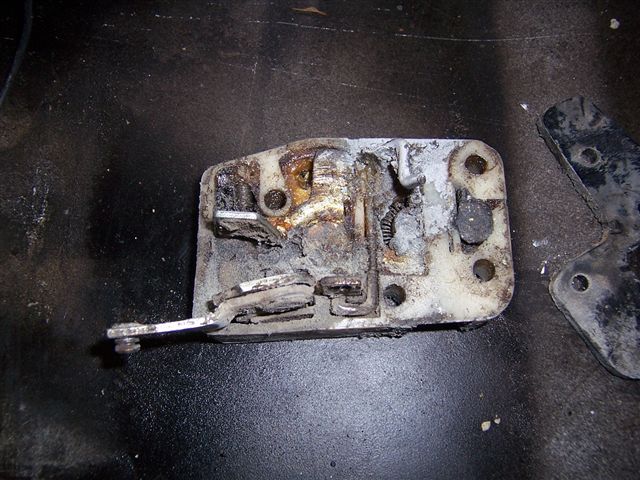
It can be done with the catch in place, but I took the catch out and used the opportunity to clean and grease it.
Once the handle is back in place, you can then adjust the striker so that there is about 1mm of movement before the handle opens the latch. Any less than 1mm and potholes in the road can cause the striker to open the door, any more and it can make opening the door a little hit and miss. Time now to refit the wing vents. They are held in place by 2 self tapping screws which are at the bottom of the vent, and 2 nuts which are accessed by removing the wing under wing mud guards and reaching inside the wing.
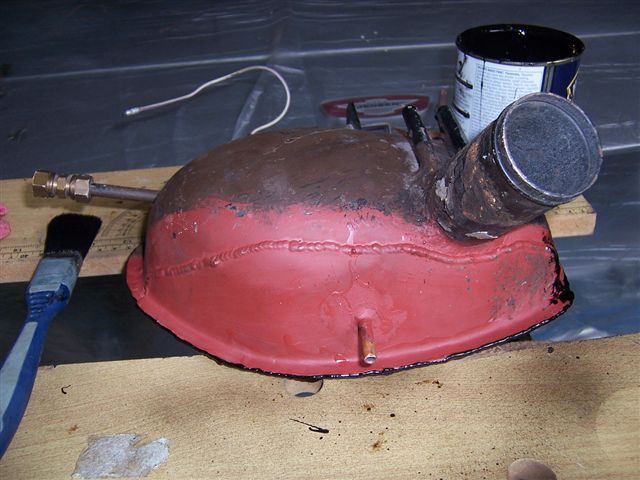
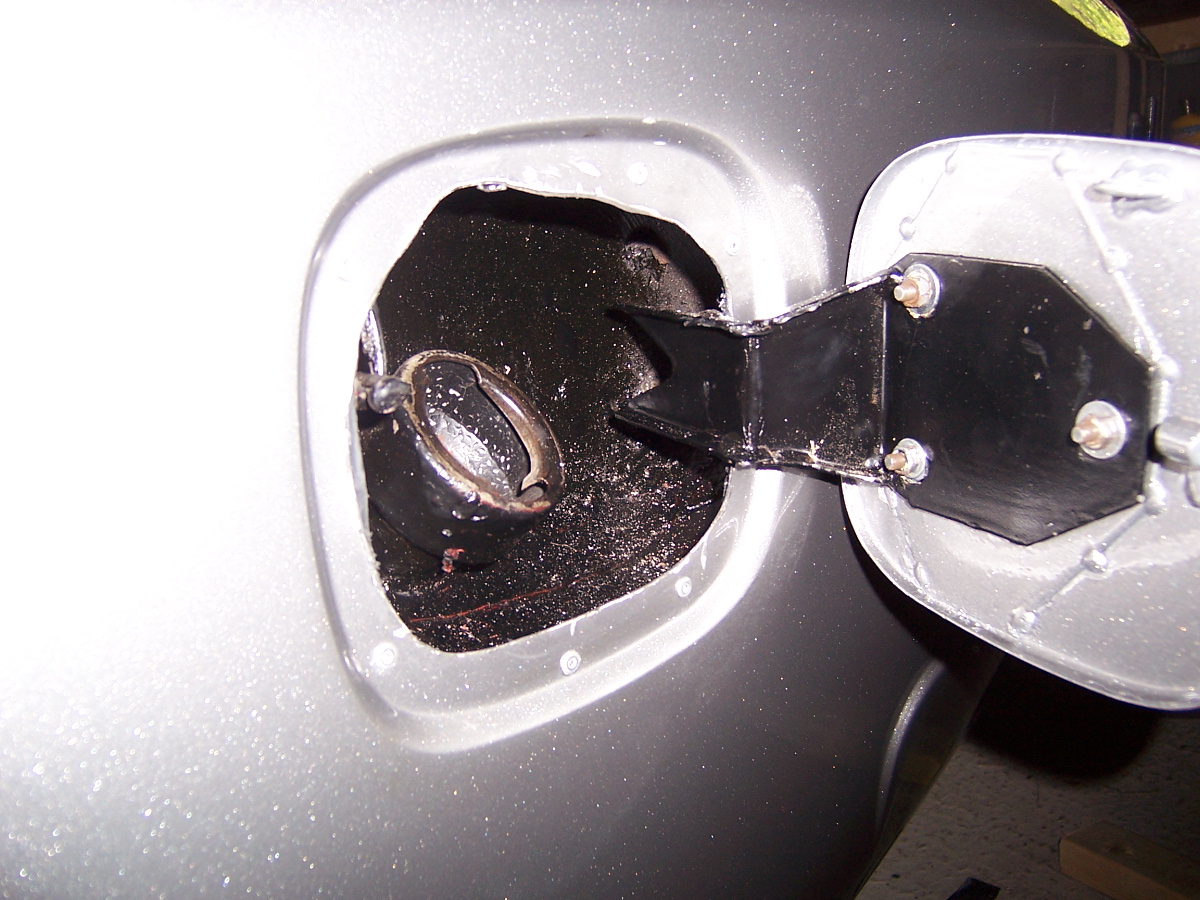
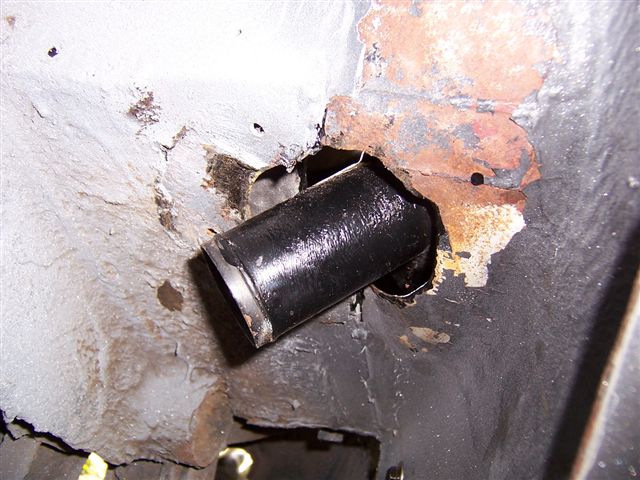
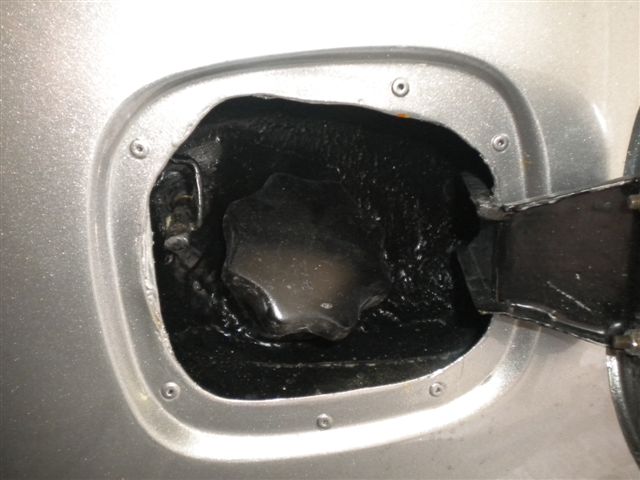
Having new rear wings fitted meant the fuel filler bowl needed to go back in. When it was removed it was found that the bottom of the bowl was rotten so the body shop repaired it for me (new ones are hellishly expensive). A combination of an extra layer of metal in the bottom of the bowl, and new inner rear wheel arches meant that the bowl would quite fit.
So this meant I had to use a piece of wood and a "fine adjustment tool" to reshape the area of the new inner rear wheel arch. The lower circular hole is where the filler pipe passes through and needed a little reshaping. It was also a good excuse for a coat of satin black paint to freshen things up.
I had previously bought a new filler pipe and grommet for the pipe to pass through
And while I had the paint brush out...
Water shoot also gets a coat (if it don't move, paint it!)
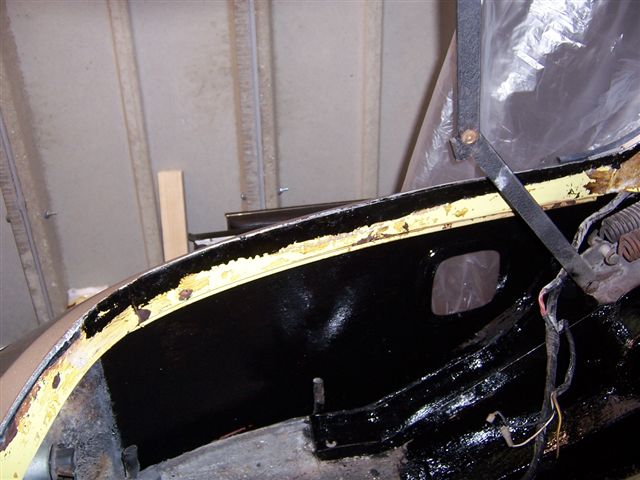
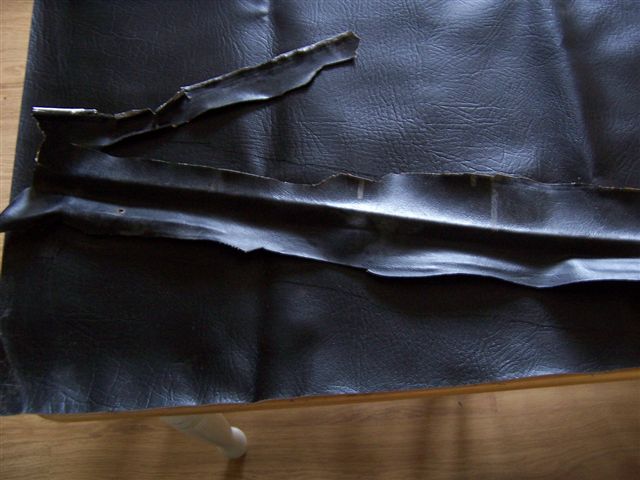
The vinyl which had covered the edge of the boot had been removed during the fitting of the new wings, revealing the original Positano Yellow colour.
I used the original vinyl as a template to cut some new pieces
New piece cut and ready
And glued in place
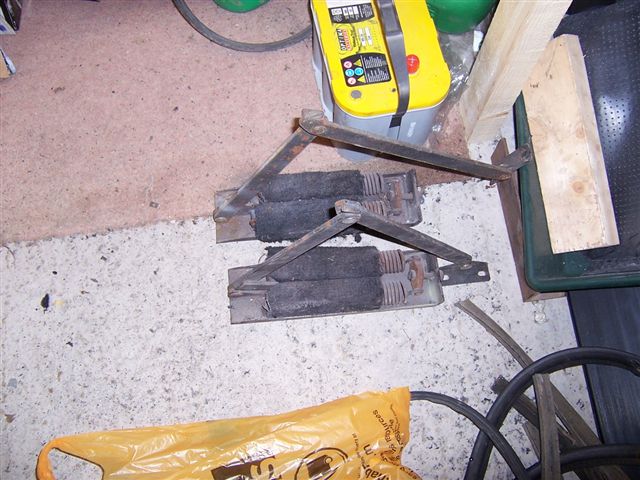
The spring loaded arm which lift the boot lid on my car were worn and the hinge joint, which meant there was side to side play when the boot opened, and this play meant the hinge kept cutting chunks out of the seal as it opened. I had got a good set of unworn arms, and there are ready for refurbishing to go in the car.
It had reached the stage where I needed a helping hand, so Chris Miller came over to assist on the 2 man jobs. The first was refitting the fuel filler bowl, which needs one of you to hold in place, and one to drill the holes. Top Bodywork Tip If you have a new rear wing fitted FIT THE BOWL BEFORE PAINTING THE CAR! The first problem was the hole in the panel was 10mm (3/8") too small and needed to be cut to size. This involved cutting with tin snips, the filing to finish to the correct shape. This meant trial fitting the bowl a lot of times to make sure the hinge would open, and the lid was in the right place.
The car has got to go back to the body shop for the painting of the coach line and cavity wax injection, so I will get them to paint the areas where the metal has been cut out. Once this was done, we added some silicon sealant to stop fumes and water getting into the car.
We used 2 self tapping screws to secure the bowl in place BEFORE riveting as it is easier to take a screw out than a rivet if you need to make adjustments. Once we were happy with it's fit we then drilled and pop riveted the bowl in place.
There is only so much adjustment we could make by moving the bowl, so for the final fine adjustment we opened the holes in the hinge by 1 drill size up.
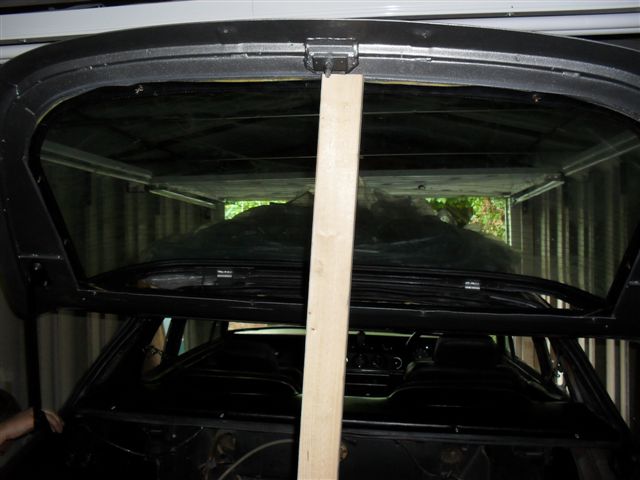
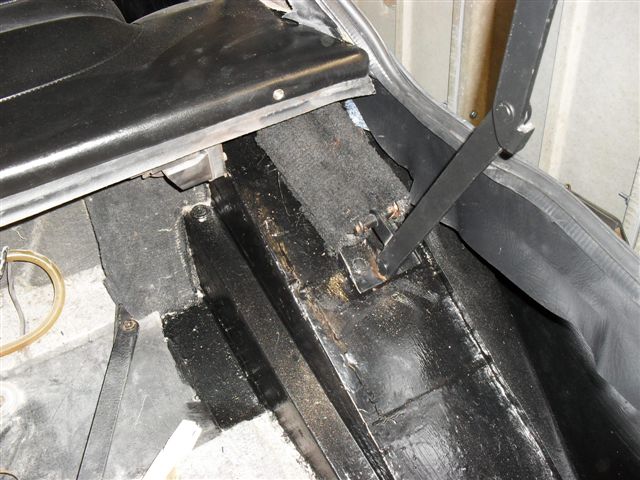
Next it was the refurbished boot hatch arms. First we used a prop to stop the hatch from dropping as it's very heavy and can be too much for 1 arm.
The arm units are held in place by 4 nuts under the rear wheel arches, and 2 nuts on the hatch.
Take great care removing these as the springs are very powerful. I had taken them apart and painted them, and washed the carpet that covers the springs. Sad eh...
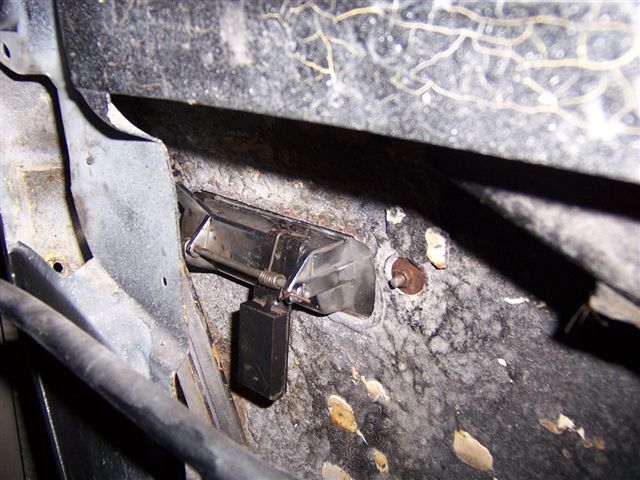
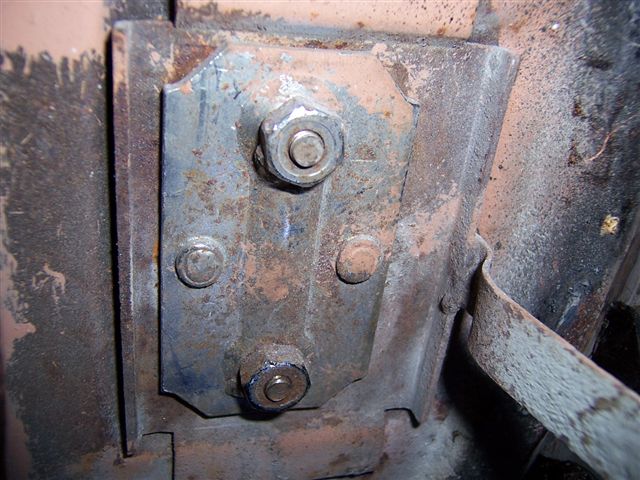
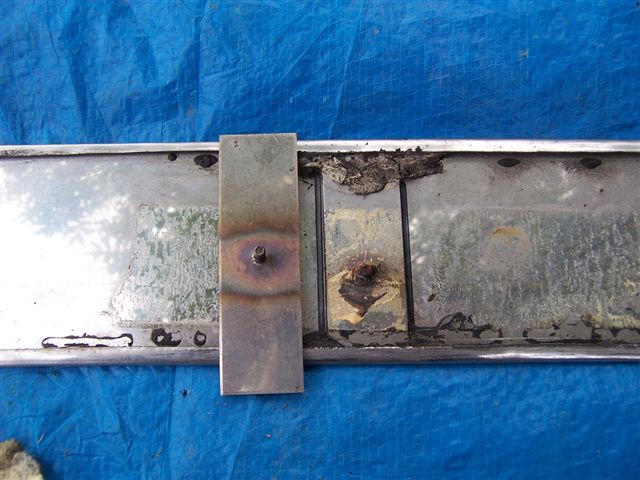
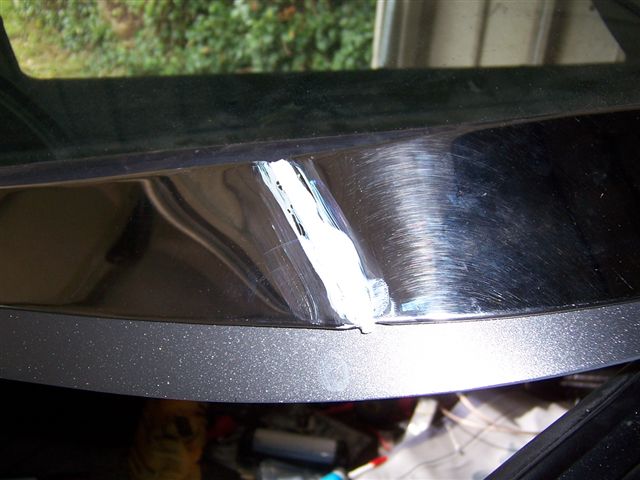
It had been a bit of a slog to refit the car as nothing seemed to fit "out of the box". One of the pit falls of hand built cars... I was glad of a weeks holiday to get away from it to be honest, and came back refreshed and with an offer of help from Chris Miller to do the 2 man jobs, such as bumpers. I had been slogging away at making the doors shut nicely. I had spoke to Steve Payne about it and he said he spent a week doing his, and it involved the patience of a saint, and some screwdriver throwing. I had spent 3 nights on mine before I went on holiday and felt I had made no progress... But, after my week away, I came back and within an hour had got them just as I wanted them. The stainless steel plate is held in place by 2 counter sunk screws, which screw into a back plate which is accessed by removing the rear speaker panel.
Adjustment is made by slackening the screws and moving the plate up/down and left/right.
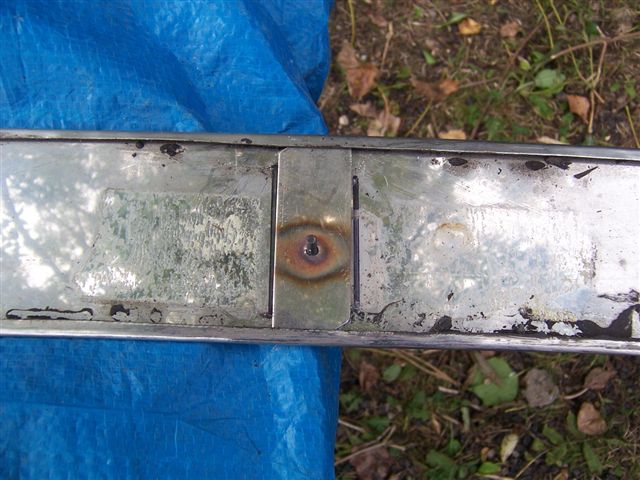
The idea is to get the latch to slot into the lock mechanism so that it does not scrape the top or bottom of the slot.
This was easy on the drivers side as the catch had enough movement, but the passenger side, which had never been right since I have had the car, needed the catch removing and the hole in the door frame filing out to allow enough movement. This was very slow as it meant refitting the catch and trying it, taking it apart, filing out a little more, refitting it... Once I was happy we moved onto the bumpers. Top Bumper Fitting Tip Make sure the captive nuts at the ends on the bumpers move freely as thet need to be aligned with the holes in the wings We found the best method with the front bumper was to loosely fit the brackets onto the square tubes that stick out of the front valance, and then offer the bumper up and once lined up to then fit the nuts which hold the bumper to the brackets. It was then just a case of fitting the bolts through the wings, checking everything was level, and then tightening it all up
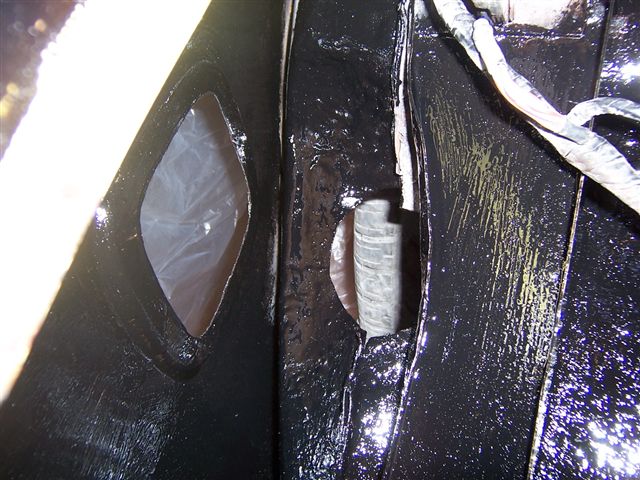
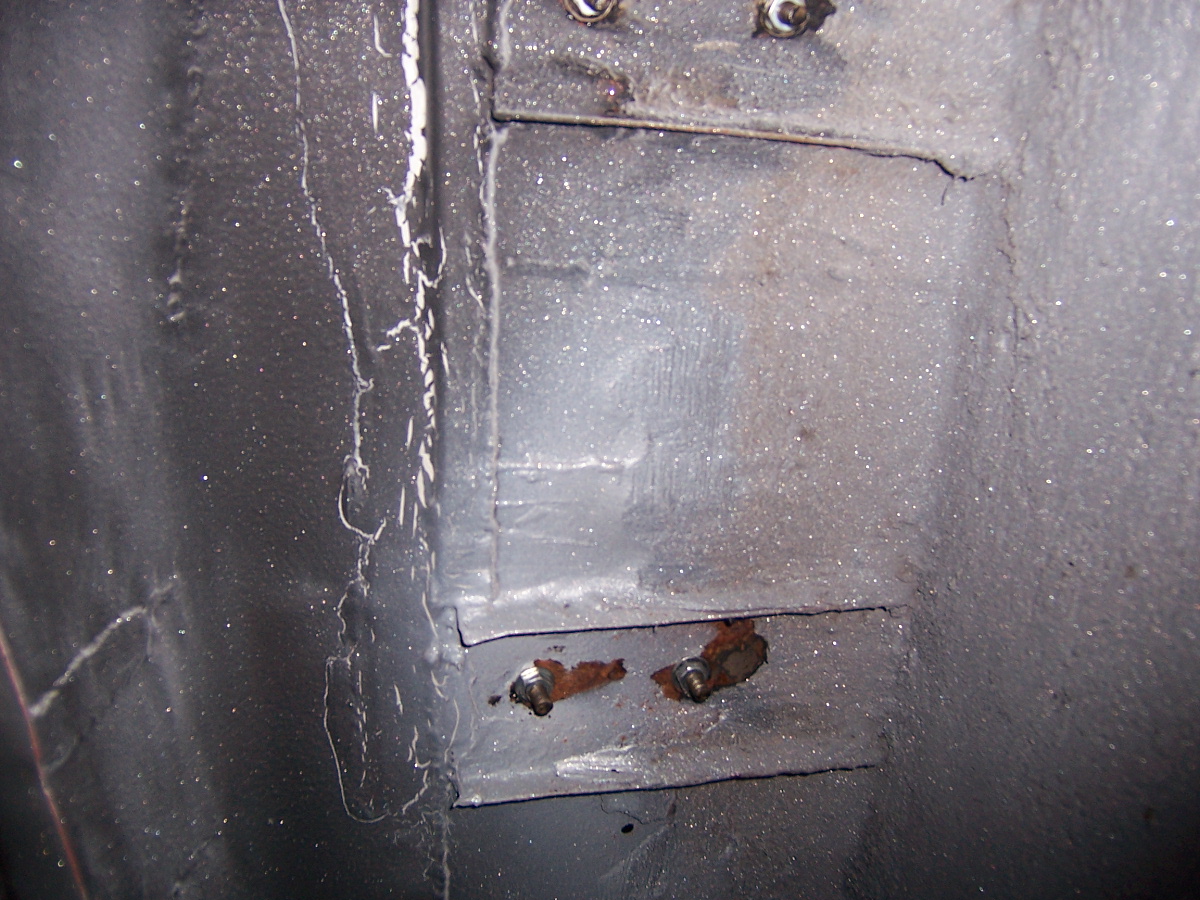
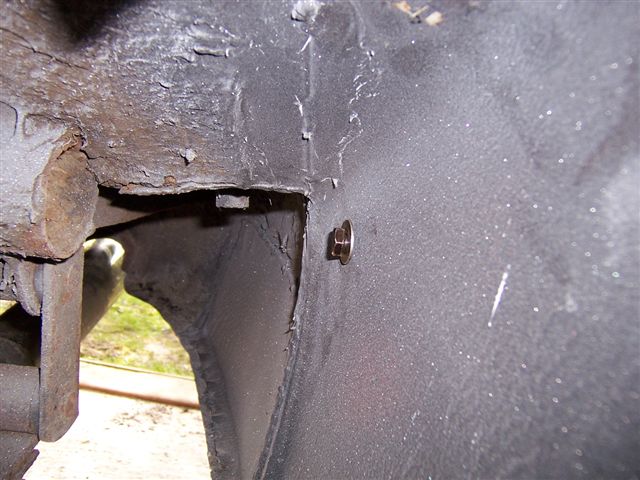
The rear bumper was a little more difficult as there were no holes in the new rear wings for the bumper end bolts, and the inner rear wheel arches had been replaced, so there was no holes in the inner skins either. This was a real "Measure three times, cut once" job, and lot's of masking tape was used to prevent scratches and to be able to mark out on. There is a spacer that goes between the inner and outer skins that requires a 12mm hole in the outer panel to pass through. We drilled the inner skin 10mm to stop the spacer pushing through. You can just make out the rubber between the bumper and the body which the spacer goes through.
And the bolt which does from the inner wing through the double skin to the bumper.
The finished article
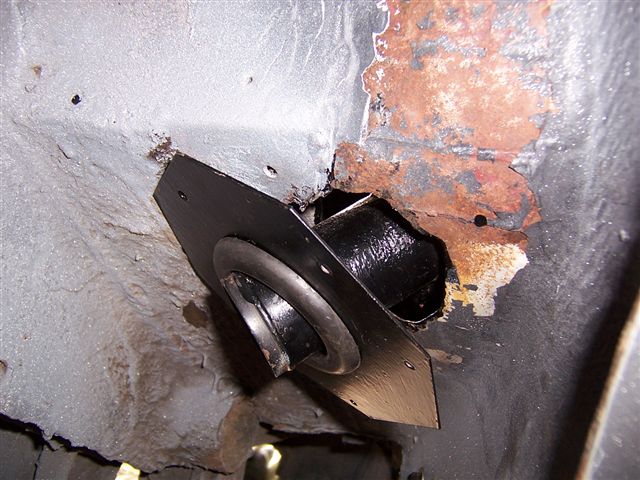
Next was the fuel filler pipe and plate. The old one had been cut out during the fitting of the new inner wings, so it was a good time to buy a new pipe and grommet
as well as the plate
The hole needed to be eased out in places to allow it to fit
and will be sealed with mastic afterwards to make it water tight.
Once it was completed, it was time for some fresh underseal.
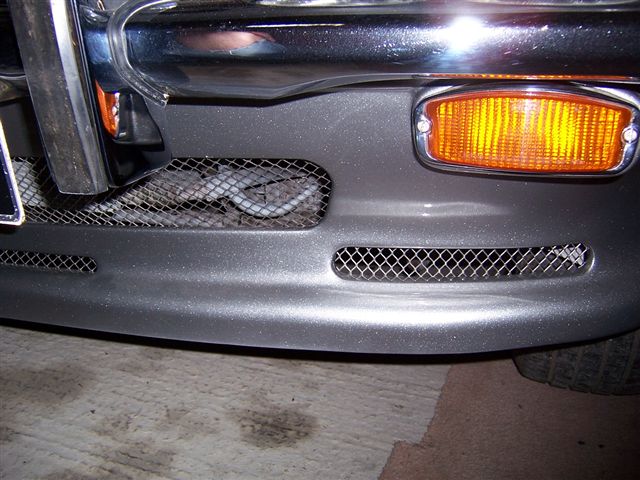
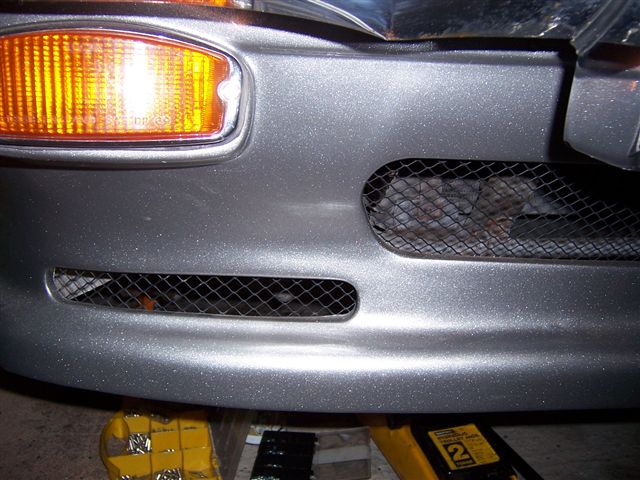
Meanwhile at the front end I have fitted some stainless steel mesh to the air inlets in the front spoiler.
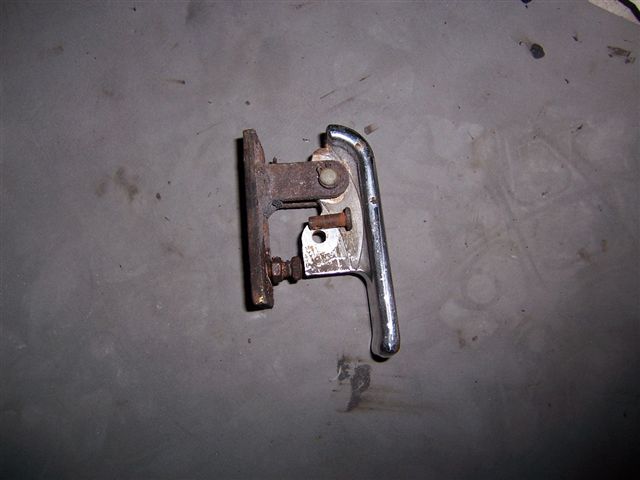
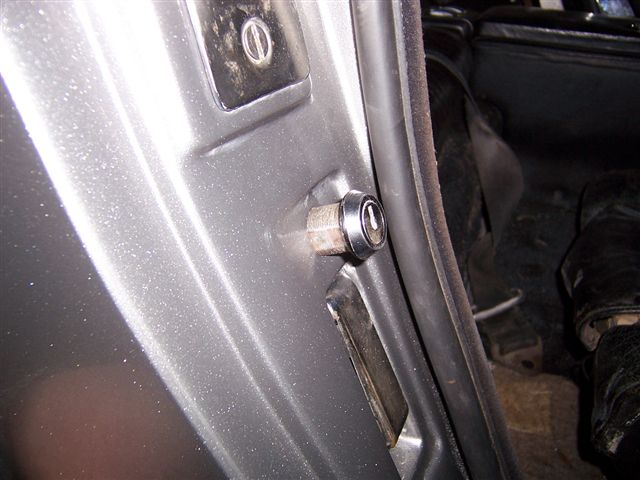
I had now got to the job I had been dreading, and to be honest I had been phaffing about and putting it off. "What job is that?" I hear you cry. "The boot release handle" is my reply... It lives in a recess in the door jamb and is fiddly to say the least, but I have come up with top tips to help you to do get it done. I bought a couple of books which were invaluable. The first is "Advanced Swearing in 42 Languages" as there are just not enough English ones, and " How not to loose your temper and attack your car screaming BANZAI!", which was invaluable. If anyone wishes to borrow them they are in excellent condition other than for a few stab wounds and teeth marks. The recess for the handle with the cable in situ.
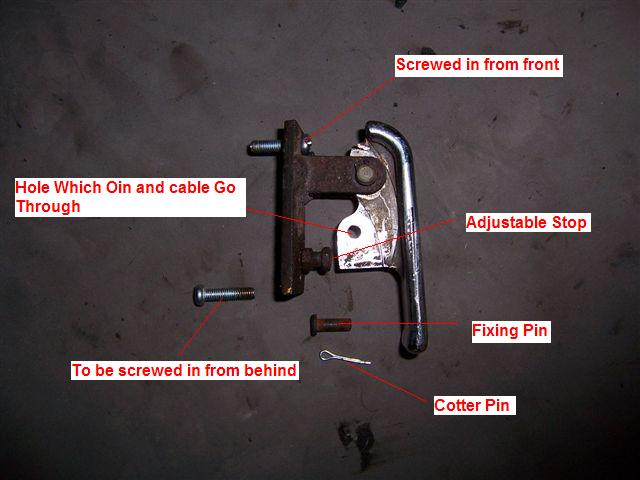
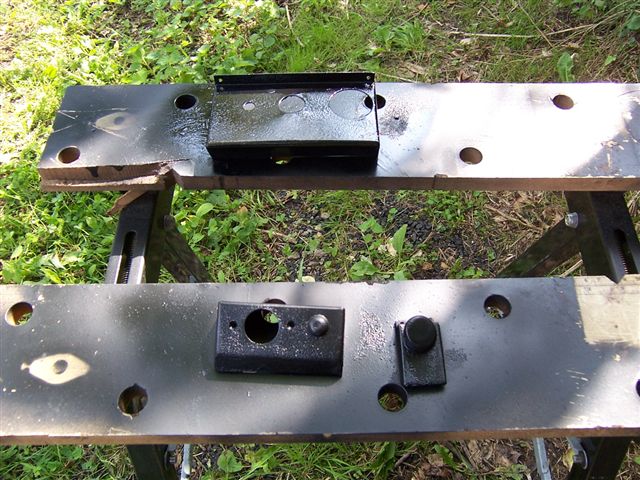
The idea is this; the cable attaches to the handle via a pin which goes through the end of the cable and the handle and is secured by a cotter pin.
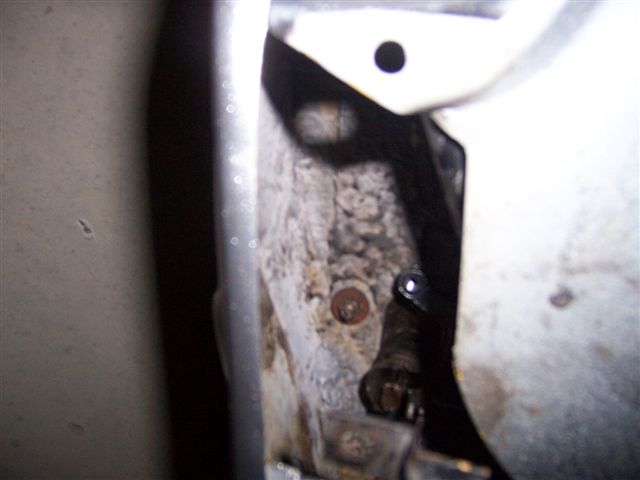
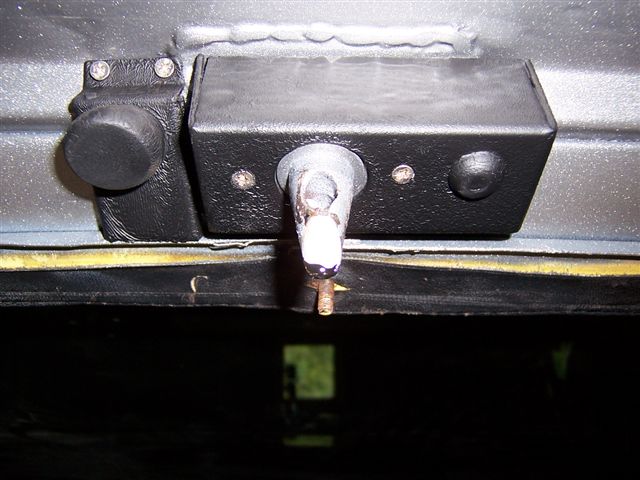
The problem I had was the body shop took this off and I didn't see what screwed it to the body. There are 2 threaded holes in the plate on the left of the picture above, and 2 non threaded holes through the body. My plan was to put 2 bolts through the plate, and then put nuts on them when they were pushed through the body. The problem was that there is an adjustable stop, which can be seen in the picture below, which got in the way of the bottom bolt. My fix was to screw the bolt through the top hole, and then when the top was in place and secured, put the bottom bolt in from the back, so it went through the body 1st.
The fiddly bit was getting the pin through the cable and hole in the handle, but it wasn't as bad as I expected, and once I pushed the top bolt through the hole in the body and got a nut on the back, the bottom one lined up no problems.
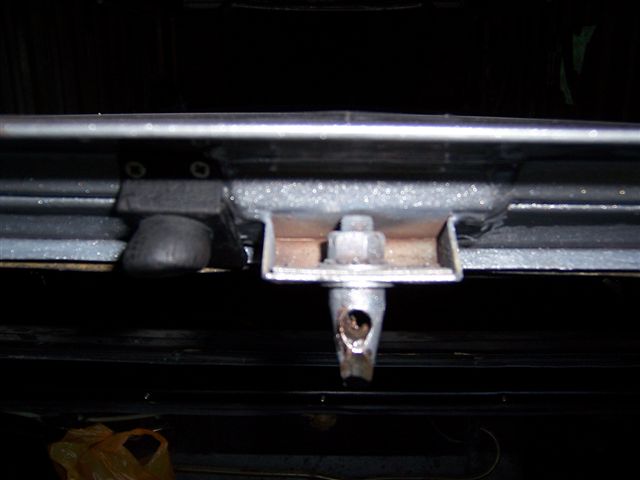
I had everything tightened up before I realised my deliberate mistake.
So it was take the nut and bottom bolt out, and fit the bracket.
This just left the lock to refit.
While I was at it I gave all the covers off the boot latch a coat of paint.
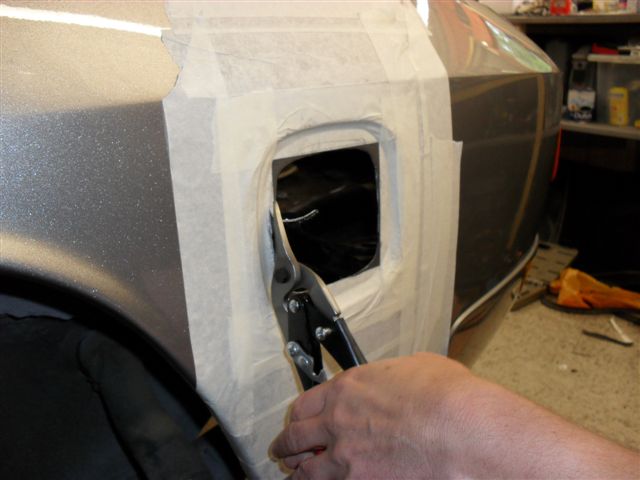
Now the release handle was sorted, I tried to close the boot lid, but it wouldn't shut. I couldn't see what the problem was, so I put a piece of masking tape over the catch and drew around the hole in pen. I then put a spot of black paint on the latch which goes in the hole and shut the boot gently.
This allowed me to see the direction and amount of adjustment required. It needed the slot the latch fits into elongating slightly to allow the adjustment.
Once everything was working smoothly, I finished gluing the last little bit of new vinyl, and found a good use for some clothes pegs.
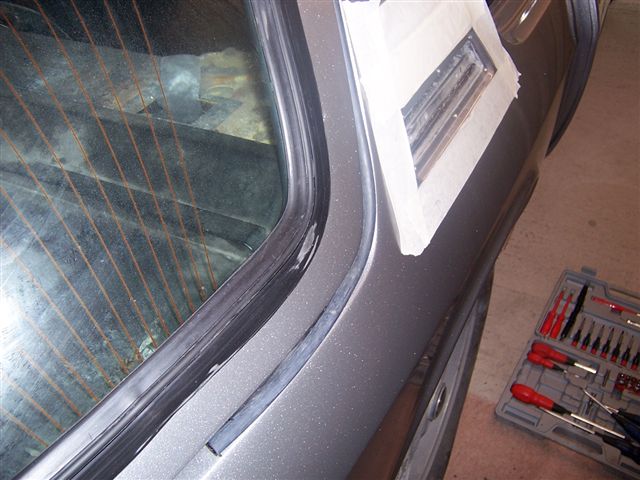
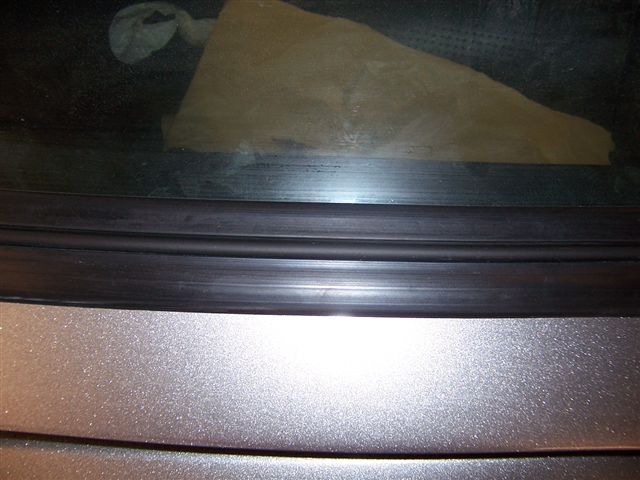
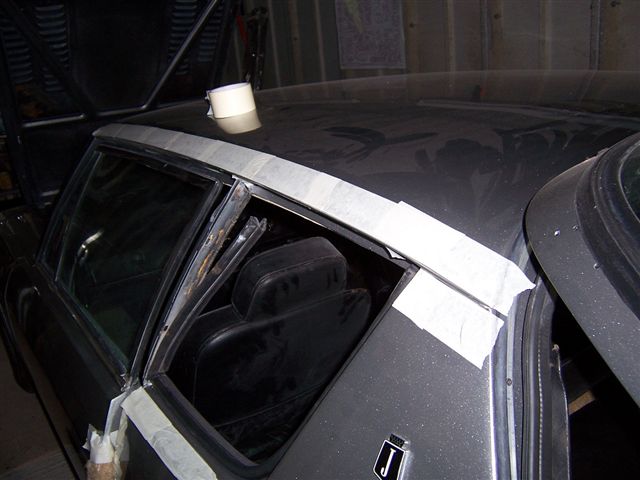
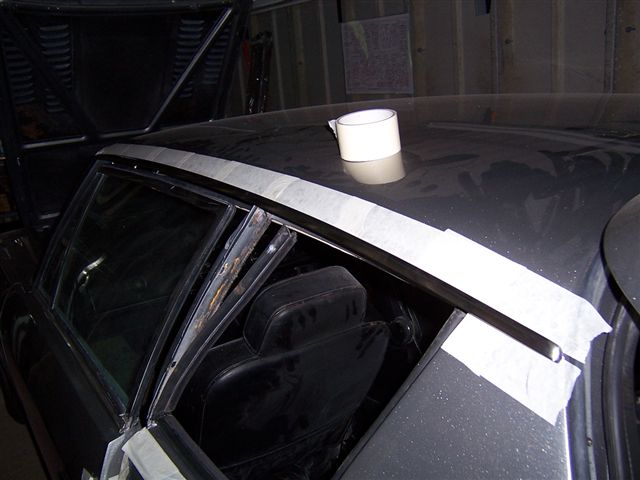
It was now time to move onto the roof gutter and window trim. Top Trim fitting Tip: Do the roof gutter 1st, and not like I did and try to do it last. There is too much stuff in the way to do it last.
Doh! The other side masked off ready for fitting
Trim getting a coat of mastic on the back
And fitted to the car
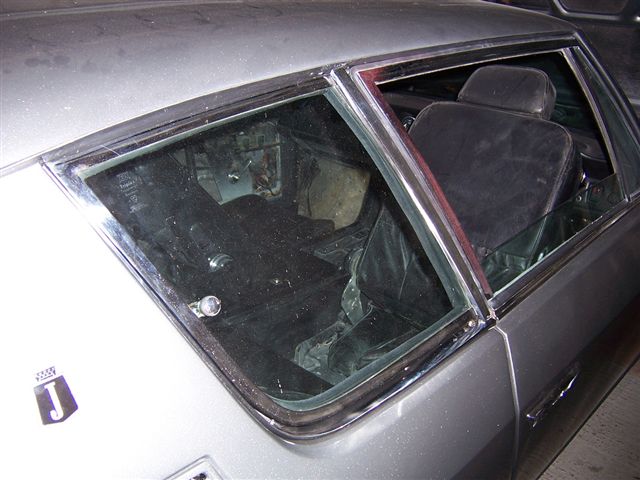
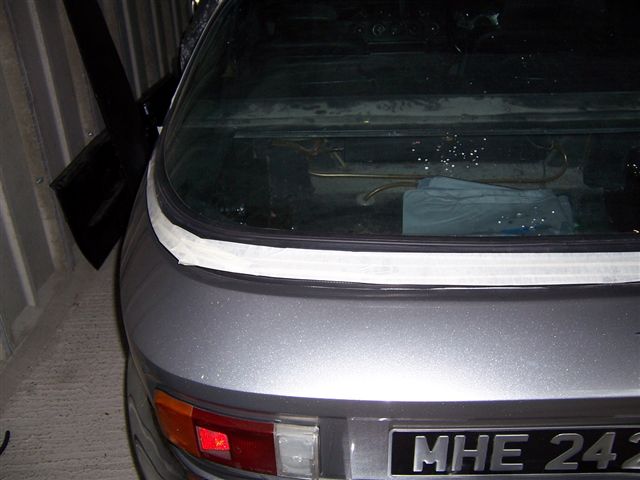
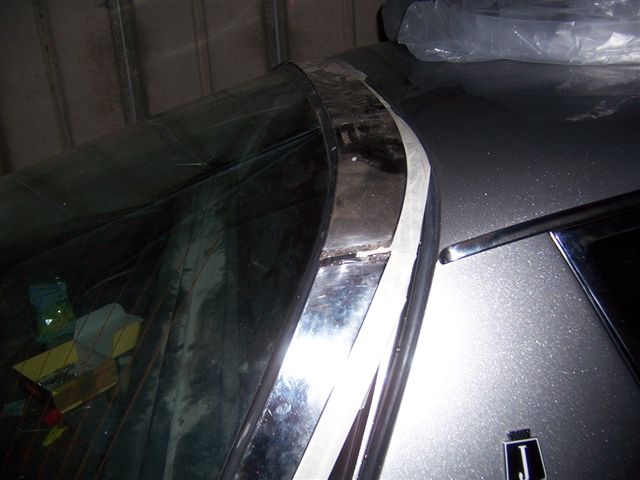
Right. I don't know why, but I had been putting off the trim around the rear window like a visit to the dentist for root canal work. Don't know why, but it was giving me the ebie jeebies. Any way, it needed doing so as usual lots of masking tape to start with.
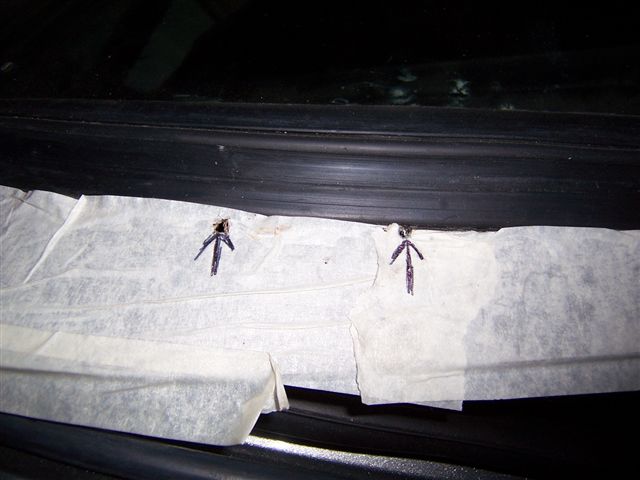
A lot of the original holes had been lost during the repairs, but luckily some had survived to give me a start. If your having your hatch repaired, then ask the body shop to leave a couple of holes to get you started.
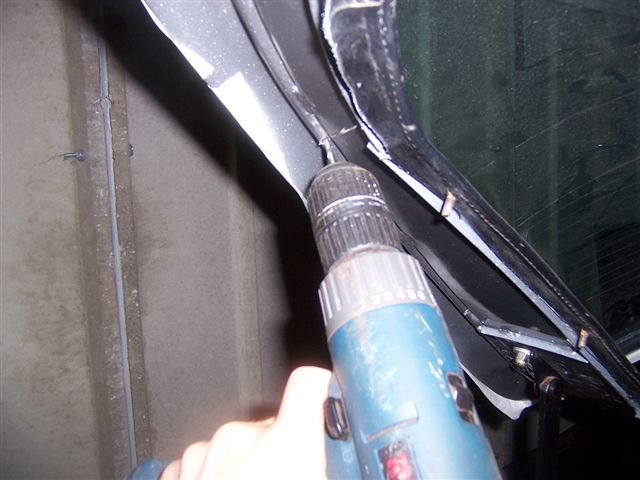
It was then a case of drilling from inside the boot outwards, taking care to align the drill so it didn't go off at odd angles.
First section fitted
And the top section in place
I found I needed to fit some new holding pieces as the threads had broken off the original ones.
I has bought some previously, and it was a case of marking and cutting them to fit.
New one in place.
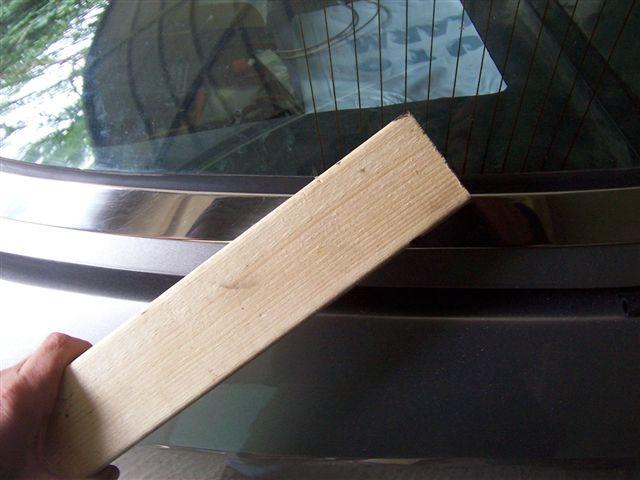
I had found that with the new rear seal, the trim didn't quite fit properly, so I eased it into shape with some wood and a "fine adjustment tool". Take great care when doing this that you do not get to close to the threads under the trim as they will leave a protruding mark in the surface.
Once it was all lined up, I added the joining pieces.
I needed to fit some new lower joining pieces, but when they arrived I found they didn't have a thread attached.
This meant having to bond the trim in place.
And this was secured in place with a screw until it dried.
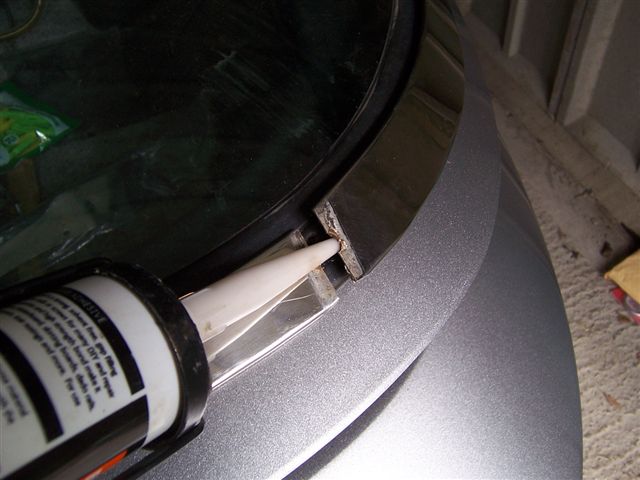
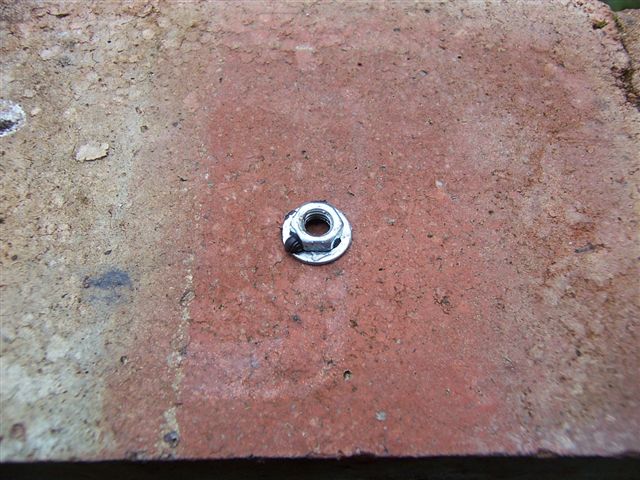
The job will be finished with a line of sealant around the trim to make it water tight. The next tricky job is the vent under the windscreen. The access is very tight, and trying to get a washer and a nut on the threads is impossible one at a time, so I bonded the washer to the nut so they would go on together.
I located the vent in place with some door trim so I would have both hands free.
And then it was the final fitting of the stainless steel mesh which I had decided to paint matt black in contrast with the grey paint.
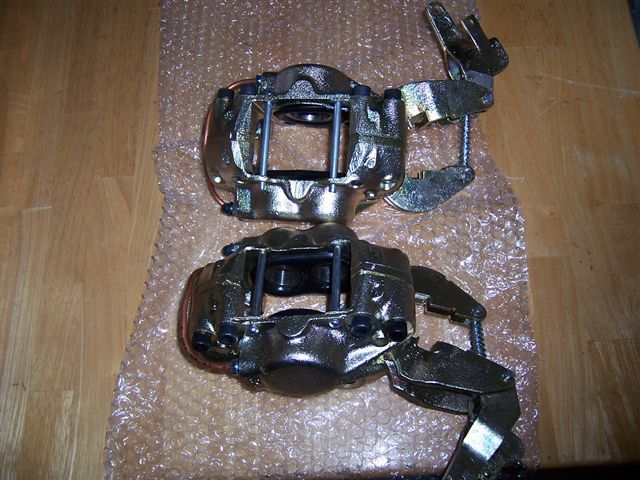
The car was just about done now. There is a little bit of adjustment here and there to make it 100%, but the last job before sending it for MOT was the brakes. The rear callipers were past their best, especially the hand brake mechanism, so I send mine away for refurbishment. The fronts are not too expensive, but the rears were a bit of a shock! When they came back I was pleasantly surprised by the quality of the work. They had been bead blasted and anodised, new pistons and seals fitted, and complete new hand brake adjusters fitted. Expensive, but top quality.
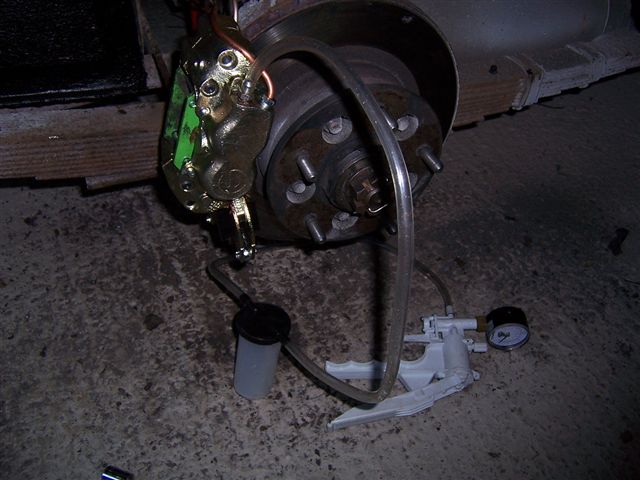
The last job was to fit them
And bleed them with a vacuum gun.
Well that's about all folks. The MOT is booked, and she's ready for the road. It's been 9 months, and sometimes an awkward labour, but it's done now.
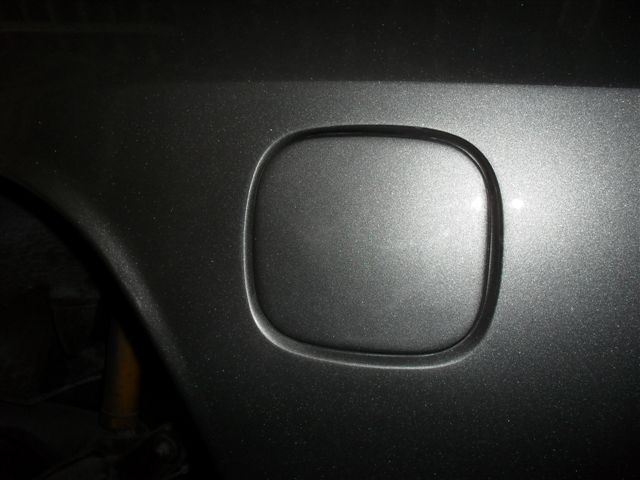
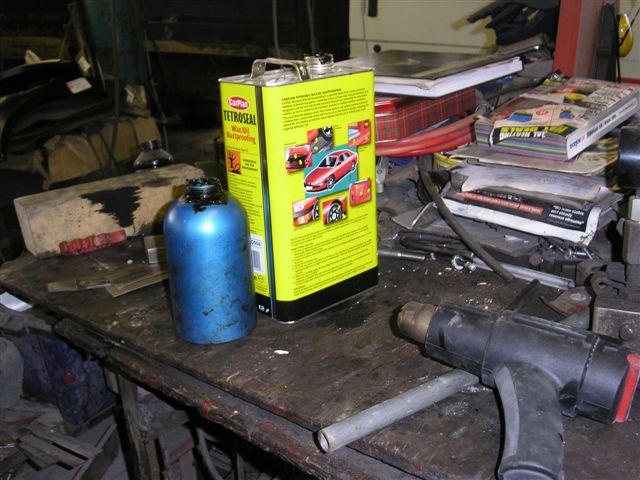
March 2010 Update Due to the bad weather, and other factors it has taken until March 2010 to get the car back to paint the fuel filler cap and get the corrosion protection done.
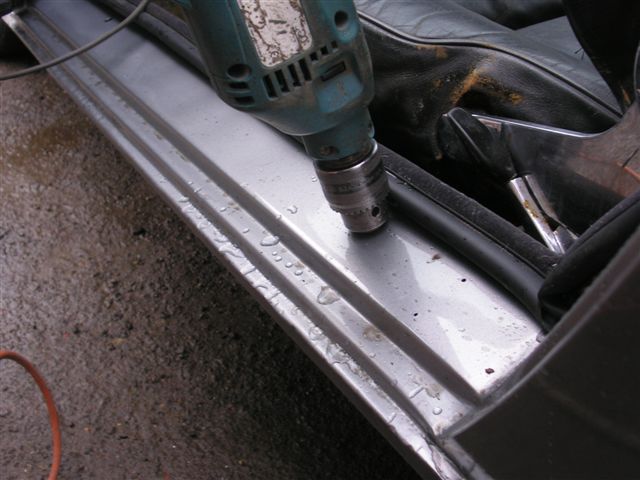
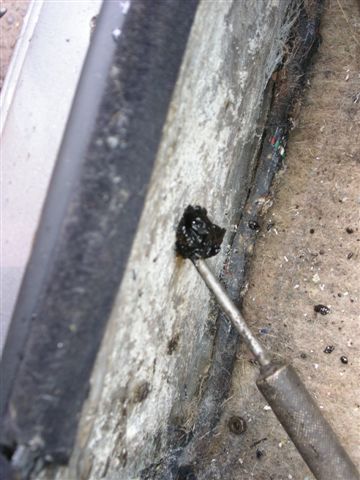
The corrosion protection involved drilling holes in the sills to get the Waxoil cavity wax in. Waxoil is very thick when cold, so we used a heat gun to warm it up and make it runny enough to inject. It's horrible stuff and the body shop lend me a breathing mask as the fumes are quite potent.
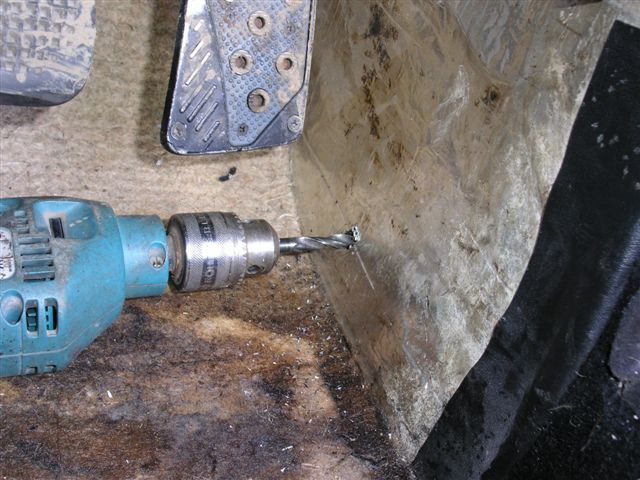
The sills are in 3 sections, so this involves drilling 3 holes in the sills.
The same was then done in the middle and rear sections.
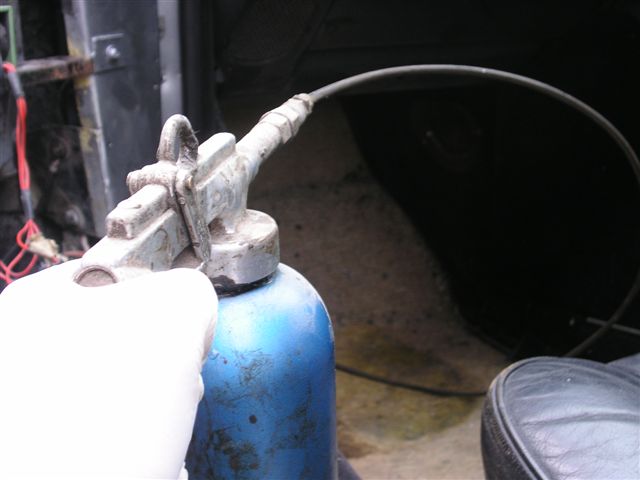
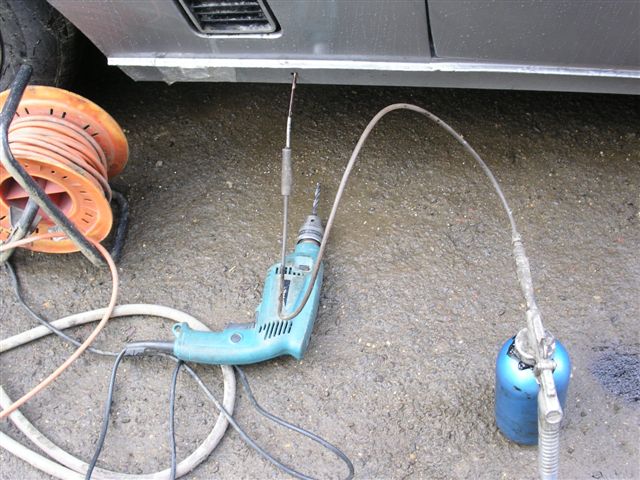
And then the cavity wax can be injected with a high pressure gun
Filling the sections
The wax is starting to expand out of the holes. A gallon went in each side...
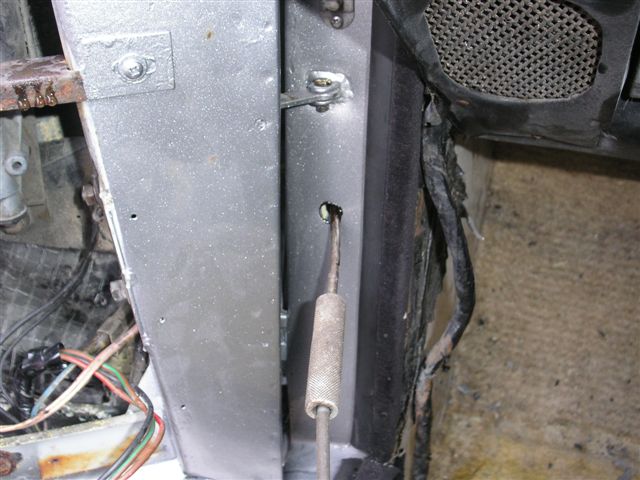
Getting in down the "A" post
It was then a case of filling the outer sills.
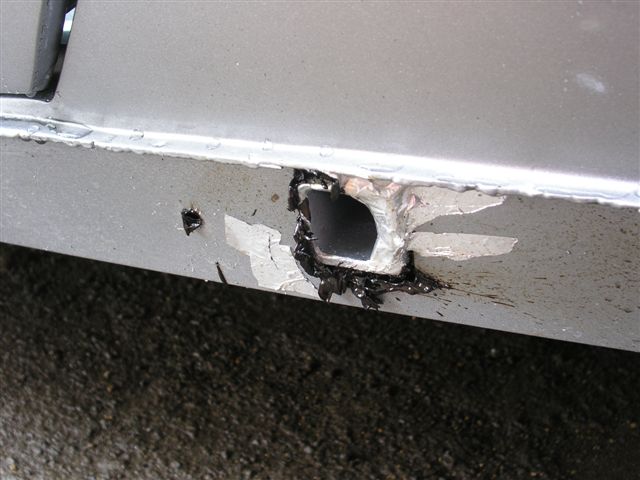
Starting to ooze out of the jacking points
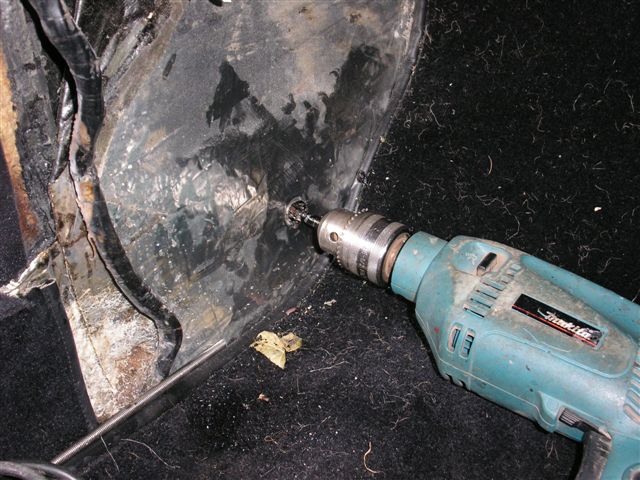
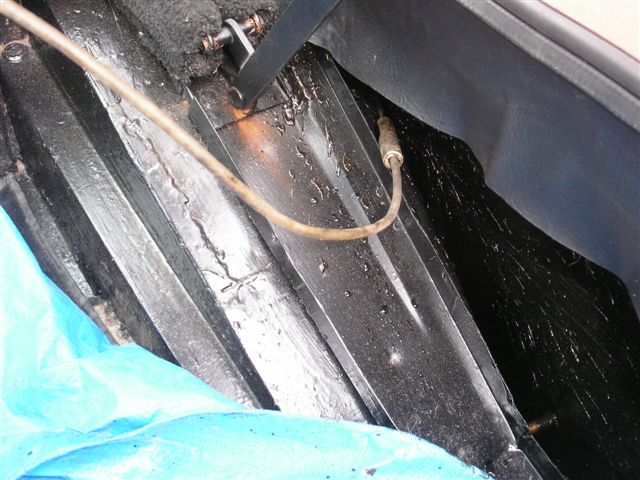
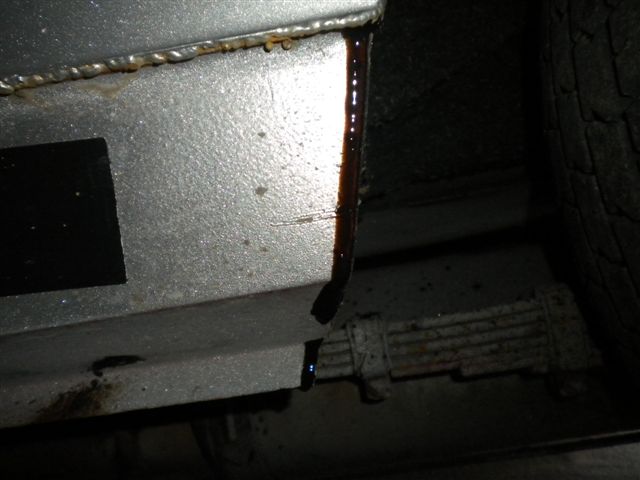
Next was the new rear wings and arches.
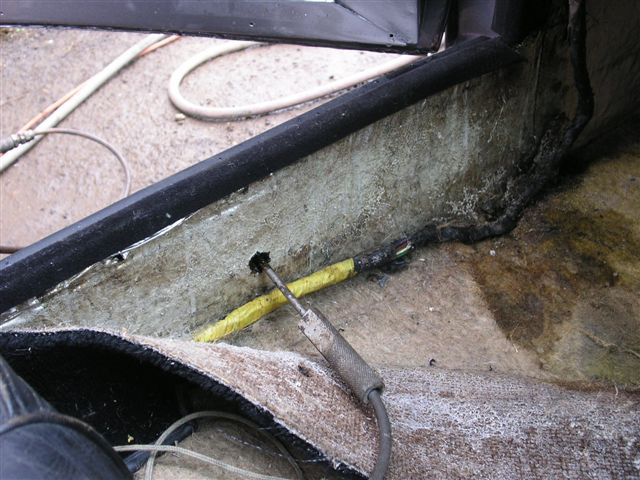
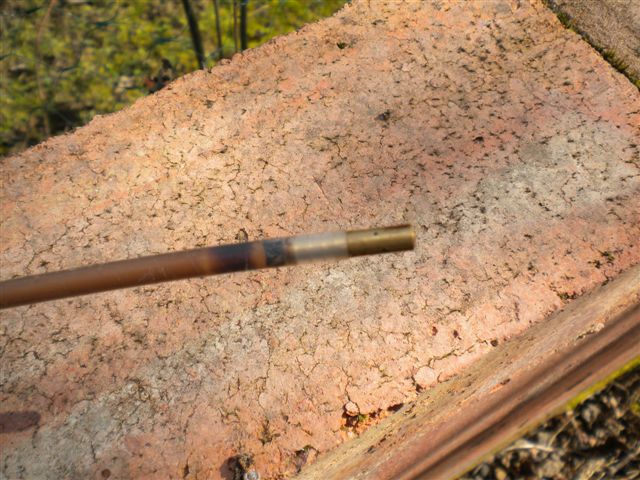
The spray wand on the gun at the body shop wasn't very long so I was concerened that it wouldn't spray all the way around the arch to inside the car. I had previously bought some DIY cavity wax which came with a long spray wand, so decided to finish it off at home. The stuff I had bought was from Bilt Hamber. I had bought their rust killer which I had used on the bumpers, and the cavity wax, which comes in large aerosol cans
It has a spray wand about 2 feet long, with a 360 degree spray nozzle.
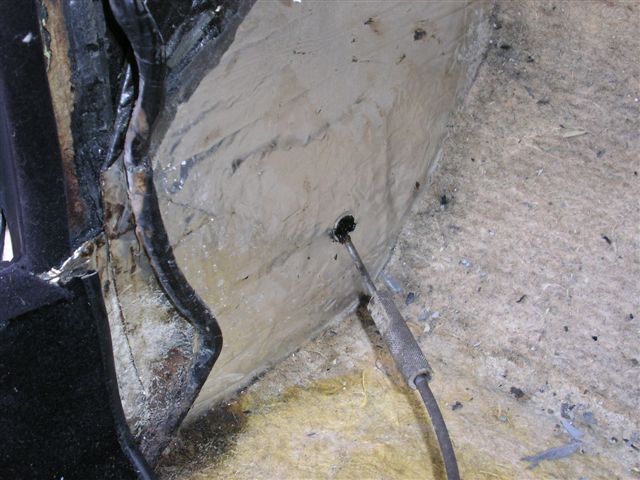
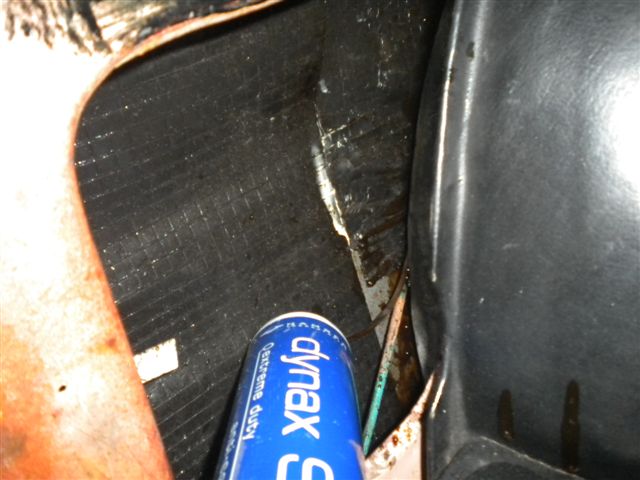
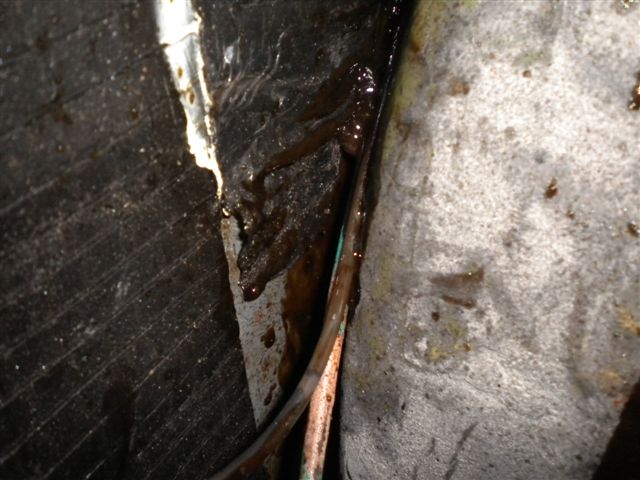
It was then a case of pushing the spray wand around the arch and filling it with wax.
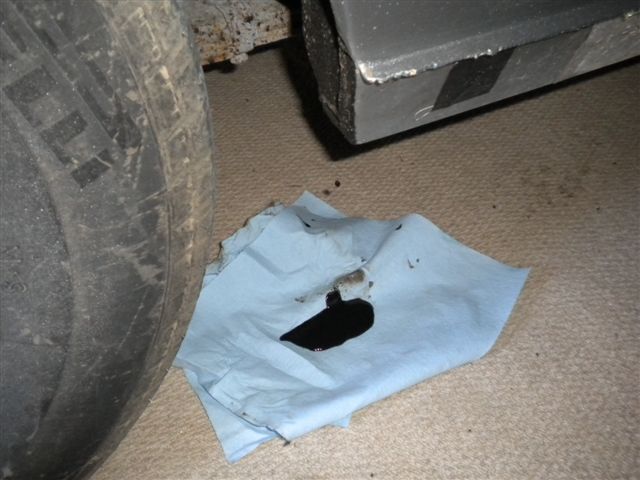
And dripping out from underneath.
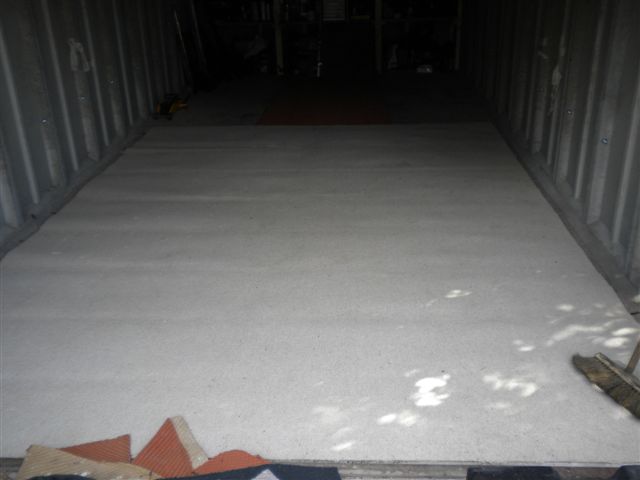
As I am getting on a bit, and am too old for lying on cold concrete, I had fitted underlay and carpet in the garage.
So I put some plastic down to catch the drips!
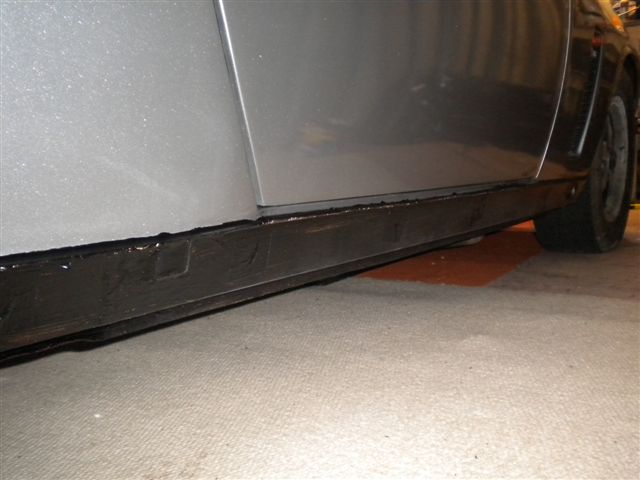
The outer sills then got a couple of coats of underseal
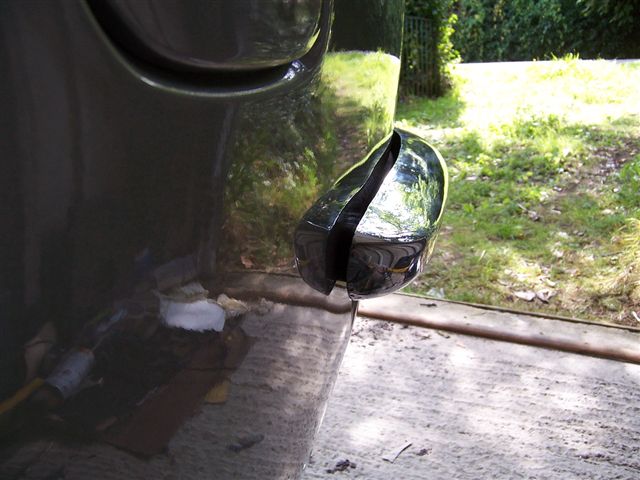
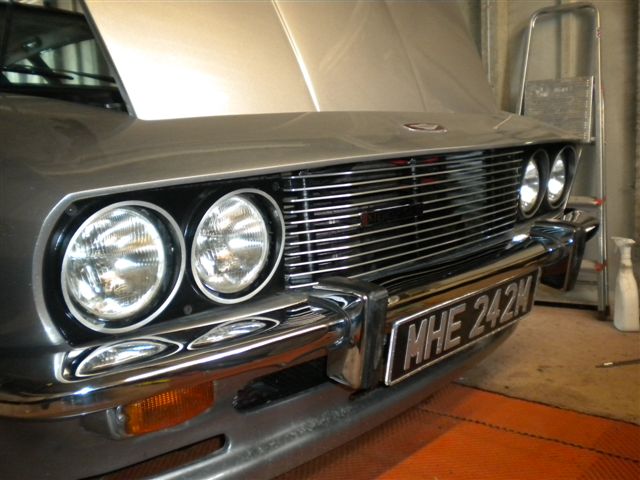
It was now time to refit the refurbished headlight surrounds and front grille.
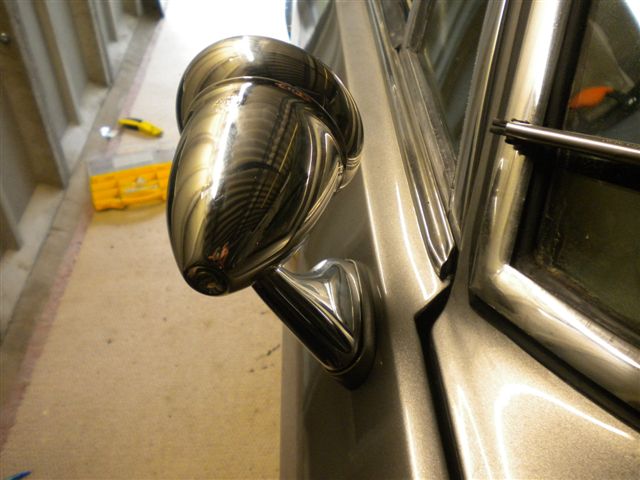
And new door mirror
* It's a door edge protector!
|
|
|
|
|